


hanging items on 1925 plaster & lathe walls
cr8onjay
16 years ago
Featured Answer
Sort by:Oldest
Comments (30)

kim2007
16 years agosautesmom Sacramento
16 years agoRelated Discussions
Removing old plaster lath wall
Comments (19)I've removed many slat and plaster walls and this is the most efficient\minimal mess technique I have discovered. The fact is, this is a messy job and "bashing walls" is out of the question if you want to minimize the spread of dust and cleanup time. Here's what you need and how to do it: 1. Quality respirator mask (no exceptions). I recommend a $19 dual filter mask from Wal Mart. 2. Thick durable work gloves. 3. Protective plastic goggles (Wal Mart). 4. 1 Large black marker. 5. 10 X 12 thin plastic drop sheets (Wal Mart). 6. 1 flat pry-bar. 7. 1 Drill with half 1/2 inch bit. 8. Reciprocating Saw (any reliable brand will do) with extension chord. 9. 1 stud finder. 10. 1 ladder. 11. Large 96 gallon square trash bin with wheels or durable plastic storage container with wheels (preferably). 12. 1 Shop vacuum. 13. 1 Broom & dustpan 14. A partner to help (needs items 1, 2, & 3). Step 1) Turn off the power in the room that contains the wall you plan on stripping. You do not want to electrocute yourself! If other rooms have power receptacles on a separate fuse you can run an extension chord into the work room to power a flood lamp. Or if it's daylight you're all set ;) Step 2) Remove all wood trim from wall. Using the ladder, stud finder, and the black marker, start about 5" down from the wall\ceiling crease and locate and mark all the wall studs on the wall you plan to strip plaster slats from. Make your stud marks horizontal and 4" wide. Have your partner mark where the stud finder began beeping and where it stopped. Make note of all electrical switches and outlets. If you have multiple plugin outlets on a single wall chances are the wiring will be horizontally ran inside the wall to join the outlets. Use the marker to draw a horizontal line between outlets. You will not cut below or within 5" of the top of this line. Step 3) Cover the floor of the room where you're working with the 10 X 12 plastic. I like to "booth off" the room with plastic by taping 10 X 12 sheets from the ceiling to the floor using blue painters tape as it will not rip your drywall paint\paper when you remove the tape. I tape all joining plastic sheet seems from ceiling to floor and allow a slit for me to walk out during breaks. Step 4) Put on you respirator, goggles and gloves. Make sure your respirator is tight enough not to let air in and the nose bridge is snug on the bridge of your nose. You do not want ancient dust creeping in your mask! A hat is optional if you don't want dust in your hair (ladies). Position the 96 gallon trash can by the ladder and have your partner waiting for you to hand them square slat and plaster section to put into the garbage can. Step 5) Start at the left hand side of the wall. At the top of the ceiling, using the drill and the 1/2" bit, drill a hole on the right end of the 4" stud marking. Only drill a hole in the section your are currently working on. Step 6) Place the blade of the reciprocating saw half way in the 1/2" hole you drilled earlier and begin sawing downward. gently add downward pressure to the saw, don't force the saw, let the saw do the work. It should cut through like butter. Keep your cut line as straight up-and-down as possible. You can also steer the saw close to the parallel wall stud for a closer cut. If the saw blade pops out or is hard to move, chances are you're cutting into a wall stud. Stop, evaluate the situation (using a flashlight), and reposition and continue to cut just the slats and plaster. Stop cutting when you're about 2" from the floor. You should now have a semi-straight vertical cut line from ceiling to floor. Step 7) On the ladder, using the pry bar, at the top of the wall, you will pry off your first single square section of wall by using the following technique. At the top of the wall, from left to right, diagonally slide the pry bar (hook end towards you) behind the cut plaster panel and leave the very end of the pry bar(flat end) sticking out at the lower bottom left. With your right hand, firmly grad the upper right of the plaster section, holding the hook end of the pry bar against the back of the plaster wall section. With your left hand, firmly hold the flat end of the pry bar behind the lower left corner of the plaster wall section. Slowly pull the entire panel of plaster towards you keeping the pry bar firmly pressed behind the plaster section you are removing. If you do it correctly you will keep 98% of the plaster in tact and all nails joining the wood slats to the 2 X 4 beam will be pulled out at the same time. Hand the square plaster section to your partner to place in the bottom of the 96 gal plastic trash can. Continue this technique all the way down the cut in the section you are working. You should get the hang of it by the time you're done with the removal of your first section. Step 8) Repeat steps 5 through 7 until the wall is stripped. You may have some remaining nails to remove with the pry bar when you are completely finished with the entire wall. Step 10) Pick up stray pieces of plaster and slats when you're finished. Gently roll up the plastics sheets being careful not to spread the dust; dispose of the plastic. Sweep and vacuum and remaining dust and debre that escaped the plastic. You may need to make several trips to the waste transfer station with the trash can to dispose of the slat and plaster or you can pay someone to pick it up. I have this technique down to where I can strip a 10 x 8 wall in 60 min with little or no mess on the floor. Have fun, be safe....See MoreWorking with lathe and plaster
Comments (21)It's a basic two gang box. The sides are flat, so this should work - right? The wings that tighten with screws probably won't work because the wall is too thick - they can't slip behind it. I have thought about putting a magnet on a string and going fishing for the metal thing that held the box in previously....See MoreHanging cabinets on lath & plaster wall - best hardware?
Comments (2)Couple of things: It's a good idea to fasten cabinets together that will be side by side. Use trim head screws through the edge of the cabined face frame. Consider the depth of the cabinet back and back rail + wall thickness. Depending on the width of the cabinet, and it's position relative to the wall studs it may be difficult to 'hit' two studs per cabinet. This is another reason to screw the cabinets together. So they are better able to support the other. I use screws on the top and bottom back rails. Using a really long screw you are taking a chance that you may dammage an electrical wire in the wall....See MoreI'm trying to hang some shelves in my office & I have plaster walls
Comments (3)Get a better stud finder. Zircon makes several decent models in the $20-30 range; they have a standard and a "deep stud" setting, which can be useful for plaster walls. I just used one to mount a heavy oak stair railing in a house with plaster walls. The stud spacing I encountered was 16" in most locations, but varied, and sometimes there were double studs; I would have missed a number of studs if I counted on consistent spacing. Once I located a stud, I put a piece of masking tape in the location and marked what appeared to be the edges. Later, after I had them all marked, I used a 1/16" bit to drill several tiny holes at each location to make sure there was actually a stud there and where the center was. If your brackets don't cover the little holes, it's a trivial matter to spackle them....See Morekec01
16 years agokim2007
16 years agosacto_diane
16 years agobrickeyee
16 years agobrickeyee
16 years agoiasheff
16 years agobarijay
16 years agoaqmodra
12 years agocolumbusguy1
12 years agobrickeyee
12 years agoTPopArt
10 years ago
vjrnts
10 years agoBruce in Northern Virginia
10 years ago
Anna Michelle
8 years agokudzu9
8 years agoAnna Michelle
8 years agolast modified: 8 years agokudzu9
8 years agoAnna Michelle
8 years agokudzu9
8 years agolast modified: 8 years agoAnna Michelle
8 years agokudzu9
8 years agopowermuffin
8 years ago PRO
PROOld House Guy LLC
8 years agoAnna Michelle
8 years agolast modified: 8 years agoreasoning_w_dogs
8 years ago PRO
PROBarbara Wood, Keller Williams Milwaukee
7 years ago- PRO
Barbara Wood, Keller Williams Milwaukee
7 years ago
Related Stories
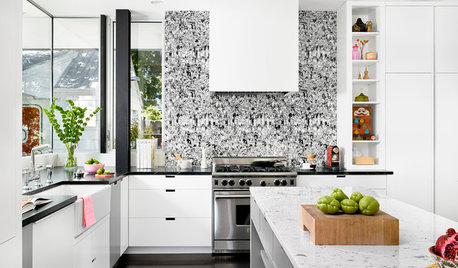
WALL TREATMENTSKitchen Confidential: 13 Places to Hang Wallpaper
Whether it’s on an accent wall or affixed to an island, wallpaper can make a big impact on the look of your kitchen
Full Story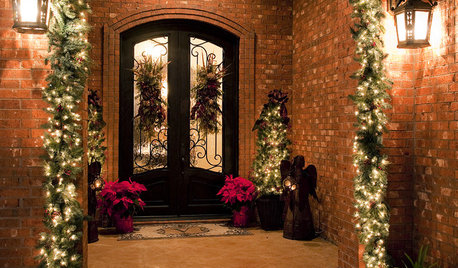
MOST POPULARA Contractor's Secrets to Hanging Holiday Decor
Hang a wreath or garland on brick, concrete, Sheetrock or wood the professional way — and avoid the potential pitfalls
Full Story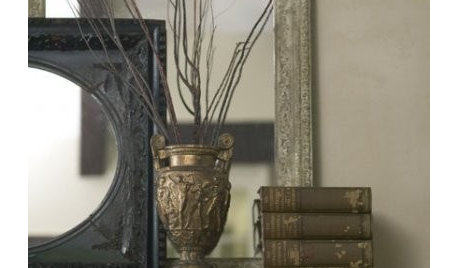
FURNITURE10 Forgotten Items to Repurpose as a Standout Feature
Transform a vintage find into a highly functional piece of furniture
Full Story
REMODELING GUIDESOne Guy Found a $175,000 Comic in His Wall. What Has Your Home Hidden?
Have you found a treasure, large or small, when remodeling your house? We want to see it!
Full Story
MATERIALSRaw Materials Revealed: Drywall Basics
Learn about the different sizes and types of this construction material for walls, plus which kinds work best for which rooms
Full Story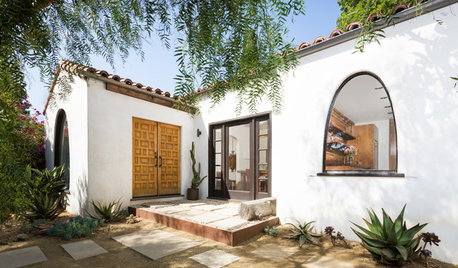
BEFORE AND AFTERSHouzz TV: See Recycled Walls and Cool Cassette Art in a Woodsy DIY Home
Walnut countertops join hardwood floors and pieces made from leftover framing in a bright Spanish colonial
Full Story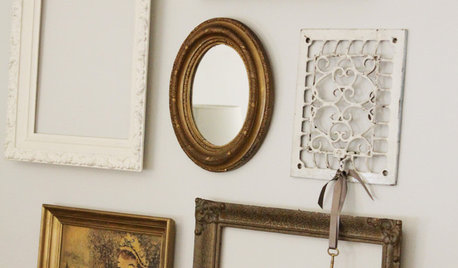
DECORATING GUIDESHandmade Home: How to Design a Gallery Wall
Learn how to transform a blank wall into an eye-catching display — with or without art
Full Story
DESIGN DETAILSDesign Workshop: The Modern Wall Base, 4 Ways
Do you really need baseboards? Contemporary design provides minimalist alternatives to the common intersection of floor and wall
Full Story
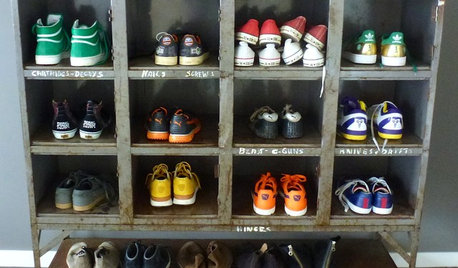
STORAGETap Into Stud Space for More Wall Storage
It’s recess time. Look to hidden wall space to build a nook that’s both practical and appealing to the eye
Full Story

pasigal