


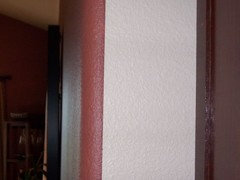
DIY painters, how difficult is 'cutting in'?
stinky-gardener
14 years ago
Featured Answer
Sort by:Oldest
Comments (36)

maddielee
14 years ago
ckstjamj22
14 years agoRelated Discussions
Prop. of a difficult species by basal cuttings--Zunac vulcanicola
Comments (8)As mentioned, some cultivars are more predisposed to basal shoots and sometimes it seems to be related to how deep that last leaf site is planted when starting the cutting to initially get roots. Maya is really prone to making basal shoots I find, especially shoots that have a green on green variegation or albino/near albino shoots. Mine makes both habitually and if I allow them to grow, the mother plant suffers in that it barely grows and is reluctant to set buds. If you don't get all the tissue off the source of the basal plant, it will in fact keep putting up more plants I find after you have thought you removed that basal source....See MoreInterested in do-it-yourself vertical structures!
Comments (28)I use those 4' orange electic fence stakes from home depot (about $1 a piece)for lots of things in the yard & gardens. Pound it in the ground and then slide the PVC pipe over it and into the soil a bit. Set out several of these with holes drilled in the PVC pipe and string wire through them to make a fairly sturdy, portable & cheap trellis. I use these stakes to build easy fencing. I use plastic cable ties to secure wire or plastic mesh fencing to them. Because I dislike the orange and it stands out like a sore thumb, I paint my stakes black. Pound 2 rows of these stakes in the ground about 4' apart and slide each end of a flexible PVC pipe over them, making an arch. Cover this with garden cloth or plastic to protect plants. I "sew" the fabric to the pvc with fishing line. If you are using plastic, cut some flaps in it, to keep it from blowing away in a big wind. I use them to brace non secured retaining walls. At my old house I built a raised bed using them to hold the lumber together. I drilled holes in the timbers and slid them over the stakes, then I lined the interior side with heavy plastic....See MoreIs cultured marble difficult to cut?
Comments (1)It sounds like you're comfortable fishing wire, so I'll not comment on that. Cultured marble is plastic resin with a bit of marble dust mixed in. Essentially it's more plastic than marble. Try to make sure that the location of your intended outlet doesn't fall on a stud. Also make sure that there is no plumbing (supply or vent) or other mechanicals/utilities in the intended location. Some may be worked around as your box will only project a couple of inches back into the stud cavity. Probably the easiest way would be to cover the backsplash area with masking tape or blue painters tape. Mark out the hole size in pencil. Use a drill to drill holes in the four corners, keeping the holes inside your cut lines. Then use a jigsaw, insert the jigsaw blade into the crner hole and cut from corner to corner. If you stay away from the studs you can use a "remodeling" or "old work" outlet box. It comes with a couple of flip tabs, the box will be secured by the tab pinching the wall thickness (drywall plus backsplash material) between the tabs and the face flange of the box. That's in comparison to a "new work" outlet box where the box gets nailed to the studs. Prior to buying the remodeling box make sure it can accommodate the thickness of your wall materials. If you run into difficulty you an always waste away some of the the drywall behind the cultured marble so the box only clamps to the thickness of the marble. Don't forget, the backsplash is essentially plastic. If you use a high speed and drill slowly, or cut slowly, you can melt the plastic and gum up your cutting edge. Try to find a balance between blade speed and blade movement through the material. There's a happy medium somewhere in there where you'll cut without melting....See MorePainting and 'cutting in'?
Comments (14)Hat banding is one thing (that edge that meets) but what also happens if you go with the second step there is you get shaddowing on the brushed edge if you wait too long to paint the wall. I just fired a contractor over that issue. It's best to start a wall by cutting in (and I always tape...the best paint job is prepped well) and I am also a careful painter even though the tape is there...the bad painters will tape and think god is holding the paint back...he's not :p be careful! Then roll that wall or space completely, stopping at a wall edge or cabinet if there is a 100% complete edge to stop on. Never stop mid wall..you'll get shadowing at the stop line as well....See More
caroline94535
14 years agohaley_comet
14 years ago
jlj48
14 years agoUser
14 years agojeri
14 years agosenko
14 years agostinky-gardener
14 years ago
lazy_gardens
14 years ago
fnmroberts
14 years agonatesgramma
14 years agosuero
14 years ago
graywings123
14 years agoUser
14 years agoamysrq
14 years ago
4boys2
14 years agostinky-gardener
14 years agosonaliagrawal
14 years agoheddarosa
14 years agopps7
14 years agostinky-gardener
14 years agostinky-gardener
14 years agoShannon01
14 years agodeltabreeze
14 years ago
Stacey Collins
14 years agostinky-gardener
14 years agoboxerpups
14 years ago
terezosa / terriks
14 years agosonaliagrawal
14 years agochispa
14 years agoladyamity
14 years agoneedsometips08
14 years agostinky-gardener
14 years agostlouie
14 years ago
Related Stories

HOUZZ TOURSMy Houzz: Personalized Style in a Portland Painter’s Live-Work Home
Empty nesters bring DIY touches and industrial-style creativity to their 1908 Oregon house
Full Story
DECORATING GUIDESQuick Fix: Multipurpose Painter's Tape
Five creative uses beyond a paint job for those favorite blue rolls
Full Story
LANDSCAPE DESIGNIs Your Garden Cut Out for Matisse Inspiration?
Look to the artist’s paper collages for a creative and easy approach to garden design
Full Story
HOME OFFICESQuiet, Please! How to Cut Noise Pollution at Home
Leaf blowers, trucks or noisy neighbors driving you berserk? These sound-reduction strategies can help you hush things up
Full Story
WORKING WITH PROSHow to Work With a House Painter
A professional house painter may be your best friend for refreshing rooms. Here's what you need to know to get the best result
Full Story
DIY PROJECTSHow to Make a Festive Paper-Cut Ornament
Add a personal touch to your Christmas tree this year with this pretty handmade decoration
Full Story
DIY PROJECTS29 Home Projects to Make You a DIY Superstar
Patch up holes, turn trash to treasure, erase stains ... these doable DIY projects will better your home and boost your ego
Full Story
DECORATING GUIDESBudget Decorator: How to Save When You Don’t DIY
You don’t have to be crafty to decorate your home inexpensively. Here are other ways to stretch your design dollars
Full Story
DIY PROJECTS14 Fun and Easy DIY Projects With Paper
Look at the abundant and affordable material in a whole new way with these stylish creations
Full Story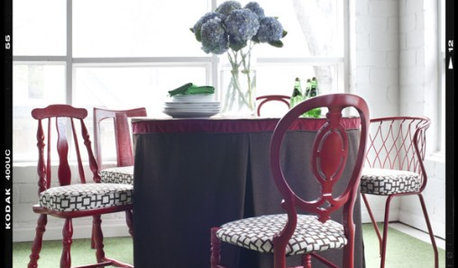
DECORATING GUIDESDIY Project: Sit Pretty with Mismatched Chairs
Create a one-of-a-kind dining set from a collection of cast-offs
Full Story


ckstjamj22