

Estimating weight of loaf of bread
18 years ago
Featured Answer
Sort by:Oldest
Comments (7)
 18 years ago
Related Discussions
Loaf of bread
Comments (16)Have you noticed that packages of processed meats have gone from a pound to twelve ounces? Bacon used to always be sold by the pound, but not anymore. Hot dogs have dwindled to eight per pack and buns don't always match the number of weenies anymore. Packaged egg noodles and pasta are sometimes twelve ounces, sometimes a pound. You have to watch if using them with dishes you've cooked in case it affects the finished product. Bags of raw potatoes now have a new price point at eight pounds. Why eight? It makes it more difficult to do price per pound calculations in your head, that's why. Most of the markets I frequent do have unit prices on the goods. But, only on the regular price. When sales hit they don't list a unit price........ever! That the goods packaged in larger sizes do not necessarily reflect a price savings? I buy staple goods like sugar and flour in large packages like twenty five pounds, and noticed that long ago it was often more cost effective to buy several smaller bags. That by changing the name of the product just a little, you may be buying something with added ingredients? Fruit juices become fruit drinks or cocktails. Ice cream becomes frozen dairy desserts. Cheese becomes processed cheese foods. Frozen hamburgers ready for the grill becomes grilling patties. I read the label on five different packs of frozen 'burgers' last week when shopping. Only ONE of them was 100% domestic beef. The rest were beef from numerous sources like Mexico, Canada, Argentina along with domestic beef. Several had added ingredients like soy meal, beef paste, and one of them had crushed beef hearts included. Not that there is anything nasty in those products, but it's a way to make them cheaper to produce and if you don't read a label you may be eating something other than what you think you are. Is it surprising that so many people find it harder to control their weight anymore, especially if they presume the calories in a prepared food are similar to those they'd prepare themselves from scratch?...See MoreBread too soft
Comments (9)Thanks, Grainlady - I thought there might have been some other factors, but I am still learning how to use this machine. I started reading the new book I got, The Bread Lover's Bread Machine Cookbook by Beth Hensperger, and it has given me some information that I think will also be helpful. I like the way it was written, and it is helping me to feel more comfortable with my machine. I'm at the point in my life where I really do not want gadgets to be so complicated that I have to read massive books or instructions to be able to use them, and this especially includes cameras. I still have not yet figured out how to do a manual focus with my camera that I have had for several years, although I gave the instructions to Kevin, and he figured it out in a few minutes. He got himself a new camera at the Sony store with an employee discount, but he won't let me use it because I have to use a different eyepiece focus. He also bought a very expensive telescoping lens for it, but that is not something that I would need, since my own camera has very good optical zoom. Back to the bread machine - I think Beth's book makes it easier for me to understand how the machine works, and I have found the instruction manual to be a bit confusing. I tried to have Kevin read the instructions to me while I am doing the settings, but he does not seem interested in helping. It is difficult for me to look at the instructions, then look at the machine controls, refer back to the instructions, etc., as I tend to get lost in the process, and it is difficult to backtrack during the settings. I found out from Beth's book that most machines have memories in case of power outage,and this is why unplugging the machine will not reset it, even when I want to start over. Part of the problem was that I generally use the delayed timer, which requires me to skip certain steps and refer to a different page, and the delay page did not have information for resetting. I did just find that I can reset the machine by pressing and holding down on the "start" button, but I missed that info by skipping to the delay setting. The instruction book gives no information about how long to let the bread cool before wrapping it and it has very little info on storage. We are not going to eat a loaf of bread in one day, and so storage is important. I have stored my loaves at room temperature for a week, and none of them have gotten mold. I do have a problem with mold for Trader Joe's flour tortillas, and so I have to vacuum seal them for storage with butcher paper between them, or else they fuse together. Lars...See MorePondering about home made bread loaf size
Comments (6)Hi Sally, Grainlady has generously shared her knowledge with us, and often mentioned loaf pan sizes. On page 3, there's a thread about Homemade vs Storebought bread. This is an exerpt on one of Grainlady's responses: "A mistake often made, and why the dough doesn't seem to raise as high as you'd like, is from using the wrong amount of dough for the pan size. This is also the cause of over- or under-proofing. As an example: if you make a recipe that makes 1-1/2-pounds of dough (about 3-cups of flour in the recipe) and place it in a 9x5" pan (which are generally designed to be used for loaves of quick breads), that's the wrong pan for that amount of dough - a standard-size loaf pan is a better choice - 8-1/2x4-1/2". Jumbo pan - 10x4-1/2" - approx. 4-5 c. flour - 2+ pounds of dough Quick Bread Pan - 9x5" - 4 c. flour - 2# dough Standard Loaf - 8-1/2x4-1/2" - 3 c. flour - 1-1/2# dough Medium Loaf - 7-1/2x3-1/2" - 2-1/2 c. flour - 1# dough Small Loaf - 5-3/4x3-3/4" - 1-1/2 c. flour - 8 oz. dough"...See MoreStarbuck's Gingerbread Loaf -- faux edition
Comments (32)Martha, he had no ability to answer my question..it seemed like he just cut and pasted a script into the email reply. So when I wrote back, I asked again. This time I got a reply thanking me for my input and assuring me they would pass on the information to the "appropriate" department. No promise of follow up of any kind. I have a very good friend who works in the Starbucks legal department, so I wrote to him and asked if his would be one of the appropriate departments, lol. Like could they be fined or sued for false labeling? I'll give them a couple of weeks and follow up. I might call and try to talk to someone and go up the chain of command. It doesn't really matter to me, but I am so curious now! And I'm in Covid jail so I might as well harass customer service workers (just kidding, I'm very nice to them all)....See More- 18 years ago
- 18 years ago
- 18 years ago
 10 years ago
 10 years ago
Related Stories

CONTRACTOR TIPSLearn the Lingo of Construction Project Costs
Estimates, bids, ballparks. Know the options and how they’re calculated to get the most accurate project price possible
Full Story
LIFESimple Pleasures: The Joy of Baking
Fill your house with a heavenly scent and your heart with cheer by making time to bake
Full Story
FEEL-GOOD HOME21 Ways to Waste Less at Home
Whether it's herbs rotting in the fridge or clothes that never get worn, most of us waste too much. Here are ways to make a change
Full Story
KITCHEN DESIGNKitchen Luxuries: The Wood-Fired Pizza Oven
If you love homemade pizza and are (ahem) rolling in dough, a wood-burning oven may be just the right kitchen investment
Full Story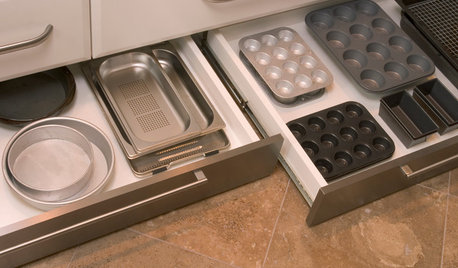
GREAT HOME PROJECTSHow to Add Toe Kick Drawers for More Storage
Great project: Install low-lying drawers in your kitchen or bath to hold step stools, pet bowls, linens and more
Full Story
REMODELING GUIDESConsidering a Fixer-Upper? 15 Questions to Ask First
Learn about the hidden costs and treasures of older homes to avoid budget surprises and accidentally tossing valuable features
Full Story
CONTRACTOR TIPSContractor Tips: 10 Remodel Surprises to Watch Out For
Know the potential setbacks before you start to save headaches and extra costs in the middle of a renovation
Full Story
LIFEIs Cabin Fever Real? Share Your Story
Are snow piles across the U.S. leading to masses of irritability and boredom? We want to hear your experience
Full Story
PETSPet-Proofing Your Home: A Room-by-Room Guide
Not all pet dangers are obvious. Keep furry friends safe and sound by handling all of these potential hazards
Full Story
FRUIT TREESHow to Grow Your Own Persimmons
Sturdy and easy to care for, these trees offer bright fruit through winter — and keeping them in bounds is no sweat
Full Story
grainlady_ks