


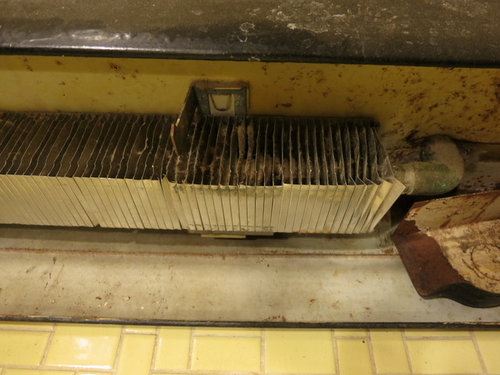
Cleaning Baseboard Heaters (hot water heat)
tippi_109
10 years ago
Featured Answer
Sort by:Oldest
Comments (11)

jonnyp
10 years agotippi_109
10 years agoRelated Discussions
Hot water heater for radiant floor heat
Comments (13)Here is what I would do if I was you. You don't need that many btu's to heat up them two rooms. Plus you want to get hot water also. haved a certified takagi tankless water rep. come to your home. ( this will be free ) tell him you want a tk-3 pro. ( better heat exchange in the unit itself) it can fire up to 199,000 btu's and down to 11,000 btus. then you want to use a bronze bump with a heat exchanger on one side, plus boiler trim. (1/6 horse power. with a mixing valve for your domestic water. you want to then put two zones on other sided of a heat exchanger with a zone board for 2 zones with 2 pumps one for the baseboard. Ask for high trim baseboard so you can set the water temp down and get max btu's per lininer foot. set the temp for 150 degress durring the winter cold month. Now for the radiant floor get a viega dealer in ur neighborhood. get climate panels that you can put cement nails in and the put a flooring on top. If you wanted to know more about this rout just leave a post. you can have all 3 comming off one unit. The best thing about this type of set up is that you dont need 180 degree water like a boiler. and in summer time you can set the water temp down to 120 or 115. and when your away on vacation you use no gas. The down side is hat the climate panels can be expensive, the tankless water heater has to have a nice size gas line. the equipment to do this job can get pricy. I mean really pricey. with nice equipment comes a good price. Takagi & viega are my brand of choice. but you could use navian and wirlsboro if you wish. all 4 manufactors will be happy to come to your home and sit dowwn and talk to you. ( I sell all four)...See Morehot water heater for baseboard heating
Comments (26)Posted by scott2006 on Sun, Feb 18, 07 at 20:32... "Guys, The Legionnairs is nothing to fool with. My neighbor got it TWICE from the hot water tank. The 2nd time the health department finaly figured it out. What happen is hes an old guy living alone and wants to save money. He turns the tank off when he doesn't shower then turns it up just enough to take a warm shower. Then off it goes." Wow...this was not an issue for me. Our apartment in Singapore used a small 15 litre electric HW tank on a timer switch. This is a relatively common arrangement in the Lion City. Just push a button 20 minutes before needing hot water, and I was good-to-go. The timer ran only for an hour at a time. I'd have to push the button again if I wanted more. In a tropical climate, that was rarely necessary. We would sometimes go a couple of days between heating the tank. Other times, I'd forget to hit the timer until it was too late. It was warm water for my shower or the dishes at this point. I'd shut it off right after I was done, as there was no need for the heater to finish it's cycle. The hot (or sometimes warm) water fed the the shower, kitchen sink, and bathroom sink. I showered, washed dishes, and drank without ever getting sick from it. As-far-as-I-know, no-one has gotten Legionnaire's Disease from using luke-warm water in Singapore. I just wish more Asian countries would use S-traps for sinks and showers. P-traps are common in Singapore. No traps are common in Indonesia. Yuck. I guess that's a discussion for another thread. Peace. Marco...See MoreWant to replace a hot water baseboard heat register
Comments (5)Okay, finally I have success! I'll detail what I did as it might save someone a lot of headache. First off, hot water pipes are thinner than cold water. I think cold water is type M and hot is type L or vice versa. No matter how many times I look that up, I still forget! Anyway, I got pretty good at cutting the thick one but was having MAJOR difficulty cutting the thin one. To make a long story short, I had to use a hand held key saw. Annoying, slow but that worked. Next, stick bread in the lines on both sides to block the water. You think you get all of the water out of the line, but you don't. With water in the line, soldering will be impossible. You'll have to heat the joints three times as long and the solders won't be good. I had leaks by not following this. A step which I knew but still didn't do. Stupid on my part. Okay, no more leaks. Now, I'm supposed to bleed the lines. Although my house was built in the 1930s, we added a large addition and the house is pretty new, including the heating system. It seems that the plumbers are no longer putting bleeders on the line. Mine don't have any. No problem. I should just open up point 1 in pic 2, and the valve on point 9, pic 1 (which you can't see) then open the garden house valve on line 1, pic 2. When the water flows out smoothly with no sputtering, the air is out, right? Well yes, but things just weren't working that way. I did everything I just said and water came out. Within 10 seconds, however, all the water came out and it just dried up! Uh, is that supposed to happen? Confused, I shut the line and waited about 30 minutes while I did other things. I came back and tried again. Same results!!! I had about enough of this plumbing project. Looks like it won and I lost. After about 10 successful projects, I was going to have to call in a plumber. I tried getting the job taken care of with my normal service contract, convinced that it was just a lack of knowledge on my part. I was told that since it was the weekend and they weren't sure the project fell under my normal service agreement, they might have to bill me...at the more expensive weekend rate...of $165 per hour!!! I quickly told the lady I'd figure it out myself. Searching this site, I found the answer. I did everything right except one thing. You have to continually add water to the line so that it keeps flushing the air out. You do that by flipping the little handle on point 5, pic 2. That automatically ensures that the pressure in the baseboards remains at the setting on the reducer by adding water when need be. However, if you open it manually, it will just let the water flow (also pushing the air out with it). If there's air in the line, the pipes aren't going to get hot, so you've gotta get the air out. With each bucket of water I let flow through, more of the line got hot. Three buckets of water later, the water was flowing smoothly and I had heat! Note that by me doing what I did, I introduced air into another zone, so I had to repeat the process for that zone as well. No biggie. Three more buckets later, that zone was working again! Now I don't know if there's a way to work on one zone while not affecting the others. I'll have to examine what I did a little and see if there's a sensible way of doing it. Anyway, hopefully this helps someone....See MoreHot water/ baseboard heat under kitchen cabinets
Comments (5)If the cabinet can be removed then remove it to measure and cut the front where the grill will be installed. If the cabinet cannot be removed the kick plate can still be cut in place with a sawzall. The bottom shelf of the cabinet will have to be sacrificed. You need to do this in order to set the kick space heater. What I do is solder about 2 feet of soft copper tubing to the supply and return connections of the heater and drill two holes into the floor. Then as I set the heater I push these lines through the holes so I can then make the connections to the hot water supply and return in the basement. I then drill a third hole to run the wire for the fan which will also come from the basement. With careful measuring it only takes a couple hours to install a heater. When I cut away the bottom of the inside of the cabinet I leave several inches around the perimeter so after the installation is complete I cut a piece of sanded plywood to the inside dimension of the cabinet and screw it down. This gives access for service to clean the heater or remove the motor if it ever fails. It also a good idea to have shut off valves for the hot water and an electrical service switch in there for ease of service...See Moreionized_gw
10 years agoUser
10 years agojonnyp
10 years agoUser
10 years agotippi_109
10 years agoazanutig
8 years agolisaritchie
7 years agoionized_gw
7 years agolast modified: 7 years ago
Related Stories
GREAT HOME PROJECTSHow to Switch to a Tankless Water Heater
New project for a new year: Swap your conventional heater for an energy-saving model — and don’t be fooled by misinformation
Full Story
GREAT HOME PROJECTSHow to Add a Solar Water Heater
Lower energy bills without a major renovation by putting the sun to work heating your home’s water
Full Story
HOUSEKEEPING5 Steps to Improve Your Heating System Now
Increase your heater's efficiency and safety for lower energy bills and greater peace of mind this winter
Full Story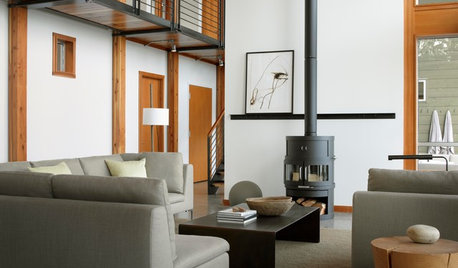
REMODELING GUIDESClean-Burning Woodstoves Ignite a Greener Heating Trend
No need to rely on oil or gas to heat your home — new woodstove designs burn cleanly and are beautiful to boot
Full Story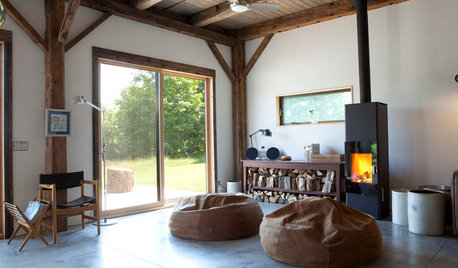
GREAT HOME PROJECTSHow to Add a Radiant Heat System
Enjoy comfy, consistent temperatures and maybe even energy savings with hydronic heating and cooling
Full Story
FLOORSIs Radiant Heating or Cooling Right for You?
Questions to ask before you go for one of these temperature systems in your floors or walls (yes, walls)
Full Story
FLOORSWhat to Ask When Considering Heated Floors
These questions can help you decide if radiant floor heating is right for you — and what your options are
Full Story
GARDENING GUIDES10 Drought-Tolerant Shrubs That Thrive in Full Sun and Reflected Heat
Got a hot spot in your garden where plants often die? Try these tough shrubs that add beauty while shrugging off the heat
Full Story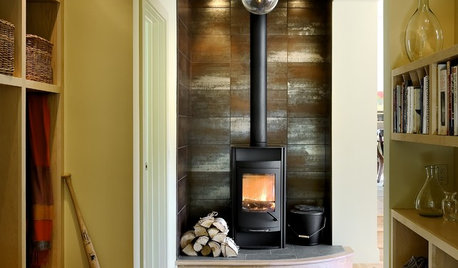
FIREPLACESHeat Your Space in Style with Today's Wood-Burning Stoves
Cleaner burning and streamlined, new wood-burning stoves warm up the room
Full Story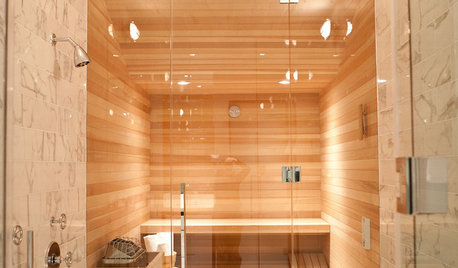
REMODELING GUIDES5 Hot Tips for Home Saunas
Bask in your very own heated haven, indoors or out. This overview will get you off to a glowing start
Full Story

aveart