


Am not getting the vapor barrier thing, at all?
17 years ago
Featured Answer
Sort by:Oldest
Comments (20)
 17 years ago
- 17 years ago
Related Discussions
vapor barrier under concrete floor?
Comments (5)I didn't know the XPS was classified as semi-impermeable. See here, first link, p.7. Actually, I've never used any vapour barrier under garage floors. For these and a few other questions you've posted, there would have best been recommendations in your building specs from a local P.Eng.* who reviewed the plan. However, I know many/most designers here don't go that extra step. Considering even the cost of a modest home, I think the $500-$600 cost would have been worth it. *mrs. worthy's OBY/GYN is also a P. Eng., but we've never solicited construction information from him!...See MoreMy contractor did NOT install a Vapor Barrier, Help!
Comments (15)Thank you for responding. Mongoct, I have thought about having them back, but I just can't bring myself to feeling right about it, for lack of a better word, the were quite 'creepy'. And I don't have the funds to hire someone else to do the work. I'll explain what I've done, even though I know it's not the perfect way, I hope you think it's fine. This is the home I grew up in and it only had greenboard in it before I tore the walls down, there was minimal mildew squares on the greenboard when I removed the tiles. There was water stains on the wood beams below the side corners of the front of the tub. and in case you haven't noticed I am let's say a tool time gal so these cement boards are killin' me. sooo, here goes what i've been up against...The spackle is water soluble, I have removed most of it by going over many, many times with a damp sponge until I'm able to remove the tape. I was able to remove the durock boards used on the showerhead side of the bathtub alcove, I cut several plywood strips and screwed them onto the studs to make it flush and come out and over the flange a little. I then used a piece of roofing felt stapled onto the studs and screwed the original pieces back up- my thinking is if the cement board is damp, I'm hoping the felt will protect the wood behind it from contacting the damp board- my clothes closet is behind this. hope you're not cringing. I reused the durock, because I purchased a hardibacker board and was not able to cut it- these boards are just too heavy for me. anyway, so I still have a little over 1/2" inch gap under the front corner side of the tub where the board meets the flange (don't know what to do about that). Also, I need help regarding the seams where the greenboard and durock meet- remember I am having the three walls of the alcove tiled up to the ceiling that has the greenboard, this is also the same application of tile in the neo-angle shower stall in the 2nd bathroom. HomeDepot recommended purchasing easysand, a setting type compound, comes in an 18lb bag and fiberglass mesh tape- however, I have read in a post on GW that fiberglass tape is awful to work with in corners. Do you know regarding the tape and setting compound if it is like working with regular water soluble spackle in regards to spreading and sanding? Thank you, Again!...See MoreHow to add a vapor barrier to existing building?
Comments (5)Vapor barriers should be on the warm side of your insulation under whatever your interior wall finish is. So if you planned on putting a new layer of sheet rock or plaster, they would go under that. If you absolutely can't do that, then you can paint with vapor retardant paint, which helps but isn't as good. The purpose of that vapor barrier layer is to keep interior moisture (cooking, bathing, laundry, plants and humans' breath) from migrating into the insulation cavity and condensing when it reaches a colder thermocline. Once condensed it can saturate the insulation making it less effective and also allowing for mold growth within the wall. Not a pretty thought. Now, there are other water/moisture barriers in many wall assemblies. The most common one you may have seen is Tyvek or Owens-Corning pink wrap plastered on the walls of houses under construction. These are really intended more as during-construction protection moisture barriers and air infiltration barriers along with water penetration blocks to prevent wind driven rain from getting inside. Theoretically they should actually be vapor permeable while being water impermeable. Where does the insulation go? Well, basically in between the interior and exterior portions, in the wall cavities. You may also read about vapor barrier/retarders on the soil underneath structures, These are to prevent moisture in the soil from rising into the living spaces and causing problems. Now, all of this info is related to the Northeast's weather conditions, not East Texas, so you should check local standards. I expect you have more heat reflector/barrier issues, along with more extreme exterior water barrier codes ( i.e. using the Tyvek-type product) in order tyo cope with hurricane-driven water. HTH, Molly~...See MoreBlown In Cellulose: Do I need a vapor barrier or not?
Comments (5)Location of the VB (if any is used) is very important and it should always be on the warm side of any insulation you're installing. That means, in case of walls, just behind the sheetrock or plaster. Unless you've got your walls open now, it's impossible to install a VB behind the surface. (There are VB paints, and you can choose some VB wallpaper-type things.) The point of the VB is to block transmission of moisture from the home into the insulation, which in a cold climate like yours will be much colder during the winter. Vapor that escapes from the warm, moist, air indoors can condense within the insulation material itself when the temperature inside the insulation hits the dew point. The potential damage posed by this is creation of a long-term saturated area within the insulation, lowering its effectiveness and possibly migrating to adjacent concealed wooden parts of the structure and creating rot problems. Many people confuse the ubitquitous house-wrap (Tyvek, Typar) materials that are installed on the outside of the house under the siding with true vapor barriers. The house wrap materials are not vapor barriers as much as infiltration and moisture barriers, intended to prevent wind and rain from entering the sheathing and siding assembly. The house wrap materials should actually be vapor permeable in order to release any vapor from within the walls as efficiently as possible. (Vapor is in very small droplets; liquid-state water from rain or snow is much larger. The small droplets in vapor should be able to get out of the wall, while the larger rain drops should be kept out from the outisde.) In general, I think the recommendation is to install VB (or at least VB paint) if you choose to insulate the wall cavities. Now, in the case of ceilings the recommendations become murkier. Some say always use a VB, some say you can get away without one, particularly if using fiberglass batts with Kraft paper which offer some VB protection, but is hardly perfectly sealed. Certainly I would never apply a VB on the cold side of ceiling insulation, but otherwise it's still a debated question. I live in northern NY and have chosen to have no wall insulation because I have intact plaster. (It's not as bad as it sounds as I have the 19th c version of energy efficiency: multiple back plastered interior wall cavities.) In the ceiling of my second floor and attic floor joist space I carefully installed Kraft-faced fiberglass above the intact plaster with no formal VB. I tried to make it a smooth, well-attached installation, but it's not perfect. When evaluating recommendations keep two things in mind: it makes a big difference where you are geographically. In really cold climates the temperature differential that can occur within the insulation material may encourage condensation of any vapor that enters from the living space. In warmer climates where winters are merely cooler, or chilly, the condensation point may not be within the insulation. In addition, keep in mind that many contractors and energy efficiency specialists don't know much about old houses and how they're constructed within the walls, nor how they were designed to work. After all, we didn't just invent interior moisture (though I think we make more nowadays, and we don't use the more drying heating technologies which they used to use). But we can create an unintended problem if our zeal for energy conservation allows us to interupt the ways in which old houses have managed temperature and moisture exchanges and stayed whole and healthy for many decades, if not centuries. Have you read the Preservation Brief on Energy Conservation in older buildings from the National Park Service series? I'll attach a link below. This is a very useful series, now available free, on-line, which covers many aspects of old house care. To see other topics scroll to the bottom of the link below and click on Presevation Briefs for a list. The info was prepared by the National Park Service so it was paid for by your tax dollars - enjoy! Molly~ Here is a link that might be useful: Preservation Brief on Energy Conservation in Old Buildings...See More- 17 years ago
 17 years ago
- 17 years ago
- 17 years ago
 17 years ago
- 17 years ago
- 17 years ago
- 17 years ago
- 17 years ago
- 17 years ago
- 17 years ago
- 17 years ago
- 17 years ago
- 16 years ago
- 16 years ago
- 13 years ago
- 4 years ago
Related Stories
HEALTHY HOMEHow to Keep Water Vapor From Ruining Your House and Your Health
We help you find out when it’s happening, what it means and how to fix it
Full Story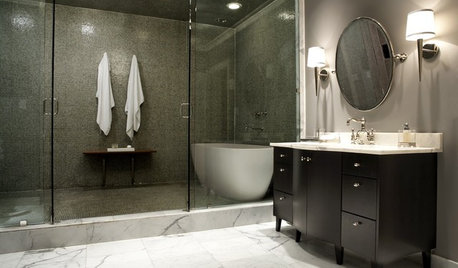
BATHROOM DESIGNHow to Choose Tile for a Steam Shower
In steamy quarters, tile needs to stand up to all that water and vapor in style. Here's how to get it right the first time
Full Story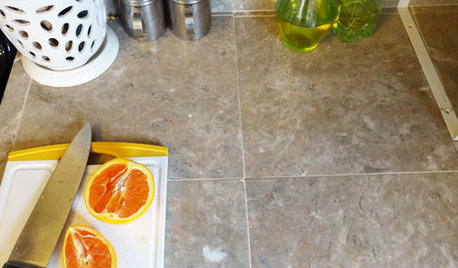
HOUSEKEEPINGHow to Clean Grout — Stains and All
If your grout is grossing you out, this deep-cleaning method will help it look new again
Full Story
FLOWERSGet Coneflower Blooms All Summer Long
Plant these 5 native species to bring beauty to the garden — and pollen to the insects — from June through August
Full Story
HOUZZ TOURSHouzz Tour: Mexican Home Gets an All-Access Pass
Flush thresholds and ramps are just some of the universal design features that make this Cabo Pulmo home entirely wheelchair accessible
Full Story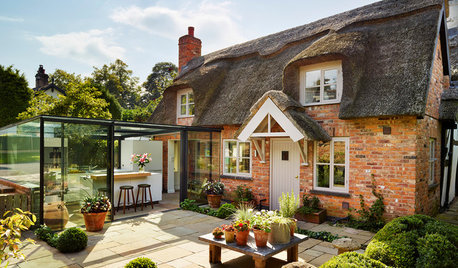
HOMES AROUND THE WORLDStorybook Cottage Gets an All-Glass Kitchen
A showstopping addition to a traditional thatched cottage houses a contemporary kitchen
Full Story
FUN HOUZZIndoor Slides Make Getting There All the Fun
Take a straight shot between floors or twist up your ride with a spiral. An indoor slide puts the playground right at your feet
Full Story
VINTAGE STYLEGet Away From It All in a Glamper
A glammed-up camper can transport you to a happy place, whether in your yard or on the highway
Full Story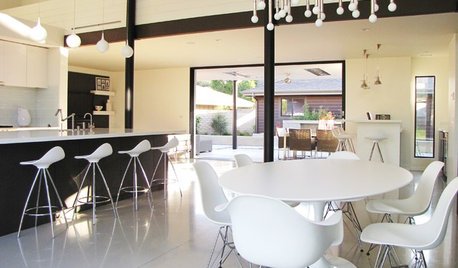
HOUZZ TOURSMy Houzz: An Orange County Ranch Gets Into the Swing of Things
Golf course views and a mild climate feature in this 1960s ranch remodeled in midcentury modern style
Full Story
BEDROOMSGet in the Swing of Things With a Hanging Bed
Give your bedroom a style lift with a fully or partially suspended bed — or one that just mimics the look
Full Story

bill_vincent