


Cereal boxes and the like for my worm bin ?
MaryAnn1950
9 years ago
Featured Answer
Sort by:Oldest
Comments (9)

sbryce_gw
9 years agorenais1
9 years agoRelated Discussions
Off to a Real Good Start with My New Worm Bin!
Comments (20)"Are BSF timid creatures, or am I most likely going to have them crawling on me or flying around when I'm checking out my bin?" Some people really love their BSFL, as much as we love our worms. They too worry about them when they have to leave them for a few days. My understanding is that when BSFL are about 3/4 inch long and smaller they are white. Then as they mature they turn black and hard like little armadillos. Then they hide. The flys that emerge are like large houseflies but they do not land on poop and then on food. They avoid people, poop and food and want to find a bit of rot to lay their eggs on. They fly erratically. Slow when they are just warming up. Then faster. They are black with some of their leg area white. I think you would like the fly and the mature larvae and not be afraid of them. The thing that is cool about the white larvae is if one puts lets say the remains of a fish that the fillets have been harvest from into the bin, the the BSFL boil over the remains so actively that the remains float over the top of the activity and wonder around the container while getting smaller and smaller until they are all gone. Maybe let your helper know that these types of things in the bin are normal so they will not be startled. There is the cutest youtube that shows a little girl with a handful of BSFL feeding then to her chickens. If they knew that even little girls are not afraid of them then they might be more ok with them. Me I do not even touch my worms except with a 10 inch stick. Not even with gloves on. Maybe the scarriest thing to ever happen was I had noticed a few things out of place around the bin lately. Things were a bit mess with the vermicomost. I thought I was just sloppy. One day I put food in the top of the bin and out of the bottom a mouse jumped and darted off of my leg. I screamed like a little girl. Then I laughed a lot because I screamed. Many people love furry mice as pets. Maybe not me. I wonder if he was eating my worms. I move the material around in my bin to learn what is going on. As I am more confident I know what is happening in there and as vermicomposting is not my newest hobby, and I am not possessed with knowing what is going on with the little guys, I am more likely to leave them alone. Then my activity with the bin would more resemble how sbryce advises. Like him I would flip the bottom material over for the same reasons. Or gain interest in flow through bins like I have. I would think the cloth worm inns would work nice for you. Just put the stuff food by the tons and bedding in at the top. Zip it in. Water frequently. Harvest at the bottom. Supposedly no need to separate worms. They do dry out fast but the activity of adding water is pleasant for some. Others may have fish tank change water they want to use. I would think that maybe the condition of the material might be gauged a tiny bit by just squeezing the bag. I do not have one. Some people sew their own. Having a strong enough stand to hold mega weight is important. I guess like not buying the first year of a car I am waiting for them to come out with the new and improved version. I think mine would dry out. That would be ... ... .,. very bad for the worms. A homemade plastic bin is more resilient in that way....See MoreUsing a deck box as a worm bin??
Comments (3)A cheap sterlite container would be the same thing. Save your deck box for another use. Drill holes as suggested. Many plans are out there. The one with a double bottom might be ideal in your climate to get the drainage you need and collect that awesome rich worm tea. We've had one for 15 years and the lid is a bit cracked from storm caused tree debris. Still works though. The larger the better because you can push it all to one side & put in a cardboard divider and new bedding. Feed only on the new side with the new bedding and the worms will migrate through. Cardboard isn't tight on all sides, but just enough to help hold the contents back to one side while you add more bedding. Location for you in Florida would be important so the worms don't get too hot. I've found the worms are very forgiving and adaptable to new bins and new methods. We've changed bedding types, taken worms out for friends, and moved things around no problem. If too wet, I leave the lid off for a few days & have to push back the slugs who migrate in. If too dry I can add moist bedding or more wet food. As long as the space is large enough the worms move to where they're comfortable in the bin. Also have started putting their food in a repurposed red plastic onion bag. Makes it easy for me to add more food & helps move the worms to one side for harvesting vermicompost. Hopes that helps Corrine...See MoreGot My First Worm Bin Today
Comments (8)Actually, I just guestimated the size of the box last night because it was late and I was sleepy. The box is 16 1/2 inches by 12 1/2 inches by 9 inches deep. I read some more on this website before I finally went to bed, plus I followed a link provided for a children's website on earthworms (since I don't know much about worms, other than they are an organic gardener's best friend, a child's website did seem an appropriate starting place to learn). Anyway, based on what I read, I think I've figured out a workable battle plan, but could sure use more experienced folks insight on this. Here's my plan, unless you folks have a better solution to share: I'm going to get a second plastic tub that is the same size. I'm going to drill a few 1/2 inch holes at the bottom, placed to facilitate drainage. I'm going to go inside the box with some of this plastic screening that looks like window screening but is made of flexible plastic, and glue patches of this screening over the drainage holes so that the worms can't crawl out. To facilitate air circulation (which the folks my husband bought this from say is important), I'm going to take the lid and cut a big 3 inch by 4 inch hole in it, and then cover that hole up with plastic screening too. After I prepare the new plastic bin with the drainage and top holes, I'm going to move the batch of worms and peat moss from the box I already have to the new, properly prepared bin. Then I will put the properly prepared bin in a drip pan, raised an inch or two in the air by wooden supports (which are taller in the back of the bin than in the front) so that there is a slight angle to the way that the worm bin sits in the pan. This is to facilitate draining. The drain holes will be placed so that excess water will drip out the bin into that drip pan. I will then place this setup in an extra bedroom closet, where it will be dark all but maybe 10 or 15 minutes each day, where I will feed them their Worm Chow once a day and moisten as necessary. I will then put holes in the plastic bin I currently have, and about 6 to 8 weeks from now when the population is grown in the bin, I'll move half of the worms over to the new box and put more moistented peat moss in both boxes to fill them up. I can understand the suggestion to just put the worms outside, however, my garden sits in the middle of Sunstroke Acres and -- despite the fact that it is not even officially summer yet -- we have had 90 degree plus days every day for several weeks now. This is the hottest "spring" on record in these parts. Those little critters would probably bake out there if I put them out right now in these abnormally harsh weather conditions. Plus my garden is completely full of plants right now that have full root systems at this point. Everything is big and coming up fast. I don't want to go disrupting my earthen beds right now if I can help it. You know what they say "Don't mess with somthing that is working quite well." I figure on waiting until the fall, when I prepare my beds for next spring. That's when I routinely fork the organic mulch I use during the growing season (a mixture of shredded leaves and shredded pine bark - a "brown" when it comes to composting) into the top 5 or 6 inches of soil. At the same time I add in some Starbucks coffee grounds (a "green" when it comes to composting, placed into the soil so that I can compost my mulch over the winter). After I have forked in that mulch and coffee combination, I routinely wet it down till it has the moisture consistancy of a wet sponge. This will cause the sheet composting operation to temporarily heat up, so I will have to wait a few more weeks I figure to add the worms in. But the initial heating up of the bed will discipate in a week or two, after which I can wet the bed again to the consistancy of a wet sponge. At that time, I should be able to add the worms into the soil safely, I figure. It will be a cooler climate by that time, and they will have plenty of fresh "eats" and the same soil moisture content that they will be used to. I figure on covering the beds with a crushed oak leaf "winter mulch" after the worms go in, to protect the worms and other soil microorganisms from any harsh winter conditions that we might experience here in the mid-south. Anyway, that's what I'm thinking right now. Any suggestions for improvement in my scheme, or valuable insight you would be willing to share with this newbie?...See MoreMy re-recycled worm bin
Comments (4)Kat I always top feed and cover with bedding - in your case leaves. I have an old heavy sheet of pywood over my box for critter control. The carpet keeps the worms and compost cool and damp, as well as helping control the odor and flies. Top feeding allows more air to the food and it breaks down quicker. I fluff the mix with a pitchfork when I feed to get more air down inside. If you have access to some coffeegrounds (starbucks) or manure , pull your leaves back, lay damp cardboard or newspaper on the soil and spread a layer out. Cover with your leaves, keep damp, and in the spring you will be amazed with the worm activity....See Moresbryce_gw
9 years ago11otis
9 years agoSeun
7 years agohummersteve
7 years ago
theparsley
7 years agobaldeagleomelette
7 years ago
Related Stories

GARDENING GUIDESHouzz TV: Make a Worm Bin for Rich Soil and Happy Plants
A worm-powered compost bin that can fit under a sink turns food scraps into a powerful amendment for your garden. Here’s how to make one
Full Story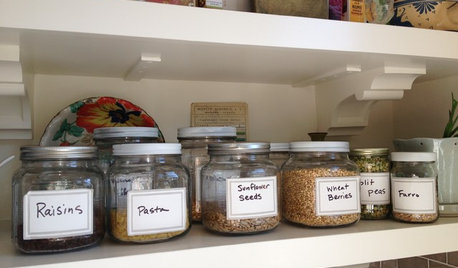
KITCHEN STORAGEArtful Organizers: Jars for Pretty Pantry Displays
Ditch the disheveled look of mismatched boxes and bags for colorful or clear pantry jars in an appealing arrangement
Full Story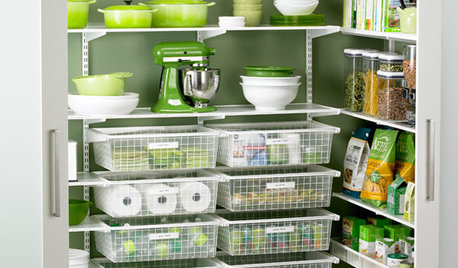
PRODUCT PICKSGuest Picks: 21 Nifty Pantry Organizers
Just say no to pantry chaos with these containers, racks, bins and other storage wonders
Full Story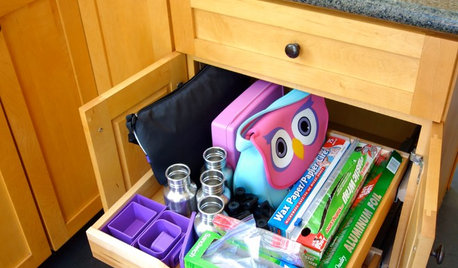
KITCHEN STORAGEEnd the School-Lunch-Prep Chaos
Make mornings less hectic with kitchen drawers and baskets dedicated to kids' lunch boxes and accessories
Full Story
LIFE21 Things Only People Living With Kids Will Understand
Strange smells, crowded beds, ruined furniture — here’s what cohabiting with little monsters really feels like
Full Story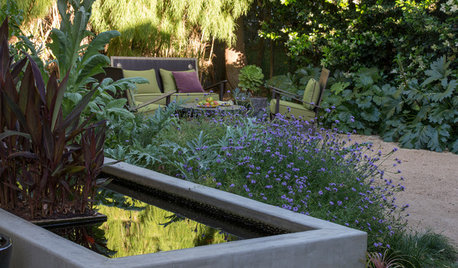
SAVING WATERHouzz Call: Are You Letting Go of Your Lawn?
Many facing a drought are swapping turf for less thirsty plantings. If you’re one of them, we’d like to hear about it
Full Story
KITCHEN DESIGN7 Steps to Pantry Perfection
Learn from one homeowner’s plan to reorganize her pantry for real life
Full Story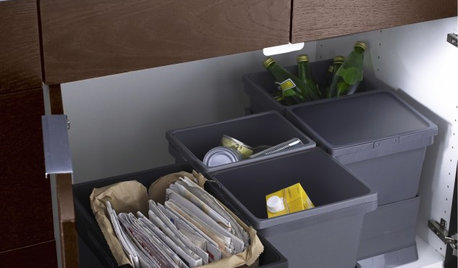
KITCHEN STORAGETake Your Recycling Station From Blah to 'Ahhhh'
Revamp an eyesore setup or just improve recycling efficiency with pullout drawers, stylish containers and innovative solutions
Full Story
KITCHEN DESIGNHouzz Call: Tell Us About Your First Kitchen
Great or godforsaken? Ragtag or refined? We want to hear about your younger self’s cooking space
Full Story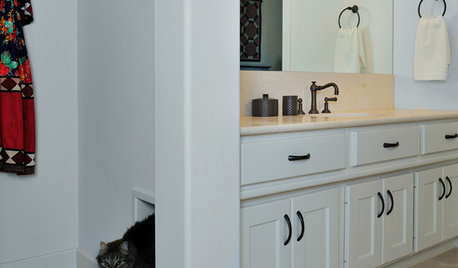
PETSSo You Want to Get a Cat
If you're a cat lover, the joys outweigh any other issue. If you haven't lived with one yet, here are a few things to know
Full Story
CarlosDanger