Hi Everyone! I'm really excited about my new hobby and how well things have gone so far--thanks in large part to all of the information posted here and available elsewhere on the internet. So I want to introduce myself and share my experience, as well as get your feedback regarding some of the typical questions and concerns we all have as new vermicomposters.
First, while I rarely consider it much of a hindrance or let it slow me down, it's obviously important for you all to know that I'm blind. In fact, I had to seriously weigh the obvious challenges that might pose before jumping in with both feet, and it was reading Hellbender's posts and your responses that finally made me take the plunge. Of course, I also read many, many posts on this forum and elsewhere and listened to as many online videos as I could find before deciding which approach I'd take to my totally new and fascinating hobby and adventure.
Fortunately, my first BIG mistake was avoided by talking to a potential source for my worms in FL who warned that I'd most likely have a difficult time handling the thirty-five gallon bins I had already purchased once they were full! Boy, was that great advice and something I'd urge all beginners to pay heed to!
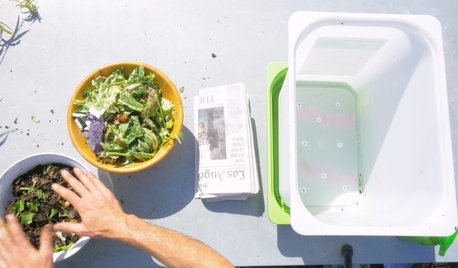
So I went out and bought three ten gallon bins and drilled holes in them, using a combination of the various suggestions I found on the internet--1/4" holes in the bottoms of the top two bins and two rows of staggered 1/8" holes a few inches from the top (about two inches apart) all around the sides of both bins, as well as the same just below the middle of the bottom bin, which has no holes in the bottom. Then I used some PVC pipe I had on hand (to make frost frames for covering my citrus trees when needed) to make supports for each bin...I think the bottom bin support is a little more than 4" inches high and the top bins are a bit more than 6". They're made with two support pieces and a cross bar put together with elbows and then set at each end of the bins. Then I put five 1/8" inch holes in the center of the top bin lid--one in each corner of the center section and one in the middle. So when the time comes to "harvest," I'll have to decide if I'm going to use the process of getting the worms to move up, or to harvest and move them down at the same time by setting up my second bin, putting the current bin on top, leaving it open with a light on and removing the top layers of vermicompost until the top bin is empty; which is what I'm leaning toward at this time. However, based on your recommendations, I suspect that I'll probably have another bin going before then as a precaution.
Then I filled my bin with a mixture of shredded cardboard and newspaper, spraying it with water as I went. Finally, I pulled back the bedding in the center of the bin and spread out some juicing pulp (aged at room temperature for a day or two, frozen and thawed), covered it back up with bedding and monitored the moisture level for the next eight days as I waited for my worms, spraying areas that seemed dry with water...and kept reading/listening to everything I could to make sure I did everything right...LOL!
I ordered two pounds of worms from Bentley at redwormcomposting.com (which I can highly recommend!) late Friday night and they were shipped the following Tuesday and got here last Thursday afternoon. I had planned to have "sighted" help to put the worms into the bin, but the box felt quite warm on one side, so I decided to bite the bullet and put them in myself. Fortunately, Bentley had kindly advised me to keep the lid off and the light on (they're in my laundry room right off the kitchen) to keep them from escaping, which I was most concerned about. They weren't moving at all, but as I touched them while getting them out of the bag, they "felt" okay (not sticky, dry or soft). Some were "stuck" in a glob to the bag, so I just sprayed them with water (as I did all around what I had already put in the top center of the bin and then covered with dry bedding) and left the bag inside out on the top. Before long, they had left the bag and when "eyes" came to check things out for me about two hours later, they were all moving downward in the bin and doing so even more actively when we checked again before my sighted assistant left an hour later. Since the top kept drying out, I kept spraying it with water and I found a little guy up near the top of the bin as I was doing that a while after my helper left (he jumped right back into the bin as soon as I touched him) because she had turned the light off! So I remedied that and all was well!
After reading that it takes a while for the food to be "ready" for the worms after adding it to the bin, I thawed some of my juicing pulp and added it late on the second day since "eyes" had told me they were much more active earlier in the day. I just pulled back the bedding a bit on the left end and spread it around and covered it back up with bedding and put the lid on (light is still on in the room). I also put a little bit of coffee under the bedding in the front right corner since I've read so much about that and have a good supply of coffee grounds saved up. I monitored the bin and as it felt too wet and had a bit of condensation on the upper sides and I found a little stray up there two different times (already leaving "deposits" there too, which someone said was good), I added more dry bedding to the top and pulled it away from the edges of the bin near the top, hoping to increase air flow.
By the next day, yesterday, most of the worms were on the left end of the bin where I put the food the day before (I can tell where they are just by lifting the bin slightly and observing how the weight is distributed). Since that end of the bin and the food felt "warm" before I went to bed last night, I pulled back the bedding over the food for a few minutes and sprayed it with water, and then sprayed the top again after returning the bedding. A final check later indicated that it wasn't getting any warmer based on feeling the top of the bedding and the worms were still there, so all seemed well again...LOL!
Then today, the worms felt more evenly dispersed in the bin, so I thought it was necessary to do some "digging" (or "brailling" as I might call it...LOL) and found that worms are on the coffee grounds now, as well as still on the food on the other end, which doesn't feel nearly so warm today.
So I'm off to a very good start and all of my research seems to be paying off. Now, I've just got to do my best to avoid the pitfalls so many of you have been so helpful to warn against by not overfeeding as I get a feel for how much the worms actually need, adding lots of bedding and trying to figure out the right level of moisture. And I've got to get brave enough to turn off the light in my laundry room to boot...LOL!
Finally, I want to say that after reading so many horror stories from other beginner vermicomposters regarding buying their worms and getting "shorted" or dead/unhealthy/incorrect species of worms, I'm very pleased with my experience with Bentley at RedWormComposting.com. I think the worms actually came from KY and they were very well packaged, and I had no reason to question how many worms I got...there are a LOT of them! There was also a good bit of compost material in the bag and I have varying sizes of worms based on the little guys I've caught up on the sides of the bin and those I touched when "digging" around today. And to all who are hesitant to jump in and reap the many benefits of vermicomposting, just remember this--IF a blind woman can do it, anyone should be able to! So just DO the work required to have a basic understanding of WHAT you're doing and get started!
Again, I want to thank all of you for your invaluable contributions to my success so far and for providing the information that should keep me on the right track for many years to come!
With Much Appreciation,
BB in FL






Gerris2 (Joseph Delaware Zone 7a)
BlinkBloggerOriginal Author
Related Discussions
Off to a good start of the New Year!
Q
good worms for kitchen bin?
Q
SEARCH function 101
Q
worm bin sos? (and, do i have aliens in my worm bin, or bsf?)
Q
thedogsLL
gvozdika
Lisa.H
equinoxequinox
mendopete
BlinkBloggerOriginal Author
gvozdika
BlinkBloggerOriginal Author
equinoxequinox
equinoxequinox
equinoxequinox
sbryce_gw
BlinkBloggerOriginal Author
Lisa.H
Lisa.H
BlinkBloggerOriginal Author
equinoxequinox
BlinkBloggerOriginal Author