


INexpensive ready-made worm bin source?
sterlingsilver
15 years ago
Featured Answer
Sort by:Oldest
Comments (18)

leearnold
15 years ago11otis
15 years agoRelated Discussions
Worm Bin Construction
Comments (12)My first experience with an outside type worm bin was about 3 years ago. A very nice cedar chest type box that I felt would be ideal for the effort. It worked OK for awhile, but then discovered those little critters have the "biggest teeth" and chewed right through the bottom of that heavy wooden box. I think if I needed a bigger worm bin outside, I would build a 2 or 3 foot high concrete block enclosure. Place it on a piece of heavy duty hardware cloth to prevent burrowing from below - although it will provide a natural escape hatch for the worms should things get too hot or toxic. A piece of wood on top should keep out diggers - skunks, etc. As I am now a 1 or 2 person family, my composting needs are presently being dealt with in the familiar plastic bin type housing. So far - so good. However, I also compost yard wastes in a pile - covered with a black tarp, heated in the sun. Works well in our hot climate - but needs watering - as we have little rain. I also composted using a styrofoam box - see my post regarding soldier fly larvae, it consisted mainly of orange drops and peels mixed with chicken manure and straw - perhaps the horse manure could be treated that way also. I would wonder about using it hot for worms tho, unless added in smaller amounts. Just my 2 c's. Bejay...See MoreNew worm bin, worms crawling on the sides- settling in period?
Comments (4)Welcome foxtailskies, Worms like the moisture in the condensation on the top and sides of the bin. If it is only a few worms don't worry too much. It will take a few days for the carrot tops to break down enough for the worms to start eating them. And the carrot itself may not break down for quite a while. Any root type plant will think you are planting it and try to grow. To make food more 'worm ready' you can freeze it first. Then thaw and feed. Freezing breaks down the cell walls and allows the microbes into the cells more quickly. It is the micro organisms the worms are going for. For a far better explanation on how that works see the very recent post "Red 'wigglers?'". lkittle did a wonderful job explaining it all 2/3 of the way down the posts. 55F is too cool for the worms. The microbes slow down and the worms pretty much stop eating at that temperature. Room temps are more comfortable for them. Even mid 60's would be an improvement. Here is a link that might be useful: Red 'Wigglers?'...See MoreNewbie attempts margarine tub worm bin
Comments (35)November 19, 2005 Week 15 I hope giving the worms the rotten strawberries wasn't a mistake. There's still a lot of bedding in there that isn't broken down, and aren't they supposed to use that as a Plan B food supply? I'd better check on them. No worms visible up here, they probably heard me coming, but there are clearly castings in this new bedding. They've been here. The rotten strawberries are gone, only seeds left and not many of those. I guess the worms haven't been overfed; they seem to have been hungry. Or maybe they just like strawberries. I prefer blueberries, but to each their own. The worms are looking healthier. Their colour is back to normal and they don't look so fat. But... something seems off. Jabba! Jabba, NOOOO! He's gone. Jabba's gone. There are only three worms in here. He can't have escaped; I take care not to let the worms wander while I check out the tub, and the air holes are way too small for his impressive girth. He must have died, broken down and been eaten. Why did Jabba die? What do I know? The others didn't murder him; they're detritivores, and they don't have knives, or guns, or teeth. There isn't enough population or money in there for them to have developed politics or unions yet. Jabba was huge, massive, one could even say overweight. The moisture and temperature of the bin have been kept within range. The worms have plenty of bedding that isn't broken down... hmmm. That bedding may still be intact, but the colour is awfully similar to the colour of their poop. The worms have been in there a hell of a long time with no bedding change or new feeding; I overfed the bin early and left it alone. They clearly prefer the new bedding and the "fresh" strawberries over what they already had. The worms got big, but they also got weird. Maybe... maybe the worms have done all they can with this old bedding. The system is close to being sealed, they don't have allies like isopods and stuff to shred things apart and ease processing. Maybe the stuff is so saturated with their leavings (toxic waste to them, same as everything else with its own excrement) that they can't eat or live in it anymore. Maybe Jabba was so big because he was bloated and sick. Okay big guy, I hear you. Your death won't have been in vain. Time to prepare something new for the survivors. Lizard unrelated, he just showed up while I was doing prep. Dig all that poisonous old bedding out, leaving just the new stuff. This is a good time to take inventory and see what I've got. Only three worms, but a little bit healthier, and one cocoon. No, make that four cocoons. I don't know whose they are, but I choose to believe they're all offspring of Jabba, knowing he had little time left and getting busy as possible. I'll take better care of your descendants, Jabba, your lineage won't end on my watch. New bedding will be a mix of egg carton cardboard, dry dead grass, and assorted shredded leaves and wood chips from a local tree trimmer's recent dump in my driveway. Wet it down with rain water, dump in a can of UCG for food, and a lot of ground egg shell for grit and pH buffering. Throw in the old bedding for microbial inoculation now that they finally got it balanced to stop stinking the place up. Mix it together, and... that's a lot of coffee grounds, this stuff is stained so dark it looks like it's already somewhat decayed. I'd better let it sit for a few days in case it heats up....See MoreBrand new worm Bin, worms running for the hills
Comments (35)Nappy... your guess of about 600 (euro per pound) is probably close however that is not too many for a 13 gal container. I started with two 27 gallon bins, about 2/3 filled and put about 3000 (red wigglers/euros mixed) in one bin and 5000 in the other. That was no where near high density. In the first four months the numbers way more than quadrupled without issues and last month when I added two more bins and split the populations the density was WAY more than what I'd started with in the original bins but know this, I did supply prodigious amounts of food continuously, and a generous part of it were powdered grains and other high protein items in addition to fruit and vegetable pulp. Before I ever introduced any worms into the original bins, I'd had the bins prepared already with the bedding of coir/peat and added soil/leaf compost and buried 10 pounds of juiced pulp under the bedding for about 3 weeks to get the microbe population started and so when the worms arrived in the mail I just dumped them into the bins and they had an immediately available food source from day one... and plenty of it. Within 2 days I found many of them burrowing through the middle of that pulp pile so I assume they were eating... it soon turned into a huge mass before the week was up. Your worms may be wandering out of the bin due to lack of a sufficiently ready food source. Yes, try to get some leaf litter in there or open a can of pure pumpkin or creamed corn or cooked spinach (packed without salt) and put it under the bedding and see what happens over the next few days.... you'll need to wait until a mass of worms begin mobbing it before turning the light off... in any case continue to keep the lid off the bin. Somehow I missed it that you've only had this worm bin set up for 2 days! (which should make it 5 days by now)... Worm bins are an ecosystem that will take time to develop so be patient and give it a week for the worms to settle in. Remember their whole environment was just radically changed and so it will take a few days for them to adjust.... just adjusting to the pH of the bin could take a few days......See Moreafrican
15 years agosterlingsilver
15 years agofolly_grows
15 years agofolly_grows
15 years agosterlingsilver
15 years agosunnysouth4u
15 years agofolly_grows
15 years agolkittle
15 years agopennymca
15 years agosterlingsilver
15 years agomaryld_gardener
15 years agoAnisten
15 years agotclynx
15 years ago11otis
15 years agoafrican
15 years ago
Related Stories

GARDENING GUIDESHouzz TV: Make a Worm Bin for Rich Soil and Happy Plants
A worm-powered compost bin that can fit under a sink turns food scraps into a powerful amendment for your garden. Here’s how to make one
Full Story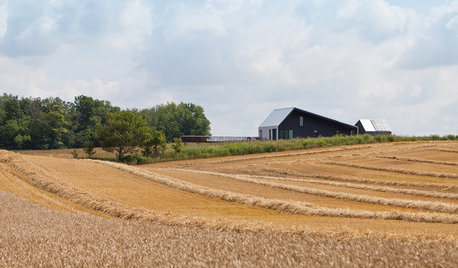
GREEN BUILDINGOff the Grid: Ready to Pull the Plug on City Power?
What to consider if you want to stop relying on public utilities — or just have a more energy-efficient home
Full Story
DECORATING GUIDES6 Cost-Effective Ways to Go Custom Made
Get a look that’s totally you — and possibly for a lower cost than you might think
Full Story
BUDGET DECORATING15 Ways to Ready a Summer Home on the Cheap
Set up a comfy getaway where stress goes down the drain, without sending wads of cash along with it
Full Story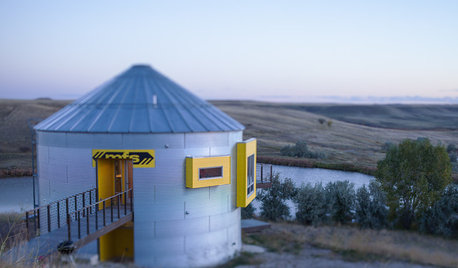
HOUZZ TOURSHouzz Tour: Prairie Grain Bin Turned Bucolic Retirement Home
An agrarian structure and a big dream combine in this one-of-a-kind home that celebrates 250 acres of Montana grasslands
Full Story
LIGHTING12 Fun Light Fixtures Made From Found Objects
Trash became treasure in these one-of-a-kind lights. See if they inspire your own DIY pendant project
Full Story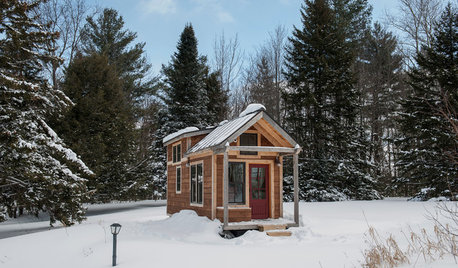
TINY HOUSESHouzz Tour: A Custom-Made Tiny House for Skiing and Hiking
Ethan Waldman quit his job, left his large house and spent $42,000 to build a 200-square-foot home that costs him $100 a month to live in
Full Story
PRODUCT PICKSGuest Picks: Shadow Box Art
Ready made with art or ready to hold your favorite mementos, these shadow boxes put creativity in the spotlight
Full Story
MOST POPULARThe 15 Most Popular Kitchen Storage Ideas on Houzz
Solve common kitchen dilemmas in style with custom and ready-made organizers, drawers, shelves and more
Full Story
HOUZZ TOURSMy Houzz: Color and Pattern Give a Newlyweds’ Home Zing
Starting from scratch, a British Columbia couple transforms their empty apartment with ready-made pieces and personal photos
Full StorySponsored
Industry Leading Interior Designers & Decorators in Franklin County
maryld_gardener