


tomato flowers are green
jimc91
13 years ago

Featured Answer
Sort by:Oldest
Comments (8)

homehydro
13 years agoRelated Discussions
prevent tomato late blight & green tomatoes
Comments (7)The tomatoes have been dribbling in one to a few at a time, but today I was able to pick my first basket, only 2/3 full, 16" across by 5" deep. Last year I picked a basket every few days. But I did have 90 plants instead of 24. I finished my pvc pipe tomato house and covered it with plastic the day before the end of summer rains started. But to prevent it from being blown away like last year I ran the plastic to the ground so it has basically no ventilation. I'm seeing more mold, especially at the stem end or in cracks. I don't know if opening the plastic up a little on a sunny day might help that... I know I am going to devote more space and time to other vegetables that are not so picky, like beans, cucumbers, squash, and greens. I've seen a couple of other local gardens recently that had very large and lush plants with very few tomatoes set on, or lots of tomatoes but very few ripe. It's a tough year. Here is a link that might be useful: my tomato house...See MoreAeroGarden Never Used, For Kids,Educational.
Comments (1)HI, Sorry I don't need a aero garden. But I have a question for you. I got one for Christmas from my Husband, anyway, it smells like burning rubber. Is that because it's new? Or did I get a lemon? Patty...See MoreGreen worm in my green tomatoes
Comments (7)Last year late in the season I had cabbage loppers eating my tomatoes. They are worse than the hornworms. They multiply real fast. The hornworms at least eat the leaves and some tomatoes. Karyl ===== Here is a link that might be useful: Cabbage Looper Photo...See MoreCherry green tomato pickles more like stewed tomatoes !
Comments (3)Have you posted at the harvest forum? They can give you some great canning tips. They (and I) always recommend the Ball Blue Book of canning - if you don't have a copy, you should pick one up, it's a great resource. These are the steps I always follow, I find that it's a good formula and always works for me. Hopefully it's not too much information - I'm probably being too thorough, but better safe than sorry. 1. Wash jars. Wash rings, rinse new lids. Put lids in a small saucepan with water on "low" so they get warm and the rubber becomes soft for canning. I set up a workstation - basically a kitchen towel spread on the counter next to my stove to set jars on while I fill them, and keep the rings at a corner of the towel, within reach. The rings don't have to be hot. I also dampen a paper towel for wiping the jar rims clean before putting lids on, and keep that handy on one side of the towel. 2. Put jars in a big canning pot**, filled so that the jars are covered with 2 inches of water. The jars will be full of water, which will sterilize them as they heat. Put the lid on the canner (if you have a pressure canner, just set it on, don't tighten). 3. Bring water in canner to a high simmer, while preparing food for canning. I usually crank the heat to high and turn it back when I hear it starting to boil. 4. When food is ready to be canned, the water in the canner should be plenty hot, so it will come back to a boil quickly. If it's not, keep your food at the ready. (You want those jars to be sterile if you're heating them in the water.) 5. Pull a jar out of the canner using a jar lifter, and carefully pour the hot water from it into the sink. I have my own angle technique that works - just be careful when you do this, because you pretty much have to pour the water toward you to keep the jar in hand with the lifter. Practicing with cold water isn't a bad plan if you haven't done the pour before. :) Or if you're more sensible than I am, you might set the jar down for a moment on your towel, then pick it up again from the side with the lifter and empty it that way. 6. Fill the jar with food to be canned, wipe the rim, put a lid on, then put a ring on. Tighten the ring to finger tight - it should be snug but not super tight. (All the ring does is apply a little pressure so that there is good contact between the lid's sealant and the jar rim - it doesn't hold the lid on; the natural vacuum will do that.) 7. Put filled jar back into canner, and pull the next empty jar. Repeat steps 5-6 until all jars are full. I do these steps as quickly (but carefully) as possible so that the first jar sitting in the hot water doesn't end up with soft pickles. 8. Put lid on canner when all jars are filled. Bring back up to a boil (should only take a few minutes, since the water has been simmering the whole time). Start timing when the boil starts, and pull the jars when the timer goes off. If pressure canning, you would wait 5 minutes (possibly more) after the timer goes off to pull out the jars. **If you're lucky enough to have a dishwasher, you can put the jars in there on sani-cycle and it will keep them hot as long as it's closed. Still, you'll have to be sure to get the canner simmering with enough water to cover the filled jars by 2 inches, and starting the heating while you're prepping food is good timing. With a dishwasher you won't have to deal with pouring hot water down the sink. That's how my mom always canned. I wish my husband would hitch up our dishwasher. Someday......See Morejimc91
13 years agogrizzman
13 years agojimc91
13 years agohardclay7a
13 years agogrizzman
13 years agoHU-182224214
4 months ago
Related Stories

EDIBLE GARDENSSummer Crops: How to Grow Tomatoes
Plant tomato seedlings in spring for one of the best tastes of summer, fresh from your backyard
Full Story
COLOR10 Reasons to Make a Splash With Tomato Red
You won’t duck at these tomatoes. See how bold red shades can play up architecture, light up a dark spot and add drama
Full Story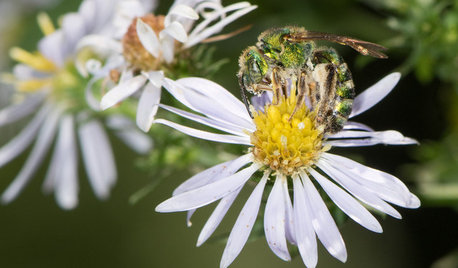
GARDENING GUIDESLook for Metallic Green Sweat Bees Visiting Your Garden This Fall
These beautiful sweat bees will dazzle and delight you with their bright emerald green color and midsummer and fall flower visiting
Full Story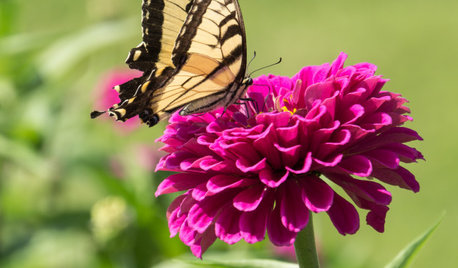
GARDENING GUIDES20 Favorite Flowers for Butterflies and Bouquets
Discover perennials and annuals that do double duty as butterfly magnets and versatile cut flowers
Full Story
CONTAINER GARDENS7 Deer-Resistant Flowers for Your Summer Containers
Grow these as protection for edibles or just for their colorful beauty — deer might not like them, but everyone else will
Full Story
GARDENING GUIDESOh, Deer! 10 Native Flowers That Stand Up to the Herds
Keeping a garden amid hungry deer can be hard, but these plants should fare well
Full Story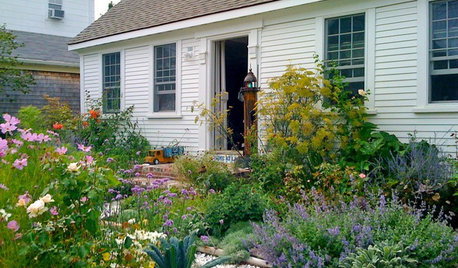
GARDENING GUIDESVegetables and Flowers Mix in Beautiful Edible Gardens
Ornamentals, meet your edible garden mates. We know you'll get along just beautifully
Full Story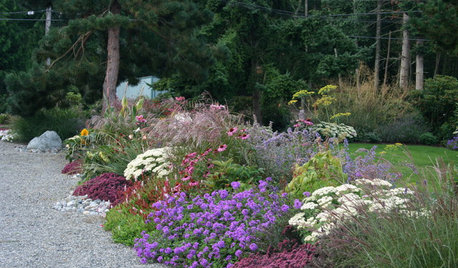
MOST POPULARHow to Design a Colorful Flower Bed
Fall planting: Delight the eye through 3 seasons with bright flowers placed just right. Late summer is the time to plan
Full Story
GARDENING GUIDESBeautiful Flowers and Foliage From Dedicated Backyard Gardeners
From lawn daisies to topiaries, Houzz users share their backyard beauties
Full Story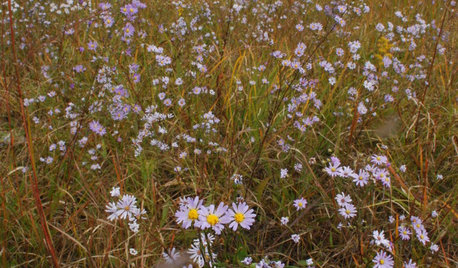
GARDENING GUIDES15 Native Flowers That Feed Native Bees
These perennials offer superfood to hundreds of bees and are gorgeous in their own right
Full Story
hardclay7a