


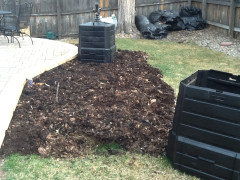
My lasagna has worms!!
farfaraway
16 years ago
Featured Answer
Sort by:Oldest
Comments (24)

tey157
16 years agoRelated Discussions
What veggies shouldn't go in my N-rich lasagna?
Comments (6)Well the nitrogen is being used up as time goes by anyway, so nitrogen will not be a problem in a few months. I believe that pottasium is good for the development of root structure ( could be wrong someone please correct me on this) so if you don't mind adding kiwi fruit and or bannanas in small trenches around your plants as they break down that should help the development of your roots. On the other hand, if you have the time or inclination, you could have the crop grow over the season without harvesting but keep adding nutrients that will help develop the root structure of the plants. just my 2 cents....See MoreI made a lasagna bed-using my compost!!
Comments (6)Wayne, I can answer your question in regard to my soil. In Northeast Wisconsin, we are blessed with an amazing clay soil that is cement-like and full of rocks when dry and sticky and in need of a potter's wheel when wet. There is nothing as disheartening as hearing the metallic "ting" my spade makes when trying to dig through this "soil." I have been amending a vegetable garden area (20' x 20') for nine years. This is the first year that I think I actually have "tilth." The soil is brown, it is crumbly, it holds together when squeezed, and crumbles when poked. Directly outside the boundary of my vegetable garden, the soil is greyish-reddish-brownish clay. I wanted more area to plant vegetables and start a new flower bed. The clay is awful to try to dig into and till. I can't plant root vegetables because they can't grow in the clay. (Garlic, radishes, and carrots all grow to look like misshapen midget gumballs.) Lasagna gardening allows me to start planting all these things right away -- on top of the existing lawn. For flowers, like Delphs, that are heavy feeders, the lasagna method creates a soil that feeds their needs and as the layers break down, the soil underneath becomes softer and less full of clay. My tomatoes, basil, carrots, flowers, melons, beans, and peas in the lasagna beds have been amazing! My basil leaves have been as big as my hand. The same plants in my in-ground garden are healthy and fine, too, but the same plants in the lasagna beds are much larger and producing more abundantly. The lasagna beds are like super-vitamins for the plants in them. This is just my own experience, but I will definitely continue with my raised garden beds as well as my in-ground garden. I think the lasagna method is well worth it for the kind of clay soil I live on. Cheers, Joanna...See Morewill my lasagna garden decompose ever?
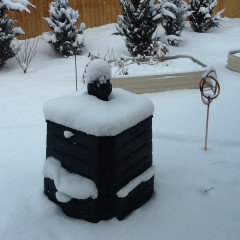
Comments (2)You're expecting too much too soon. Especially with the cool weather we're experiencing. Give it time to work. Meanwhile find something else to worry about....See MoreHelp - my worm bin has turned to muck!!
Comments (9)Here's some advice on harvesting from a former member who is quite knowledgeable on anything worms: Kelly posted: * Posted by: Kelly_Slocum on Tue, Feb 17, 04 at 13:01 The window screen harvesting method is a bit of a challenge to try and explain in text only, and I apologize for not having some pictures to help with this. It is time to separate the worms from the vermicomost/castings in bin-type systems that are fed and managed using the pocket feeding method (the bin is bedded to the top with damp, shredded bedding material and fed by digging holes or 'pockets' in the bedding into which feedstock is deposited) when the original bedding is no longer recognizable and the total volume of material in the bin has decreased by roughly half. At this time the window screen is set in the bin right on top of the ready-to-havest material. The bin is then filled the rest of the way with new, dampened bedding that is set right on top of the window screen. At this point the screen is sandwiched between the ready-to-harvest material in the bottom half of the bin and the new bedding in the top half. The ready-to-harvest material remains in the bottom half of the bin, beneath the screen, until the new material on top of the screen is ready to harvest. When the material on top of the screen is ready to harvest it is removed from the bin by lifting out the screen on which it is sitting. By this time virutally all of your worms will have typically moved through the screen into the material in the top half of the bin, leaving the vermicompost beneath nearly free of worms. The vermicompost from the bottom of the bin is then dumped out, the new batch of ready-to-harvest material containing all of your worms from on top of the screen is dumped into the bottom of the bin, the screen is set on top of this material, the bin is filled the rest of the way with new bedding set right on top of the screen, and you begin feeding into the new bedding. This harvesting method gives the worms ample opportunity to thoroughly process the material beneath the screen and to move through the screen to the new bedding above when they are ready. Since the new bedding above the screen is initially less biologically active then is the material beneath, the worms are given the choice of where in the bin they prefer to be, ensuring the population is not stressed, and that there is no population decline. Further, this harvesting method provides time for cocoons that might be in the ready-to-harvest material beneath the screen to hatch and the babies time to move to the material above the screen, resulting in few worms "lost" during harvesting. Does that answer your question, Idontgrow? Please let me know if you're still confused as I want/need to try to articulate this better. Kelly S To keep from being scratched by the screen be sure you are using the soft, pliable fiberglass screen as opposed to the wire screen. The fibergass stuff has no sharp......See Morefarfaraway
16 years agotey157
16 years agofarfaraway
16 years agoearthworm73
16 years agocdsetx8
16 years agofarfaraway
16 years agotiffy_z5_6_can
16 years agofarfaraway
16 years agotdscpa
16 years agoroxanne777
16 years agoelphaba_gw
16 years ago
dchall_san_antonio
16 years agodoc_dot
16 years agoUser
16 years agograyentropy
16 years agoshagaia
15 years agoshellva
15 years ago
Jim Willeford
4 years ago
annpat
4 years ago
gardengal48 (PNW Z8/9)
4 years agonancyjane_gardener
4 years ago
Kathy Farnsworth
4 years agolast modified: 4 years ago

Related Stories

GARDENING GUIDESHouzz TV: Make a Worm Bin for Rich Soil and Happy Plants
A worm-powered compost bin that can fit under a sink turns food scraps into a powerful amendment for your garden. Here’s how to make one
Full Story
GARDENING GUIDESGardening Solutions for Heavy Clay Soils
What’s a gardener to do with soil that’s easily compacted and has poor drainage? Find out here
Full Story
UPHOLSTERYFabric Focus: Savor the Sensuousness of Silk
With its refined texture, resiliency and luxuriousness, silk has been popular since 3000 B.C. Here’s how to make it work in your home today
Full Story
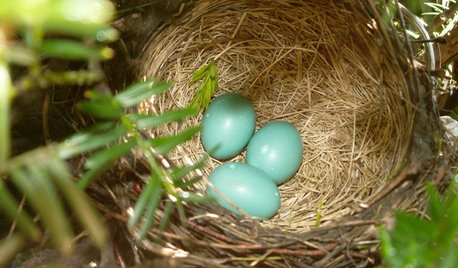
GARDENING FOR BIRDSWhat to Know About Birds Nesting in Your Yard
Learn how to observe, record data and help ornithologists with NestWatch’s citizen science project understand bird trends
Full Story
HOUZZ TOURSHouzz Tour: For the Love of a Cat in Philadelphia
Pet-friendly features integrated into a mod, eclectic and colorful home mean everyone in the family is happy
Full Story
KITCHEN DESIGNCockadoodledoo! Roosters in the Kitchen
Add Country Charm and Good Luck With a Chicken in the Cucina
Full Story
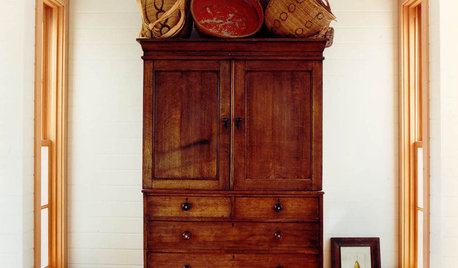
FURNITUREOld Furniture: Clean, Reupholster or Replace It?
A veteran upholstery cleaner weighs in on the options for found, inherited and thrift store furniture
Full Story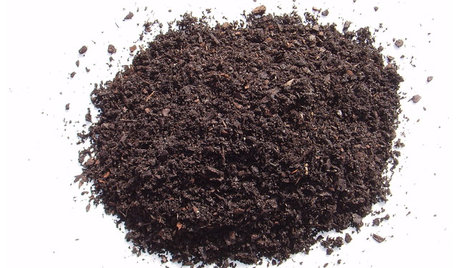
GARDENING GUIDESGet on a Composting Kick (Hello, Free Fertilizer!)
Quit shelling out for pricey substitutes that aren’t even as good. Here’s how to give your soil the best while lightening your trash load
Full Story

rjinga