


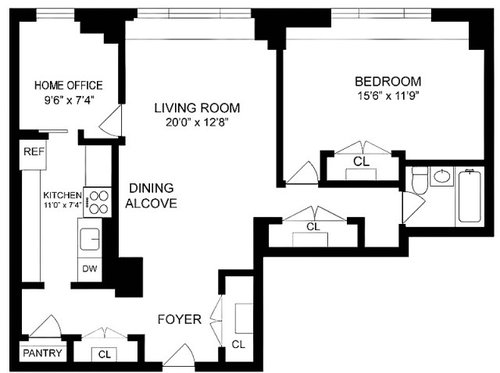
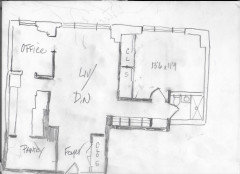
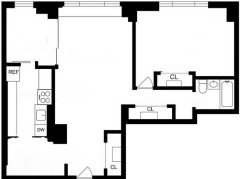
keep these bottom left closets next to foyer or change to a den?
C R
14 days ago
last modified: 14 days ago
Featured Answer
Sort by:Oldest
Comments (13)

C R
14 days agoRelated Discussions
Layout changes again
Comments (14)Cross posted! You're right...I think to accommodate 5 seats even w/a tight fit you need to add a foot to the length of your island. You will still have over 5-1/2 feet of aisle space b/w the desk & island. When calculating aisle space, don't forget to account for the 1 to 1-1/4 inch counter overhang beyond the cabinets. I'd also reduce the depth of the island cabinetry from 30" to 27" to account for that overhang...so you don't take any additional inches off the aisle b/w the island & north wall. The recovered inch or two could go on the seating side (bottom) of the island to give you a little more room b/w the pantry and the island. The pantry...if you are drywalling your pantry, remember that walls are 4 to 5 inches wide/deep. So, that means that if you have 42" set aside for the pantry width, the walls will take away 9 or 10 inches...you're down to 33", tops. That's not very wide, especially if you're using it for bulk items and b/c it's not really very deep either...2'? You'd be better off, I think, making the pantry wider, say 5' (60" - 9" = 51") and make it 18 to 24 inches deep with bi-fold doors. You could then put the china cabinet on that wall. Question: If you're using the uppers/lowers for food storage on the north wall, will you have enough room elsewhere for your dishes, storage (tupperware, etc.), pots & pans, cooking utensils, kitchen linens, prep dishes (mixing bowls, measuring cups), etc. I think that if you make the pantry bigger as I suggested, you may be able to store both food and bulk items in it. That frees up the cabinets for other uses/storage. Or...you could put in 12" deep pantry cabinets to the left of the desk armoire... HTH!...See MoreKeep or change bones of 60's southwest ranch kitchen?
Comments (96)lyfia, thanks, and we agree. The glass company said building codes only require us to use safety (tempered) glass for the two end panels; the center three could be annealed, if the glass started 18" off the floor. How crazy is that? We'd never want to take that risk, either. Yikes. Fortunately the bid for tempered glass was only about 15% higher than annealed glass (which really surprised me.) So we'd only consider tempered 1/4" if we use glass. Laminated glass (with the plastic skin in the middle) would be the safest, but it's super pricey. I think safety glass would be OK. Another option is 1/4" plexiglass, which I think would work as a substrate for the glass mosaic, as long as I didn't go too big with the panels. (I think big plexi panels might flex, which isn't good for a grouted mosaic...?) At some point I need to go ask the folks in the stained glass/mosaic forum here. So far the pricing for thick plexiglass seems comparable to tempered glass. There would still be small grouted glass pieces on one side of the divider (we could put it on the low traffic side) but I don't think the surface would be risky for kids, since all the sharp edges would be embedded in grout. And it would be pretty hard to break. We considered colored plexiglass panes too, but it just seems so "mod" for the informal, earthy textures in the house. Colored tempered glass and frosted tempered glass are way too expensive (pushing $1000 just for the frosted glass idea, for five 5' panels.) I considered frosted films and frosted spray paint, but I think those ideas have a limited life span (especially if the house has active kids) since the spray frostings can scratch off. And DH keeps wishing for color, and he's got me agreeing. It has to be somewhat transparent or it blocks too much light. So, now considering a fairly open wooden framework, with smallish glass mosaic panels scattered. Still playing with ideas...!...See MoreNeed help with paint choices two story foyer w/chair rail
Comments (32)I wanted to post some after photos and thank everyone who took the time to comment. It turns out that the wall was "indented" when we removed the chair rail so my DH has spent several weekends to build it back up with joint compound and texture it to blend in with the walls. It was a painfully tedious process (first trying to do it by hand, then with a sponge, then with spray-on compound that dribbled everywhere, and finally with a trowel lightly loading dabs of compound on). If you look closely you can still tell, but it's not as glaring as it was several iterations ago. Suffice to say, we are thrilled to be done with sanding, priming, texturing, and painting! Now, I need to figure out what wall decor to put up as the removal of the chair rail makes it a much easier space to deal with! Any and all advice would be appreciated. I was thinking of doing a photo gallery near the front entry, but that is a HUGE wall and I don't know that I can put photos high enough where you can still see them but not so low that the wall looks off-balance. Forgive the quality of the photos, taken without a flash on my iPhone....See MoreAdvice for renovation with layout changes hampered by bay windows
Comments (27)We DIYd our fireplace/chimney removal. We are not particularly gifted in the ways of DIY either. We did a total gut renovation on the house and our structural engineer confirmed the chimney wasn't supporting the house in any way. The fireplace was pink and huge--maybe 4x7 footprint? Our house is single level with the chimney continuing to the basement. We rented a drop box for the brick and an impact chisel from home depot to remove them. My husband started on the roof and removed brick by brick dropping them down the chimney where I'd gather them in 5 gallon buckets to take to the drop box. In all it took us a weekend and probably $500 in rental fees. The roof was repaired as part of our GCs scope of work in the remodel, so I'm not sure how much that cost, but it was a very simple patch It seems to me that chimney and fireplace removal is totally unskilled labor if it isn't holding up the house. As such, it really shouldn't cost a lot....See MoreC R
13 days agoC R
13 days agoC R
13 days agolast modified: 13 days agoC R
13 days agoC R
13 days ago
Related Stories

STORAGE5 Tips for Lightening Your Closet’s Load
Create more space for clothes that make you look and feel good by learning to let go
Full Story
HOUZZ CALLShow Us Your Board Game Collection (and Where You Keep It)!
We want to see how you store your games at home, whether they’re stuffed in closets or displayed on shelves
Full Story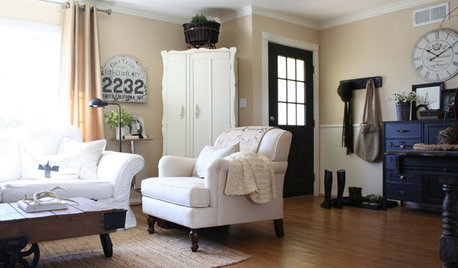
ENTRYWAYSHow to Make the Most of Your Entry (No Coat Closet Required)
A well-designed foyer offers storage, seating and other features to help you get out the door on time and looking good
Full Story
BOOKSCan Tidying Up Result in Life-Changing Magic?
Organizing phenom Marie Kondo promises big results — if you embrace enormous changes and tough choices
Full Story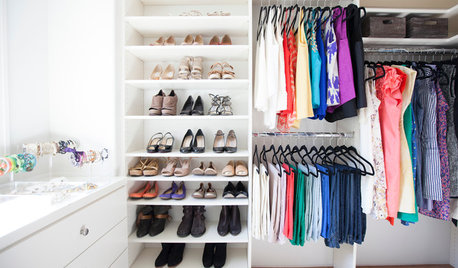
CLOSETSHouzz Call: Is Your Closet a Storage Powerhouse?
We want to see how you are making the most of your closet storage areas. Post pictures and tell us how you’ve organized them
Full Story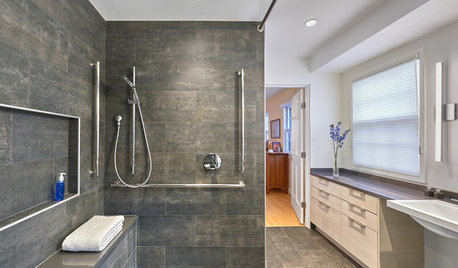
INSIDE HOUZZBaby Boomers Are Making Remodeling Changes With Aging in Mind
Walk-in tubs, curbless showers and nonslip floors are popular features, the 2018 U.S. Houzz Bathroom Trends Study finds
Full Story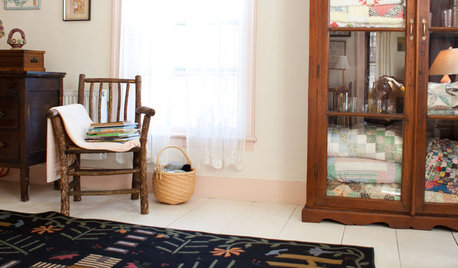
THE HARDWORKING HOMEClever Ways to Rethink the Linen Closet
The Hardworking Home: Get rid of those toppling piles with these ideas for organizing bedding, towels and more
Full Story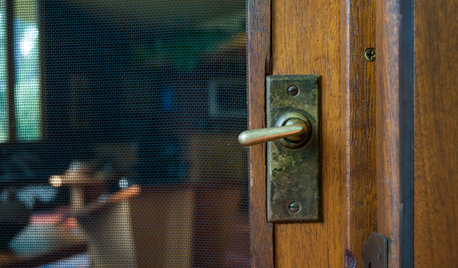
REMODELING GUIDESOriginal Home Details: What to Keep, What to Cast Off
Renovate an older home without regrets with this insight on the details worth preserving
Full Story
DECORATING GUIDES8 Pieces of Furniture You’ll Keep Forever
If you’re just starting out in a new place, consider these furniture options you can take with you to any new home
Full Story
DECORATING GUIDESDitch the Rules but Keep Some Tools
Be fearless, but follow some basic decorating strategies to achieve the best results
Full Story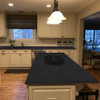

auntthelma