


Scrappy #1.
nannykins
23 days ago

Featured Answer
Sort by:Oldest
Comments (7)

nannykins
22 days agoRelated Discussions
Scrappy quilt as you go question.....
Comments (23)Hi Jackie, Have not had time to work on quilting this week, however, I did make a 19" crazy quilt block. Need to make another one and then experiment with joining. The 19" block looks great, it used larger size scraps. Probably need to make smaller blocks in order to use up smaller scraps. Live and learn!! Have a question regarding the quilt pic you posted. The block with a star in the center: Did you sew 2 blocks then 2 rectangles on sides and then cut it to 5 sides? If so, that will work great for me since I have so many small blocks to use. This would also reduce length of other strips needed, use more shorter scraps. Have fun making more crazy quilts. I have a scrappy quilt (sew as you go)in progress using 7" blocks with 5" batting. Using 2" strips diagnoal across the block. Each block ends up being framed with the backing fabric. A quilt shop owner offered to show me how to do it (they had a night class for it). Some places are great to share info to those doing charity work. Thanks for brainstorming with me!! Krissie...See MoreScrappy25 renovation Part 1- layout evolution and cabinets
Comments (25)thanks for the kind words! I'm just going to reply to those who asked questions but I do very much appreciate your comments. general note- I've had the appliances all over my house for the past 5 years! Pretty much all of it was closeout/clearance/ebay / or craigslist. Imaging my sigh of relief when one by one, they turned on and worked. I did resell some of the extras that I could not fit in, that I had purchased for a larger kitchen expansion. Having the appliances made it "easy" in a sense to plan the layout since it constrained the choices. I had been thinking about this last plan for a few months already by the time I met with Lorna, the Dutchwood kitchen designer, so I was able to send her all the specs on the appliances and she worked out the details to make it fit into the layout I wanted. I did ask for maximum ventilation height of the induction cooktop above the 30 inch oven. dccurlygirl- I brought lots of pictures of things that I had pinned - toekick drawers, pullout cutting boards, cut down drawer for Stages sink shelf, cut-down drawers for 36" cooktop over 30 inch oven, dividers in my pots/pan drawer, custom paneled appliances etc , most of them from gardenweb postings, and Lorna worked them into the plan. In their showroom, they had the pullout cutting boards and toekick drawers in their displays already. One thing I did not post is the electric trash opener for the trash drawer under the sink which was also in their display, it is a big hit with my whole family. I provided the "asks" and Lorna either worked it in or told me if it couldn ot be completed for whatever reasons. I am including one picture of just the fridge wall here so that you can see the level of detail and customization in these plans (BTW the fridge wall is partial overlay and again not one person has noticed that) . Dutchwood is used to working with paneled appliances and appropriate spacing- at the end I wrung out another inch or so of space from Jason for my pantry on that wall over a few emails, the last bit he gave me was 1/8 inch by reducing the overlay to 1/2 inch on the pantry only instead of 5/8 inch on the rest of that wall (that happened after these plans). They were super accommodating with my wishes. lannegreen, here is the "overview" layout , it's a little hard to read but the dishwasher is under the kitchen window around the corner from the sink. It is paneled which is why you could not identify it in the picture. It is at the base of the "U" with 24 inches space on one side and 24 inch space on the sink side. I can stand on both sides and unload dishes. I have the Lemans unit in that blind cabinet between the sink and the dishwasher, so the toekick between the dishwasher and the sink was made removable to install and access the plumbing. This was suggested by the inspection office of my county when I called to explain the problem (before I found a contractor). The removable toekick was the only think that I found surprisingly expensive at Dutchwood but it was more than balanced by the reasonable cost of everything else ($90 for toekick drawers for example). AineLane, here are more picture of my "sitting bay." It cost slightly less than $5000 all told (including moving electrical and adding foam insulation under the exterior Azek cladding, tempered windows since I have all boys :) ), measures 78 inches wide internally by 18 inches deep. Much cheaper than adding a 40k breakfast room or an 80k large kitchen expansion as I first planned. I have a custom cushion for it now and my teen boys enjoy lounging and napping there. The key is to seat it low enough to the ground to make it comfortable for sitting (16" height). I also specified the weight that it had to be able to carry (600 lb). The style is known as a "box bay" and the brand is Sunrise windows. I purchased their premade "projected frame" window through their authorized contractor and he worked with me on the other details. My good friend and former nanny came by to visit the other day and barely noticed the kitchen renovation, she was so taken with the sitting bay. Exterior of original windows New box bay replacing old windows. Somehow those bay walls bring in a lot more light into the space. We also really like watching all the small wildlife outside that we could not reall see before. In terms of the layout, it gave us enough "breathing space" and sitting area that I could put 16 inch deep drawers on that side of the peninsula. I added an undercounter fridge (paneled, it is next to the wall) on that side as well with the idea that the "coffee center" would be accessed from that side. The light, animal/ibird watching, and perceived airiness is a huge bonus. This post was edited by scrappy25 on Fri, Dec 5, 14 at 18:51...See Morescrappy25 renovation Part 3- The kitchen cockpit (Stages 45 sink)
Comments (14)Hi Ainelane, since the Stages comes with the bottom rack , and it is undermounted, I don't think that my pots have ever hit the metal. I just went and knocked on the metal and it sounds like a good solid metal, much different than my cheapie sink in m basement kitchenette.I don't see any insulation when I look from below. Curious, I looked it up the Stages listing and they are touting "SilentShield sound-absorption technology offers quieter performance", I honestly have no idea what that means other than that it seems to be on a lot of the Kohler sinks. Perhaps they have engineered something into the metal design? The inside deeper part measures 31 inches across. It is 9.5 inches deep and with the undermount it is deep enough that there is very little outside splashing when cleaning pots and pans. I LOVE my peninsula sink for all the reasons you mentioned. The two matching pull down faucets are like the Chinese lions that flank the front doors in China, they seem to stand at attention in the sight line. When I have company, I put the small drainer into the sink and pull out the heavy Kohler cutting board over it . Although too heavy to be regularly used, that board is a thing of beauty and creates more counter space. The white containers can also come out as needed to hold items for a buffet. pinkpanther5, I remember looking for cheaper alternatives and the Ticor 4000 for $400 would give you a similar design for the larger part of the sink (no ledge), but the drain is in the back center of the Ticor and does not allow the large pullout trash that the Stages does with its off-center drain. I think they are hard to find but they are still out there. That is worth considering if price is an issue, just add one or two integral drainboards to your countertop and you have most of the functions of the Stages sink....See Morescrappy25 renovation Part 2- Julia soapstone installed
Comments (30)archie123, my drainboard is 16 inches long. The standard for Stonemasters is 18 inches but I wanted to preserve some flat countertop next under the corbel shelves and they were quite flexible. It is about 16 inches front to back but I did not specify that, I think they decide that depending on the sink measurement. Many people get the runnels which are prettier but I wanted the smooth drainboard of ease of cleaning. I thought I would mostly use the Stages sink shelf for drying things but that shelf does not slope down at all and there is always a ittle water on it unless I wipe it off , so this integral drainboard in the soapstone is my most used drying area. Also, that sink including the raised shelf has become my most often used prep area so the integral drainboard adds even more functional real estate. I use this very low profile drying rack from Ikea which easily stores in the sink out of view if needed. BTW the templater mentioned that Kohler dxf files were very accurate and they trusted them. Mags438, the sink is I think my favorite thing! You are too funny. tea4all, the corbel shelves are already holding our most used bowls and mugs. The bottom edge of my cabinets are 19 inches from the countertop with an integral 1 inch hollow area underneath for undercounter lights etc. I designed the shelves to have the bottom 7 inches below that bottom edge of the cabinets (12 inches above the countertop) and 7 inches front to back. I drew the corbels poorly but asked Dutchwood to make the top part 13 inches front to back. tapering down to the 7 inches front to back for the shelves. The shelf thickness is 3/4 inch thick, the thinnest that the cabinetmaker was comfortable with. My upper cabinets are 15 inches deep so the 7 inch corbel shelf depth still allows the undercounter lights (mounted towards the front under the cabinets) to not be blocked by the shelves. I designed the shelves i because I wanted to have easy access to my most used items yet get things off the countertop. The height was determined by the location of my preexisting outlets and switches which also happened to be the right height that my coffeemaker could fit under (just) when not in use. I do pull the coffeemaker and rice cooker out from under the cabinets when in use because of the steam that they generate. I will eventually post a picture of the corbel shelves in use. Here is a link that might be useful: Ikea Boholmen dish drainer...See More
Related Stories
HOLIDAYSThe Tale of the Holiday Table: One Family's Joyous Discovery
TV-dinner trays one year, garage dining another. Find out what made mishmash holiday dinners for this couple special anyway
Full Story

PETSHouzz Call: Looking for Dogs in Design
Share a Pic of Your Pet, and He or She Could Star on Our Homepage
Full Story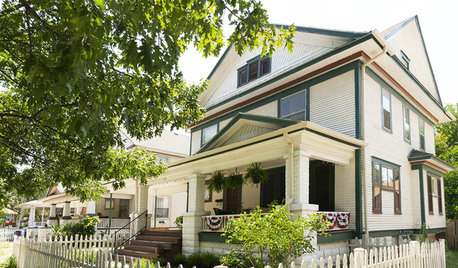
HOUZZ TOURSHouzz Tour: A Fixer-Upper Becomes a Labor of Love
A thrifty spirit and endless vision enable a hardworking Kansas couple to create a charming home on a small budget
Full Story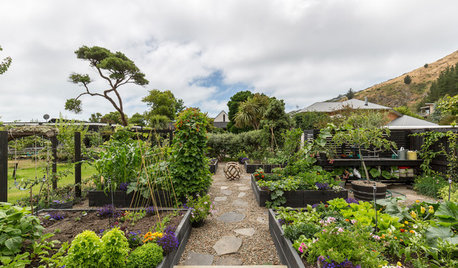
EDIBLE GARDENSNatural Ways to Get Rid of Weeds in Your Garden
Use these techniques to help prevent the spread of weeds and to learn about your soil
Full Story
MOST POPULAR8 Backyard Ideas to Delight Your Dog
Cue the joyous soundtrack. These pet-friendly landscape and garden ideas will keep your pooch safe, happy and well exercised outdoors
Full Story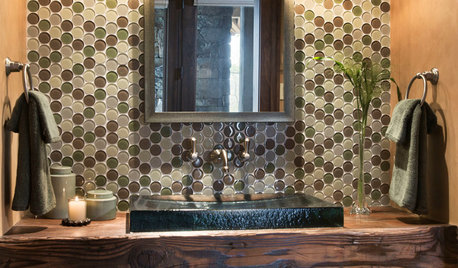
BATHROOM DESIGNPowder Room Essentials to Keep Guests Happy
Set out these bathroom necessities (hello, hand towels) to make your company comfortable and your parties run smoothly
Full Story
LIFESimple Pleasures: A Room of Your Own
Free up space for your own creative or meditative pursuits, and your dreams may have freer rein too
Full Story
GARDENING AND LANDSCAPINGA Pretty Backyard Dinner Party
Before and After: See how unfussy, vintage style and a simple menu adds up to a beautiful L.A. winter dinner outdoors
Full Story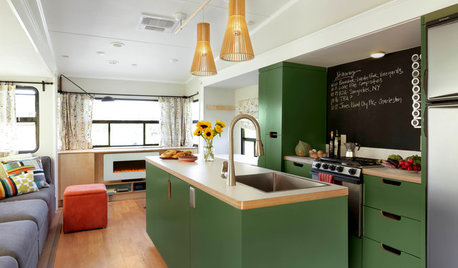
SMALL HOMESYou Probably Didn’t Know an RV Could Look This Good
A Florida designer renovates a used RV, building in a workspace that allows her and her husband to travel half the year
Full Story
bkay2000