


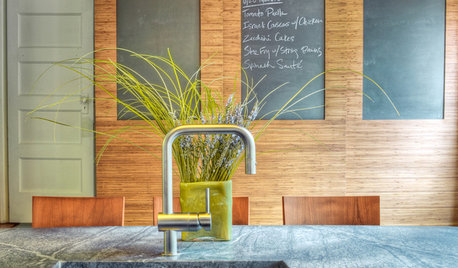
scrappy25 renovation Part 2- Julia soapstone installed
scrappy25
9 years ago
Featured Answer
Sort by:Oldest
Comments (30)

eam44
9 years agolast modified: 9 years ago
bbtrix
9 years agolast modified: 9 years agoRelated Discussions
Pix! Pix! Pix! Maine Soapstone Install and a question
Comments (22)How firm is the beeswax that the rest of you are using? The only Bee's Oil I could find locally was at Williams Sonoma. It is very soft, so there is no need to heat it up (tho I tried--just out of curiosity. It didn't really melt at all--just got warm). It has the texture somewhat of a shea butter cream. As soon as my hands rub it, it melts into the counter. If it were more solid, I think I might get frustrated with it, and switch to regular mineral oil. I use it as hand cream in between the SoapstoneSpaTreatment (trademarked--tho I didn't coin this term--someone else here did. Who?) My feet could really use a spa treatment. Thinking...thinking...Can't figure out how to do that without slipping and falling. We need to get some t-shirts/bumperstickers made: "Real stoners use their hands" "Have you rubbed your soapstone today?" "My parents went to Punta Gorda and all they brought me was this soapstone" "My other counter is made of soapstone too" "My soapstone is silkier than your Chipman Middle School Honor student" etc Can't wait to see more pictures! I can imagine how stressful the waiting and wondering has been (will it fit? did we template right?). Thank goodness it turned out so well! Hooray!! Francy...See MoreSoapstone install - is this normal?
Comments (40)Roger, This will be my last response because I think the issues have been resolved and everyone is moving on to greener pastures hopefully. I think we all reached out to kpaquette because she has had a number of unfortunate issues arise during this long distance remodel. Remodeling from far away is in and of itself a stressful process, but she has had several other problems and is also dealing with an ailing cat who is a beloved family pet so we wanted to reach out and give her a big internet hug. Most of us did also point out that the sink cut out was the responsibility of the cabinetmaker and she (OP) conceded that point fairly early on. That can be one of those things that gets lost in translation. I myself have had several things slip through the cracks and I'm here everyday, but between subs speaking to my husband and also to me, we sometimes fail to communicate everything to one another. All that said, I think it's nice that you wanted to set the record straight, and as a former sales/marketing person myself I think it's important to get both sides of a story out so that the reputation of your company isn't damaged. There are many glowing reports of Texiera on here so I don't really think there is much fear of that in your case. I did have to chuckle a bit when I read you were a commercial pilot, my husband is also a pilot and even attended the Navy's Test Pilot School. Pilots tend to be a breed among themselves...very much about setting things straight and staying within the letter of the law so to speak! I hope you don't take that as an insult, it was just something I might have guessed on my own had you not mentioned it! ;-) Kat :)...See Moreportland_renovation, ? re your soapstone counters
Comments (35)Wow, its great to see feedback on some Portland providers. We have been giving our kitchen a makeover as well, it all started with me falling for a Bluestar range...which then made it apparent the rest of the kitchen needed work to make it stand up to the range. We have our original cabinets from when the house was built 80 years ago, we did have to resize a few of the wall cabinets as they hung too low and made the counter useless. They had been refaced at some point with some lightly stained maple, and after getting quotes to paint our small kitchen cabinets in the range or $1800 we painted them ourselves with Miller primer/paint. I performed all of the electrical work, we just had to have a contractor run the gas line as we originally had a wretched electric stove. We are now at the counter decision, and are leaning towards soapstone. We got one bid and it just seemed way too high for the amount of work soapstone takes (no polishing or sealing), I just don't see how it can have $1800 in labor if I compare the cost of "DIY" from Teixeira cost. We have two straight counter tops, nothing fancy. I could screw it up and do it twice for what the quote we got was. If we had to pay the bid price of $3000+ for soapstone, I couldn't justify it. We have old cabinets, so they are a shallow depth...which means the counter is not "standard" and would have to be completely replaced if we ever replaced the cabinets. However the DIY price is a bit easier to consider. We also got our Bluestar at BASCO, but just the 30". They had a great deal going last year that saved $300 off the standard price. One complaint is that their delivery guys dented the side panel, pretty big mistake for guys that deliver high cost (heavy) appliances every day. This reminds me I need to call and finish getting credit for the damage as they offered. We found some soapstone slabs at Casa Bella and a few other spots around town, i think we found 3 warehouses with SS slabs in stock...I just hate how they can't tell you the price of it. It really seems like they have a racket going with the installers and can just make up whatever price they want. None of them would even tell us a "real" price, seems shady to me. Perhaps that is how stone is sold, but I'm not down with that game...just seems to leave too much room to just jack up the price if they don't like your fabricator or something....See Morescrappy25 renovation Part 4, final reveal, white inset/soapstone
Comments (99)OP here. My Julia soapstone from Stonemasters in Kennet Square, PA, which I picked for the hardness, has only one tiny chip on the flat counter that you can't see unless you look for it. I had the fabricators round over all the edges and there are no edge or corner dings. It has only had three applications of the oil wax mixture on it in over three years and is truly a no-maintenance counter. We put hot pots on it, have had lost of spilled juices and sauces, tomato and red wine, and continual coffeemaker drips, but all clean up without problems. Sorry to hear that dataw1127 did not have the same experience. Stonemasters had given me 2x2 inch samples of all their soapstones and I took them home and experimented before choosing the one with lowest maintenance. Maybe that is a key to selecting soapstone? PS I also had my overhanging counter corners rounded and did not realize what a difference that made until this past week when I stayed at my sister in law's home and banged my hips several times on her very sharp 90 degree granite counter corners. Apparently her 4 year old grandchild had a bad run in with them earlier also but with his head. Thankfully he is OK....See More
gyr_falcon
9 years agolast modified: 9 years ago
Errant_gw
9 years agolast modified: 9 years ago
magpier
9 years agolast modified: 9 years ago
my_four_sons
9 years agolast modified: 9 years agobordenh
9 years agolast modified: 9 years agoitsthedetails
9 years agolast modified: 9 years ago
romy718
9 years agolast modified: 9 years ago
hsw_sc
9 years agolast modified: 9 years agoCEFreeman
9 years agolast modified: 9 years agofriedajune
9 years agolast modified: 9 years agoeam44
9 years agolast modified: 9 years agoeam44
9 years agolast modified: 9 years ago
cookncarpenter
9 years agolast modified: 9 years agoRudebekia
9 years agolast modified: 9 years agoPAZC
9 years agolast modified: 9 years agoscrappy25
9 years agolast modified: 9 years agoarch123
9 years agolast modified: 9 years agoscpalmetto
9 years agolast modified: 9 years agoMags438
9 years agolast modified: 9 years ago
Jenna Brown
9 years agolast modified: 9 years agotea4all
9 years agolast modified: 9 years agoscrappy25
9 years agolast modified: 9 years agochristina222_gw
9 years agolast modified: 9 years agoscrappy25
9 years agolast modified: 9 years ago
Aglitter
5 years agoscrappy25
5 years agolast modified: 5 years agoAglitter
5 years agolast modified: 5 years ago
Related Stories
KITCHEN DESIGNKitchen Counters: Durable, Easy-Clean Soapstone
Give bacteria the boot and say sayonara to stains with this long-lasting material that's a great choice for kitchen and bath countertops
Full Story
BATHROOM DESIGNShould You Install a Urinal at Home?
Wall-mounted pit stops are handy in more than just man caves — and they can look better than you might think
Full Story
LIGHTINGReady to Install a Chandelier? Here's How to Get It Done
Go for a dramatic look or define a space in an open plan with a light fixture that’s a star
Full Story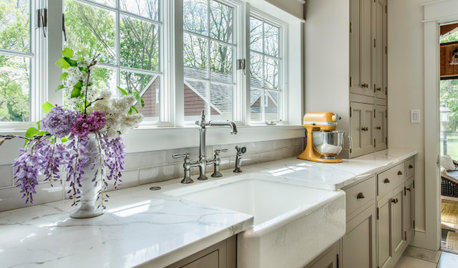
KITCHEN DESIGNHow to Choose the Best Sink Type for Your Kitchen
Drop-in, undermount, integral or apron-front — a design pro lays out your sink options
Full Story
KITCHEN COUNTERTOPS10 Top Backsplashes to Pair With Soapstone Countertops
Simplify your decision-making process by checking out how these styles work with soapstone
Full Story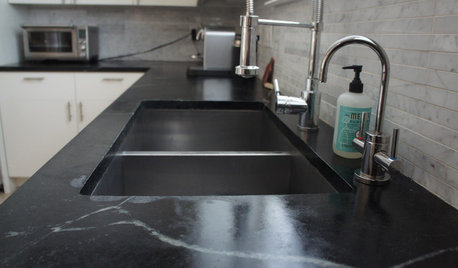
KITCHEN DESIGNSoapstone Counters: A Love Story
Love means accepting — maybe even celebrating — imperfections. See if soapstone’s assets and imperfections will work for you
Full Story
GREAT DESIGNERSDesign Icons: Julia Morgan
Take the family to see this groundbreaking architect's Hearst Castle, or just virtually visit it and 2 more of her projects right here
Full Story
LIFETime Travel to Houzzers' Childhood Homes, Part 1
Peek into home design's past and share the memories of Houzz community members with these personal photos and stories
Full Story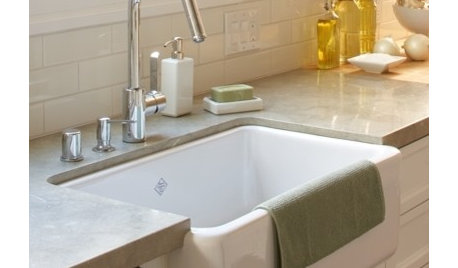
CONTRACTOR TIPSContractor Tips: Countertop Installation from Start to Finish
From counter templates to ongoing care, a professional contractor shares what you need to know
Full Story
KITCHEN DESIGNAlternatives to Granite Countertops, Part III
9 more reasons to rethink the granite kitchen counter
Full StorySponsored
Central Ohio's Trusted Home Remodeler Specializing in Kitchens & Baths
scpalmetto