


DIY or pro? Help needed
dcsam
3 months ago

Featured Answer
Sort by:Oldest
Comments (9)

millworkman
3 months ago PRO
PROJoseph Corlett, LLC
3 months agoRelated Discussions
Do-It-Yourself Wall-O-Water
Comments (29)For a couple of years I had a garden spot away from my house, with no water supply available so if I wanted to supplement rainfall I had to haul gallon jugs of water. To make my watering efficient, when I planted my peppers & tomatoes in the spring, I dug down and buried empty gallon plastic jugs, one between each plant. I had poked 4-5 holes in the bottom of each, of course, and left the caps on until later in the summer. Once the weather warmed, and after a good soaking rain, I mulched the beds 4-6" deep with chopped leaves, being sure to cover the tops of the (so far empty and still capped) bottles to protect them from the sun since I had found that the plastic degrades and becomes brittle when exposed to the sun. (In previous years, just cultivating around the bottles inevitably resulted in my breaking the tops off by midsummer.) When the weather reached a point where I actually needed to water, I cleared the mulch away for the moment and poured a gallon of water into each buried bottle. I set the cap loosely back atop each bottle to keep the leaf debris from falling in and clogging the exit holes in the bottom, then pulled the mulch back up to protect the plastic. I did not care about how long it took for the bottle to empty-- it seemed like a gallon or two a week per plant was sufficient, and the best part is that by burying the bottles the water went right down to the root zone where it was most effective. As for using wall-o-waters, since I had gotten some free from a friend, I tried them last year with 3 really early tomato plants I started specifically to experiment with. While they survived a good bit of frosty weather, in the end the plants I had started weeks later and planted out a month after the first ones when the weather had warmed quickly caught up to the wall-o-water ones and all the tomatoes pretty much bloomed & set fruit at the same time & rate. So my conclusion is that it was satisfying to my eager gardener's soul to be out planting early, but it really made no difference in overall plant performance. I have found the same to be true with early plantings of such things as peas and salad crops, too. Early plantings may survive, but later plantings quickly catch up and may even surpass earlier ones that have been stressed by the weather....See MoreNeed help from gel stain pros...
Comments (28)My experience is “DON’T USE MINWAX FOR ANYTHING, ESPECIALLY THEIR POLYSTAIN”!!!!! I sat around for 2 weeks trying to stain everything and having issues with stain dripping or being uneven and stripping it back off to do it again. I knew it must be the stain because I was doing everything according to what I’ve seen on YouTube by Bruce for the Minwax products. The only problem was that that was the only color in the stores that I liked (Bombay Mahogany) When I started reading reviews I saw that everyone was having same issues. I finally got in touch w/ painter friend who said that’s why he didn’t use Minwax products anymore. He hooked my up with Old Master Gel Stain in Rich Mahogany and wow what a difference. Bad news is I had to strip all the old stuff off so it’s like I did my cabinets 2x. Still not quite done but I’ll post pics off my progress and the Minwax nightmare vs what Old General looks like. My cabinets are pine and with gel stain you don’t have to condition wood but with regular stain always use wood conditioner first or it will be a blotchy job. Also you need to make sure any scratches or flaws in wood are sanded out or stain will highlight them big time. The last piece of advice is that when you’re sanding to get scratches out, you must sand through the grits. For example: if you’re using 80 grit to get out a deeper scratch, you’ll want to follow up with a 150 grit then a 180 grit or 240 grit. You can’t just jump from 80 grit to 180 or 240, trust me I tried. 240 can remove scratches 80 grit leaves, by sanding through the grits you’re leaving smaller scratches until with the last grit the eye can’t see any scratch. To check if scratches are gone hold wood horizontal while shine light from the bottom of wood piece, with eyes just above eye level peer down wood toward light and any flaws should be visible. Also when using oil based stains if you wipe wood down with mineral spirits first any scratches will show up right away. Let the mineral spirits dry and then sand out....See MoreI need a Pros help for entryway!!
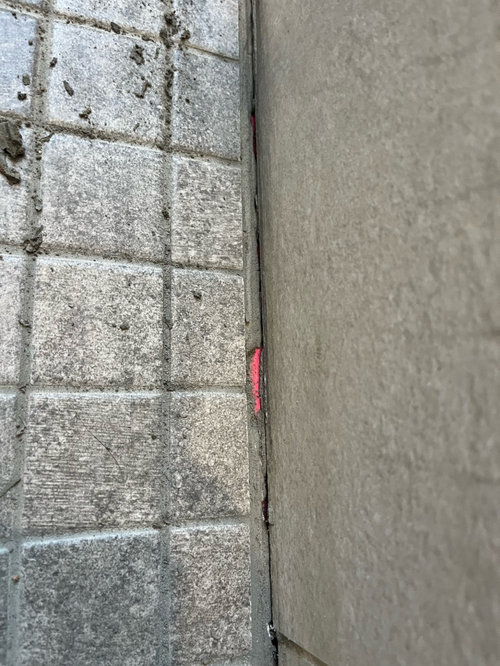
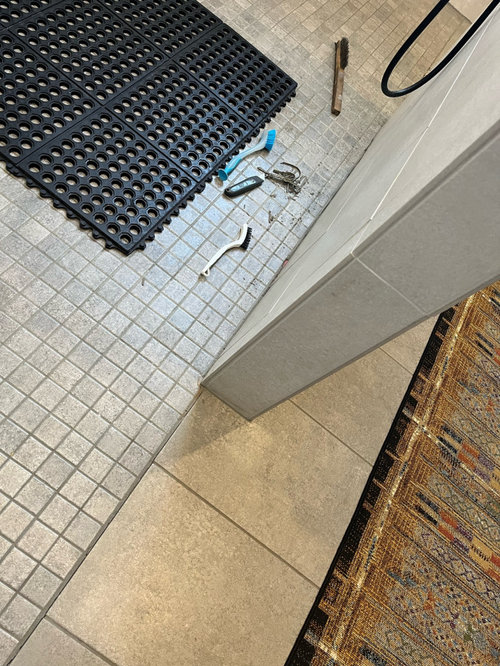
Comments (19)Is this a new home? Whoever did the tile work did a shoddy job. Door to left in the entry...what's going on there? I see tile from another room. Before you invest in furniture, think about a rug. It will disguise mistakes and warm up the space. Depending on the style you choose, it will also give you inspiration on how what else you want in the area. Consider two rugs and rather than a mirror add some wood into the mix....See MoreNeed the Paint PROS help for our outdoor paint as well
Comments (2)I would try and match the color of the siding part of your house for your trim. For a door, its your choice, strip, sand well, stain, color of your choice, or paint it a nice bright color. Either one will work. Right now, it appears that the siding and the trim are totally different, so it looks unmatched....See More
dcsam
3 months agodcsam
3 months agomillworkman
3 months agodan1888
3 months agodcsam
3 months agomillworkman
3 months ago


Related Stories

ORGANIZINGPro Tips to Help You Get the Storage You Need
Experts share their favorite guidelines and products for keeping homes organized
Full Story
ORGANIZINGGet the Organizing Help You Need (Finally!)
Imagine having your closet whipped into shape by someone else. That’s the power of working with a pro
Full Story
CONTRACTOR TIPSContractor Tips: 10 Home Areas That Likely Need a Pro
Safety, less cost and better aesthetics on a home improvement project may rest in the hands of an expert
Full Story
HOUZZ PRODUCT NEWSHow Houzz Pro Helps Designers Create Fast, Beautiful Proposals
Stay top of mind and win more projects with branded proposals and documents that showcase your professionalism and skill
Full Story0

ORGANIZINGStick to Your Resolutions: Help From a Pro Organizer
Accomplish your goals — from decluttering to rediscovering fitness — for real this time
Full Story
LATEST NEWS FOR PROFESSIONALSPro Tips to Help Clients Make Decisions and Stick to Them
Avoid the pitfalls of indecision and shifting plans with these easy solutions to inspire confidence in your customers
Full Story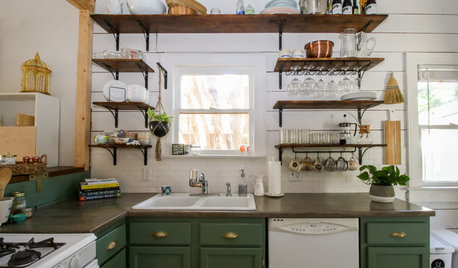
MY HOUZZMy Houzz: Friends Help With the DIY Redo of a San Antonio Kitchen
A Texas homeowner and her pals transform the room with green painted cabinets, open shelving and shiplap walls
Full Story
SMALL HOMESMy Houzz: Fashion Pro Brings DIY Charm to Her Studio Loft
Personalized touches inspire joy in this light-filled rental in Oakland, California
Full Story
HOUZZ PRODUCT NEWSNew Houzz Pro Takeoffs Tool Helps Builders Create Fast Estimates
Perform takeoffs and produce detailed estimates faster and bid more jobs with ConX-acquired takeoff software
Full Story
HOUSEKEEPINGWhen You Need Real Housekeeping Help
Which is scarier, Lifetime's 'Devious Maids' show or that area behind the toilet? If the toilet wins, you'll need these tips
Full Story


Windows on Washington Ltd