


Homewrap on inside of wall sheathing, leave or cut out?
Scott
2 years ago
Featured Answer
Sort by:Oldest
Comments (9)

Scott
2 years agolast modified: 2 years agores2architect
2 years agoRelated Discussions
Questions about polyisocyanurate foil-faced foam sheathing
Comments (26)Sheri: The Aluminet stretches in one direction only, so when you order it, make sure you have the fabric cut to stretch in the direction it will hang from top to bottom. When the sales rep from IGC (where I ordered mine) told me the vents would open under the fabric, I was a bit doubious, but she was right. The key is to mount the fabric without stretching it tightly. My husband was concerned that the corners of the vent windows might punch holes in the aluminet fabric and wrapped rags around them. So far, even with the vents opened full and pulling the fabric, no holes, but I'm looking for a more elegant solution. Fat, self adheseive foam bumpers come to mind. But I didn't suggest that you use the aluminet AS a screen, only that when it's draped over the ROOF vents, it serves as one, which I found ironic, because we made screens for the roof vents, that will soon serve as storm panels for winter, as we can use them to hold bubble wrap in place under the vents. For your intake vents, use standard screening material, in a frame. To screen the powered intake vents on my GH, we used white vinyl house trim materials to create a box frame, 5- 1/2" deep, to allow the vents to open out, then just made screens using the screen channels, corners & spline sold in any home center. The box is made of 1 x 6 vinyl trim board, (actually 3/4 X 5- 1/2) so the edge facing out is wide enough to accomodate the screen frame, that is mounted to the box face with screws. To give a surface to mount the box to the GH, we used vinyl brickmould. The box sits inside brickmould, attached with small screws. The brickmould was fitted tightly around and to the fan frame, sealed with silicone. Once we fiddled the design, they were pretty easy to make and give me the ability to both remove the screens for cleaning, and in late fall, when we seal up the GH for winter, we can seal the vents by placing insulation in the boxes, then use the screens to hold it in place. My inspiration was shadowboxes, which, when you look at them, are no more than a picture frame with a second frame inside of it that projects out, with another frame on it's face, to hold the glass. From the craft shop to the GH. LOL!...See MoreLooking for ideas for the layout of my GH (inside/out)
Comments (29)If you are worried about critters install chicken wire barried around foundation about 8" deep. The top edge of the wire should be covered by the floor. I would lay down weed barrier first, no matter what the floor covering. No weeds! If you are worried about too much heat in the summer the best and cheapest bet is to make your poly easily removable. The less poly the more air circulation. Without knowing how your structure is configured I can't tell you if seasonal poly removal will be easy for you or not. It does beat paying fot electricity for fans. The panels can be replaced with framed screens. Pretty easty to make yourself to size....See MoreHow can I tell where a wire is cut inside a wall?
Comments (18)Well, after thinking about the problem for about 3 months in the background, I finally decided to act on it last weekend. The fix was successful. As many of you suggested, indeed, the wire connection inside the hidden junction box had come loose. Luckily, I had taken quite a few pictures of the studs and the electrical wires when I demolished the walls to remodel the room last year, so I was able to locate where the junction box should be behind the wall by making some measurements on the digital pictures. In retrospect I was able to predict the location of the hidden J-Box from the digital photo with an accuracy of ½ inch! IÂll remember to always take pictures during remodels. So I drilled one first hole where I thought the center of the box should have been and voila! I hit the box. Then I kept drilling holes close to each other until I located the perimeter of the box. Drilling the holes was made a little more complicated by the fact that this wall was sheathed with 3/4in plywood from the inside and there was also insulation between the plywood and the J-Box. So I had to drill through both the 5/8" wallboard and the 3/4" plywood. Once the exploratory holes revealed the perimeter of the box, I cut out the exact perimeter with a jigsaw. Once I established access I broke the old hidden box (plastic) installed a new one, redid the wire connections and was able to cover the hole with a blank access plate. Having been careful while drilling the initial exploratory holes, the cutout was small enough that I was able to cover it with a standard size cover plate....See Moredamaged sheath
Comments (2)Thanks bigbird. I thought that was correct, but I wanted to be sure. It is a lot better option than a box. My son was sick. It was a real pain of a run to make. To get that far and have that happen on the very last staple was not good....See MoreScott
2 years agolast modified: 2 years agoScott
2 years agolast modified: 2 years agoScott
2 years agolast modified: 2 years ago PRO
PROCharles Ross Homes
2 years ago


Related Stories
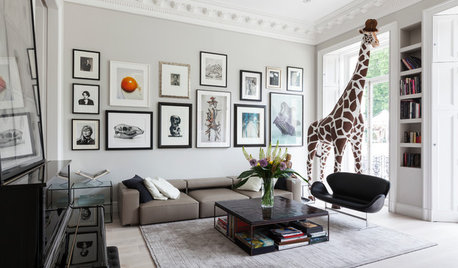
ARTAn Insider’s Guide to Creating the Perfect Gallery Wall
Bring your room to life with these expert tips for grouping artwork and photographs
Full Story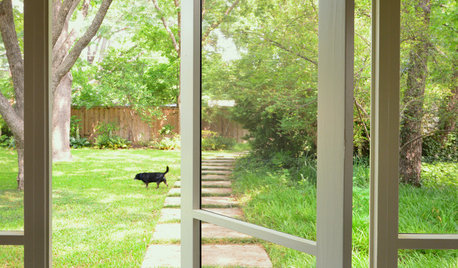
DOORS10 Ways to Work Screen Doors, Inside and Out
Take this functional feature up a notch with one of the many alternative door styles available
Full Story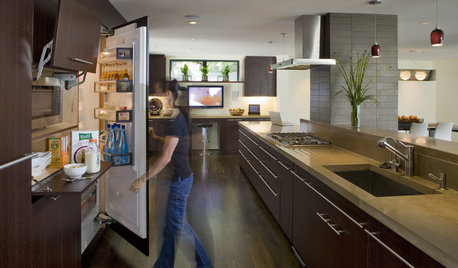
HOUSEKEEPINGHow to Clean Your Fridge, Inside and Out
Keep your refrigerator clean and fresh, while you gain storage space and lose those ‘UFOs’
Full Story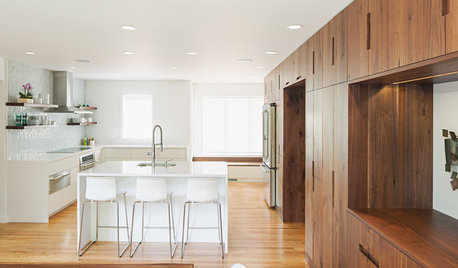
INSIDE HOUZZInside Houzz: A Walnut Wall of Storage Opens Up a Kitchen
A 30-foot wall of storage frees up cooking areas and counters for food prep and entertaining
Full Story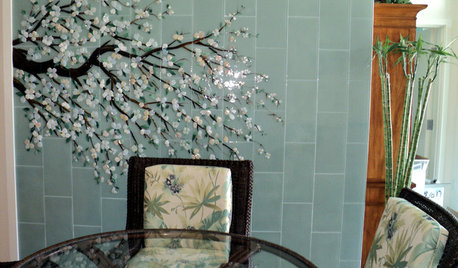
WORKING WITH PROSInside Houzz: An Art Mosaic Wall Banishes Dining Room Gloom
A glass mosaic created by Houzz pros gives a San Diego couple's condo a major design boost
Full Story
REMODELING GUIDES11 Reasons to Love Wall-to-Wall Carpeting Again
Is it time to kick the hard stuff? Your feet, wallet and downstairs neighbors may be nodding
Full Story
INSIDE HOUZZInside Houzz: Refaced Cabinets Transform a Kitchen
No walls came down. No windows were added. But this once-dark kitchen looks completely different, thanks to bright new surfaces
Full Story
HOME OFFICESQuiet, Please! How to Cut Noise Pollution at Home
Leaf blowers, trucks or noisy neighbors driving you berserk? These sound-reduction strategies can help you hush things up
Full Story
INSIDE HOUZZMoving Out vs. Staying Put for a Kitchen Remodel
The 2019 U.S. Houzz Kitchen Trends Study asked those who have renovated about their stress levels and moving regrets
Full Story
FEEL-GOOD HOMEWhat Really Makes Us Happy at Home? Find Out From a New Houzz Survey
Great design has a powerful impact on our happiness in our homes. So do good cooking smells, family conversations and, yes, big-screen TVs
Full Story
Mark Bischak, Architect