


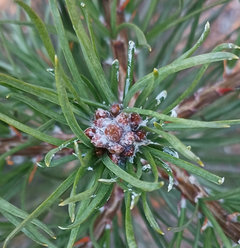
Starting and growing conifer seedlings, relative humidity.
User
3 years ago
last modified: 3 years ago
Featured Answer
Sort by:Oldest
Comments (78)

User
3 years agoUser
3 years agolast modified: 3 years agoRelated Discussions
slow growing seedlings
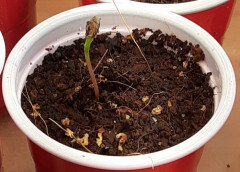
Comments (2)Ok, roots are showing now, but I think I'll wait until the first true leaves are open, then warm up the room, transplant and fertilize. Wish me luck. Actually, things are suddenly germinating like crazy!...I don't know if I can keep up. Man I hope I didn't start too early. I'm going to have to get some more lights, that's for damn sure....See MoreSeedling problem: humidity too low?
Comments (11)I think I might have watered too much. Since I had been worrying about humidity, I thought I could add it back by watering lightly everyday. After posting this question, I had thought about the possibility of over-watering, and so I had stopped giving them water for 2 days already. The top of the planting medium is dry, but it is still moist about 1cm down after 2 days. Definately not wet though, just slightly moist. This problem can now be seen on every single one of my collard seedlings (I have 6 pots). I checked on the stem, although there is a bit of purple coloring on them, they aren't tipping over or turing thin and brown. So I hope I'm not over-watering to the point of damping off. The planting medium I used was turface, perlite, akadama, and peat (baked to sterilize). I have another question regarding temperature. Since I have the plants lined up against a north-west facing window (with metal halides above that runs from 6am-7pm), when sunlight shines through in the afternoon, the temperature of the surfaces where sunlight reaches will rise to close to 90F; eventhough the ambient temperature of the room is kept under 80F. Does it matter? Will the 90F sunlight patch be too hot of the plants? Or is this okay as long as the potting medium is kept cool?...See MoreConifer Seedlings Prairie Restoration
Comments (15)to get the permits to build the house.. a survey had to be done ... no use building on the neighbors property ... eh ... then... when and if you converted from a building loan to a mortgage ... presuming it wasnt all paid for by that time... you had to submit the survey to the bank for your mortgage ... by irrigation .. as i noted.. i do NOT mean a system of drippers, etc ... i simply mean a few spigots strategically place around the property ... whether the water is handy and close ... or 500 feet away ... you will use the same amount of water ... its just a question of how far you drag it ... how big is your property? i will try to get a picture for you.. after the snow melt ... IF I REMEMBER ... DAX!!!! .. prioritize your project.. so you do NOT have regrets in the years to come .... what you are able to do at the age you are now.. may not be within your capabilities ... 10.. 20.. 30 years down the road ... invest in the superstructure of your garden ... at the expense of immediate gratification ... you got the fever in a bad way.. don't you.. lol ken...See MoreFoliar Feeding for Conifer Seedlings?
Comments (11)"Cool soils that are low in initial fertility are conducive to root-growth" - this is why my seedlings and my recent transplants are not fertilized heavily at first. As the seedling establishes new roots in the mix, I increase the fertilizer incrementally - generally starting with a 1/4 strength dose and working up from there. Foliar Feeding is inefficient for the most part, and really only benefits certain plants at certain times of the season when growth is happening so quickly that the normal root-pathways can't keep up with the demands of the plant. In other words, there is a very narrow window for the practical and useful application of Foliar Nutrients. Not all plants have foliar pathways that can even take up nutrients, nor are all nutrients in a form that can pass through those pathways. Temperature, humidity, and time of day will also affect the nutrient uptake. Fertilizing via root-pathways remains the most efficient means of nutrient delivery. If the real issue with the plant is that the roots aren't taking up nutrients, then the root-issue ought to be addressed. In containers, that issue most often has to do with a soil/mix that does not allow for proper watering and drainage. Once the soil-mix is sorted out, root-health and nutrient uptake shouldn't be an issue. Josh...See MoreUser
3 years agoUser
3 years agoAddison in VT z4a
3 years agoUser
3 years agolast modified: 3 years agoUser
3 years agoUser
3 years agolast modified: 3 years agoUser
3 years agolast modified: 3 years agoUser
3 years agoUser
3 years agolast modified: 3 years agoUser
3 years agolast modified: 3 years agoUser
3 years agoUser
3 years agoUser
3 years agoUser
3 years agolast modified: 3 years agoUser
3 years agolast modified: 3 years agoUser
3 years agoUser
3 years agoUser
3 years agoUser
2 years agolast modified: 2 years agoUser
2 years agoUser
2 years agolast modified: 2 years ago
BillMN-z-2-3-4
last yearlast modified: last yearBillMN-z-2-3-4
last yearlast modified: last yearBillMN-z-2-3-4
last yearBillMN-z-2-3-4
last yearBillMN-z-2-3-4
last yearBillMN-z-2-3-4
last year
bengz6westmd
last yearlast modified: last yearBillMN-z-2-3-4
last yearBillMN-z-2-3-4
11 months agoBillMN-z-2-3-4
11 months agolast modified: 11 months agoBillMN-z-2-3-4
9 months agolast modified: 9 months agoBillMN-z-2-3-4
9 months agobengz6westmd
9 months agoBillMN-z-2-3-4
9 months agolast modified: 9 months agoBillMN-z-2-3-4
8 months agoBillMN-z-2-3-4
7 months agoBillMN-z-2-3-4
6 months agolast modified: 6 months ago


Related Stories

EDIBLE GARDENSSummer Crops: How to Grow Tomatoes
Plant tomato seedlings in spring for one of the best tastes of summer, fresh from your backyard
Full Story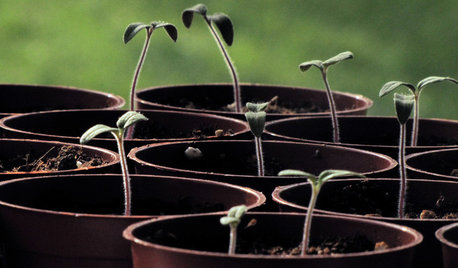
EDIBLE GARDENSPlanting Time: Get Your Garden Started With Seeds
You can get an early gardening fix — and save money too — by starting seedlings in the warm indoors
Full Story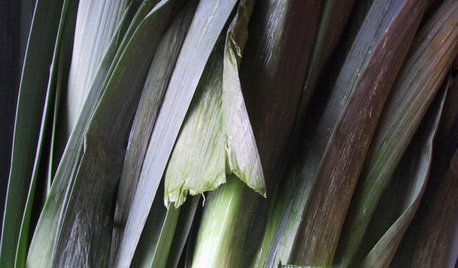
COOL-SEASON CROPSCool-Season Vegetables: How to Grow Leeks
Elegant in the garden and handy in the kitchen, onion-related leeks are worth the effort
Full Story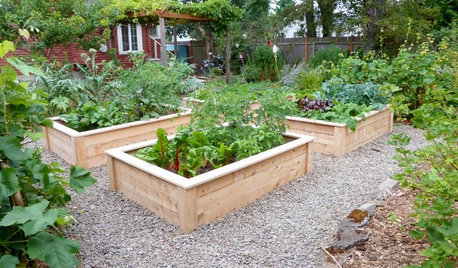
GARDENING GUIDES12 Tips to Help You Start an Edible Garden
Get on your way to growing your own vegetables with a raised bed or a few containers on the patio
Full Story
CONTAINER GARDENS8 Easy Container Plants to Grow From Seed
Get beautiful blooms and herbs in summer by starting these choice garden picks from seed in spring
Full Story
GARDENING GUIDESDesigning With Conifers: Find the Perfect Fit for Your Landscape
Conifers range from fairy-garden size to 70 feet tall. Here’s how to decifer the plant tag for the perfect long-term fit in your garden
Full Story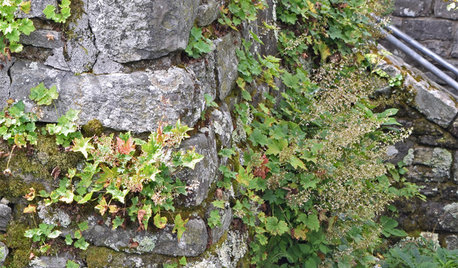
FLOWERS AND PLANTSHeuchera Villosa Stands Heat and Humidity in a Shady Garden
This Appalachian native provides long-lasting foliage and has a lot of colorful cultivars
Full Story0
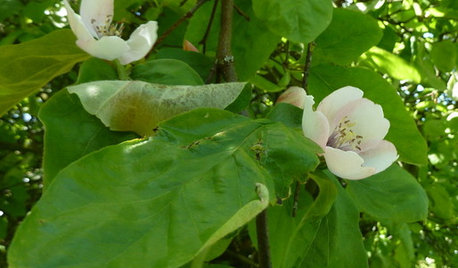
EDIBLE GARDENSWhy Grow Quince? For Beauty, Fragrance and Old-Time Flavor
Delightfully perfumed fruit and lovely spring blossoms make this apple and pear cousin worth a spot in the garden
Full Story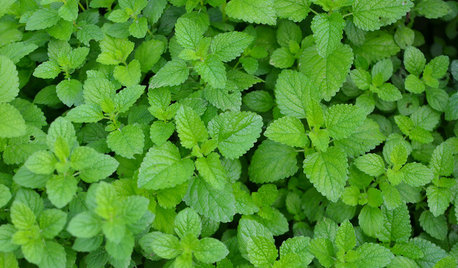
GARDENING GUIDESHerb Garden Essentials: Grow Your Own Delicious Mint
Pull out a pot for this one. Mint's spreading habit and hard-to-kill nature can be a blessing — if you're properly prepared
Full Story
FARM YOUR YARDHow to Grow the Edible Garden That’s Right for You
Choosing the vegetables you want to plant this year will be easier if you keep a few guidelines in mind
Full Story
UserOriginal Author