


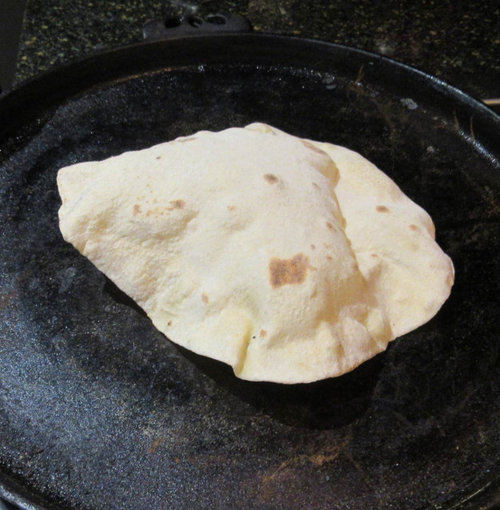
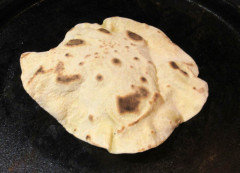
New Lavash recipe, Armenian Flatbread
Lars
3 years ago


Featured Answer
Comments (13)

Lars
3 years agoLars
3 years agoRelated Discussions
What's For Dinner - #331
Comments (100)Maggie2094, I would never judge such a wonderful dinner option! CLBLakey, those stuffed prawns look wonderful! Would love a recipe. Solsthumper, Love everything you post, but especially love your gorgeous food pics! Sorry they are taking a back burner. Ann_T, Dinners look amazing as always! Hainanese Chicken looks interesting! For some one who doesn't like salads, your beet and feta salad, looks like one I would love! (love beets, but only one in family who does). Apple fritters also look really good! Need to bake soon! Lamb is one thing I have only cooked once. I find it's so expensive so I never tend to buy. Might have to look into buying a quarter or half as you did! Last night I made a pepita crusted halibut with cilantro, serrano cream sauce. I cheated as I had picked up a cilantro chutney at the Farmer's market. When I looked at the ingredients, they were pretty much the same as the sauce. I sautéed some onions, added a Serrano chile and some cream. Was wonderful! Here's the link to the recipe, http://www.foodnetwork.com/recipes/guy-fieri/pepita-crusted-pacific-halibut-with-cilantro-serrano-cream-recipe/index.html...See MoreRosemary Flatbread
Comments (12)Wow, sleevendog, I like your stove. Grandma taught me to cook with the wood stove when I was young, but I haven't done it for several years. There is definitely a trick to gauging the heat! KatieC does lots of cooking with her wood stove too. The only crackers I've made are cheese crackers, but Lars posted this one: Lars Flatbread Ingredients 1-1/3 cups water (lukewarm) 2 tbsp dried malt extract (or 1 tbsp sugar) 1 tbsp instant dry yeast (or one package) 1/2 cup oat bran 1/2 cup rice bran 1/2 cup rice flour 2 tbsp canola oil 1 tbs olive oil 2 tsp salt 3 to 3-1/2 cups unbleached flour Toppings: 1 egg + 1 tbsp water (for brushing on top of dough)* Pour lukewarm water into a mixer bowl and add sugar (in your case). If you use liquid extract, you will have to double the amount and use less water. Whisk in yeast until all is dissolved. Then stir in oat bran, rice bran, and rice flour. Allow this mixture to rest for half an hour or more, and then add the oils. You can add less oil if you want a harder cracker. Then add 2 to 2-1/2 cups flour that has been sifted with the salt, and put the bowl in the machine with the dough hook. Mix at high speed (with the splash guard on) until blended. Then add flour in small increments until the dough makes a ball that is not too sticky. Finish kneading by hand, or simply place in a bowl that is lightly greased with olive oil, and allow to rise for a couple of hours, or leave it in the refrigerator covered overnight. I let my dough rise twice. Preheat oven to 375 degrees. Pinch balls of dough about 2-1/2 to 3" diameter and roll the dough on a floured surface into a rectangular shape as thin as possible. Prick the dough all over with a fork or docker and brush lightly with egg wash. Cut the dough into squares using a pizza cutter or ravioli cutter into the sizes you want. Transfer the dough, using a metal spatula, onto an ungreased baking sheet, and bake at 375 degrees for 8-10 minutes, or until toasty in appearance. You will need to watch them closely towards the end, as they will burn easily, once they are done. I use a toaster oven for most of them, but sometimes I bake them in the regular oven until almost done and then finish the untoasted ones in a toaster oven at a lower temperature - about 350ð for 2-5 minutes. You can always toast underdone ones later. *Note: My normal recipe uses a lot of seeds plus onion and garlic granules for toppings, which is why I use the egg wash. You can possibly omit the egg wash. Do not omit the rice bran and rice flour if you want the crackers to be crispy/crunchy. The oat bran also helps the crunchiness. You can make these crackers whatever size you want, which would be the advantage to making your own. I like the flavor when made with malt, but you probably will not want that. When it cools down here I'll have to make some, thanks for the "push" and the recipes. Annie...See MoreWeek 95: How often do you cook?
Comments (67)Texas_Gem, great QOTW! Kudos for teaching your kids to cook, clean, do laundry, etc. My parents also did that with us and I did it with my two boys and girl. About a decade ago, I was in the market for a new tool kit and Sears had a basic one on a great sale. I ended up buying one for my son too, who was about 22, and added in some things it didn't have, such as a hammer, duct tape, picture hangers, etc. I sorta swelled with pride, when Joe told me about a year later that it was one of the best presents he'd ever gotten and that he used it on a very regular basis. OTOH, neither he nor my daughter ever mastered my clean as you go cooking technique. When I cook, by the time dinner is served, the counters are clean and cooking dishes at a minimum are rinsed and stacked neatly in the sink. When they cook, it looks like a category 5 hurricane has swept through the kitchen, lol! :-) Depending upon your definition of "cooking," I cook almost every day. It was just myself for the past few years, but now my daughter (age 30) lives with me. I do really enjoy cooking and puttering around in the kitchen, but it's hard to cook for one, and even two is not as ideal as cooking for a larger family. So I categorize a lot of what I do as "heating up" or "assembling" a meal. Breakfast is cold cereal, juice, and coffee most days, and something like eggs and hash browns and toast about once a week. Joy and I both work mostly from home. I'd say we heat up or assemble lunch 3-4 days a week--sandwiches or canned soup, a simple salad, maybe some tortilla chips and salsa. Another 2-3 days we eat breakfast really late and skip lunch, or we skip breakfast and do brunch. The other day or two we eat lunch out while running errands. We cook dinner, on average, six nights a week. Sorry Texas_Gem, but Hamburger and Tuna Helper do count as entrees, but only once a week. Mainly due to time and budget constraints we cook simple meals. Once a week or so we do something in the crock pot like chili, a chicken, soup, etc. We probably do tacos once a week. One or two meals are more elaborate, such as eggplant Parmesan, lasagne, spaghetti with either home cooked marinara or Alfredo sauce, babooti, etc. One to two nights are leftovers, and one day is either take out or a "lazy day," which means a frozen pizza or frozen dinners, lol. We steam veggies every day with dinner and rice when the entree isn't pasta. We make salads every day with dinner too. Fruit lives in the fruit bowl or fridge, and is our go-to for snacks. Now that I've bought the house, we are going to have a veggie garden! We're very excited about that! Although our cooking isn't gourmet, a well designed kitchen would be really, really helpful. It's not so much the design, as it follows the ice, water, rock, fire flow, it's simply the lack of counter space, because everything is packed in so tight in this small eat-in kitchen! I don't need a "chef's kitchen," just some basic, hard working appliances and a decent amount of prep space. Ample storage and pantry space would be icing on the cake! I think I've got it figured out, but it will be a couple of years before the kitchen remodel, so lots of time to change and learn! Great question! I enjoyed reading everyone's answers! Have a great day! :-)...See MoreBread without Fear
Comments (13)So, the thing about deciding to bake bread is to have time. My mother always started bread early, like before breakfast. I might start after my work is done and be willing to have it finally done after midnight. You need to choose a time when you can give it time. You can always shove your dough in the fridge if something comes up, but since you need to bring it back to room temperature before baking, I don't find it saves time. A long ferment in the fridge can do other nice things, but time saving really isn't one. Here are the instructions and the recipe for the bread above, with the additions as I specified in the original post: Bread is easy. Nearly foolproof and you're not a fool. The good thing about stylish recipes is the cast iron Dutch oven. As with other kinds of cooking, it takes away the variability of the ovens, which is the hardest part. The other thing is getting your hands to learn bread. To know when it needs a little more flour or water, more kneading, etc. Just keep trying. Don't go trying to use all the tricks and advice from different people. Just bake. Most times when you try a new recipe you can get a doorstop, or other mess. You can always turn it into bread pudding or crumbs. Try again. Bread is much easier with a kitchen scale, especially one that will do grams. You also need a big bowl and something to cover it with (could be a mixer bowl and a tea towel. I also use the Anchor Hocking 2 qt. measuring jug with cover). You need a clear counter space and a baking board or silpat to knead and shape your loaves on. A Danish dough whisk is useful, but not required if you're willing to use your hands to mix your dough. A heavy mixer will mix and knead. KitchenAid Artisan will do one loaf, or up to three if it’s soft dough. Anskarum will do big batches of dough. If your dough is very sticky and drippy, add a little more flour. If it’s too stiff to work, add a little water. A single loaf can be made in a 2 qt. Dutch oven, loaf pan, baking sheet, pizza pan, cake pan.... Make a bed of flour for the dough to rest on for a flat pan,or spray some oil in any pan. Ingredients: Flour. Malt will help your rise. I add malt powder to many recipes, but for daily bread (eaten daily, not baked daily) I use Central Milling Artisan Bakers Craft Plus. It's 11% protein, which is on the heavy end for All Purpose flour, about equivalent to King Arthur AP, but has the malt already in it. If you want a very hearty, heavy bread with a lot of stretch, a 14-15% protein flour will do you better. I've made bread from Central Milling Tony Gemignani pizza flour, which has fantastic flavor and 15% protein, as well as a fine "00" grind, and it was really good, but it's too much for general bread. Highly recommended for pizza. The high hydration breads need more protein so that fewer of the gluten strands break and you get a better crumb. I'm not fond of King Arthur flours. Gold Medal Better for Bread (12% protein) is a good choice, but King Arthur All Purpose (11.7% protein) will work fine. N.B: The protein content on the nutrition label loses the difference as a matter of rounding error. The protein content tells you the ratio of gluten you can develop. Kneading speeds up the gluten forming, but it’ll happen just sitting if you leave it alone long enough. Whole wheat breads are a whole different story. The bran cuts the gluten and 100% whole wheat takes some experience and confidence. You can use up to 40% whole wheat flour in a regular recipe without too much problem, but you might not get as much loft. Water. Do use spring water or whatever good tasting water you can. There's nothing in bread for it to hide behind if it doesn't taste good. Salt. Regular granulated table salt works fine. If you prefer a larger grain, grind it up for bread, so it dissolves fast. Tuscan bread has no salt but is mean to be eaten with very salty foods. Generally, breads want half a TBSP (or 1.5 tsp or 11g) table salt per pound of flour. Otherwise, they're exceedingly bland. If you want to weigh your salt, you may need a special scale. They cost about $25. You don't need that kind of precision, however. Your dough should taste salty--unless you use a lot of salt in general and can't taste it in small quantities any more. Salt retards the rise. If you're having trouble with the rise, you can add the salt later, but you shouldn't need to. Stir the salt into the flour first, and you'll be fine. Yeast. ADY=Active Dry Yeast. The Instant is for bread machines. It's the same thing but ground up to work faster. It's a pain to use in other applications. Yeast should be stored in the fridge, but set it out to warm up to room temperature before you use it. A packet is the same amount as a small cake (1" square) is the same as 2.25 tsp. Two tsp should work fine if you don't want to be bothered. Jars are much more economical, and if you're going to be baking regularly, get the 2 lb. bag and store most in the freezer. Given the above, just follow the recipe and you should have bread. :) JC's Daily Bread Lower Hydration Adapted from King Arthur flour Ingredients 1 packet ADY (Active Dry Yeast) = 2 ¼ tsp. 11g or 1.5 tsp Salt 1.5 cups lukewarm Water 475g Central Milling Organic Artisan Baker’s Craft Plus malted flour Or Gold Medal Better For Bread or King Arthur All Purpose plus a teaspoon of diastatic malt, dried malt extract (powder), liquid malt, or even a heaping tsp. of Malt-o-Meal Optional: An egg or milk to brush the top with for sheen and color, and oil spray for pot. Optional: Replace up to 1 cup of the liquid with vegetable puree of any kind, beer, juice or other liquid. You may have to add up to half a teaspoon more salt if the liquid doesn’t have salt. You may also add other seasoning, spices, etc. but better to add it to the liquid first to get the balance right. Directions Combine all ingredients, mix, and knead at least 10 minutes to a well-stretched, smooth, elastic dough Put dough in greased bowl, turn over (grease both sides, thereby), cover, and let rise at (warm) room temperature for about 1 hour, to double volume. If your kitchen is cool, you can run a load of towels and set the bowl on the dryer, or the cable box, or set it on top of a simmering pot of water, or heat your oven for an hour before starting to its lowest temperature and turn it off and put your dough in when it has cooled to pleasantly warm.. Punch down—i.e., let out the air by poking it, and bake in a 2 qt. cast iron pot or other high sided vessel. Optionally spray with oil to fry the sides a little. Cover and let rise to double again. Optionally, brush the top lightly, without deflating the dough, with a beaten egg or milk. You can slash the top of the dough with a very sharp knife, but don’t deflate it. Preheat to 415° F Bake for 35 minutes. Remove cover and lower temperature to 375° F for 12-15 minutes....See MoreLars
3 years agolast modified: 3 years ago
User
3 years agocolleenoz
3 years agoLars
3 years agolast modified: 3 years agoLars
3 years ago


User