


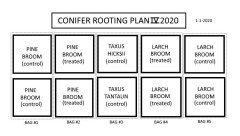
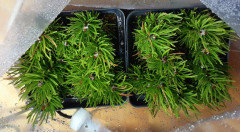
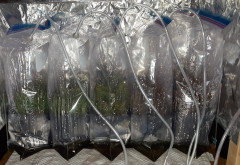
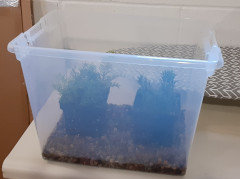
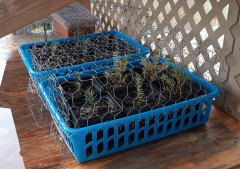
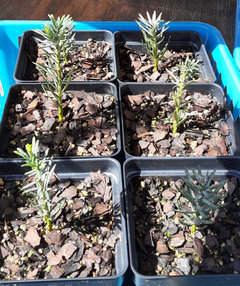
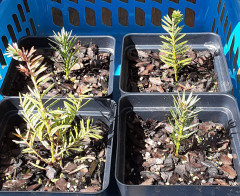
Thinking about rooting Conifers again.
User
4 years ago
Featured Answer
Sort by:Oldest
Comments (86)

User
4 years agolast modified: 4 years agoRelated Discussions
Bare Root conifer understock
Comments (19)Oh, ok Ken. I see the form now. I don't think I need 1 gallon trees right now. I ordered quite a lot of understock that will be arriving in bare root form which will tie me over. for next year. I understand if your graft does not take that you can use that same understock again the next year. Year 3 I will analyze how much I have left and work from there. At least I will have enough understock again for next year. Also, I received information on how to make my life much easier from a friend by watering my understock with sprinklers set on a timer. That will be heaven for me and alleviate my concerns if I go out of town. I think I may be able to begin grafting some of my trees this weekend. I am so excited and will report back on my success....See MoreWinter Conifer Rooting
Comments (1)you trade the ponderosa understock.. for scion ... in the future .... ken...See Moreyour thoughts again on cotoneaster -- and dwarf conifers!
Comments (3)Hi mayalena :-) Oh that is so funny, I remember your first post about the contoneasters. I had to go out and look and think about, did I like them or didn't I? [g] I have been eyeing them all season, suspiciously...lol. I had just bought a 'coral beauty' in the spring and planted it and it just took off, and I started wondering was it going to be overwhelming? I thought I remembered that they had nice fall foliage, so I was waiting to see. Sure enough, it berried up and the leaves turned colors. It also has a few branches shooting up into the air and looks kind of nice. I don't have it in it's final position. I wanted to put it right on top of a little rise, that has a rock border below it. I am also thinking of putting it up against a cedar stockade fence and see if the vertical branches will continue and look nice against it. The other issue was whether they just collect the leaves and look messy. Well, they sort of do but so far, I didn't find it hard to pull out a few leaves, and mine is near a maple. As for your design dilemma, my creative juices are very stagnant right now. [g] My few comments... I wonder if the cotoneasters will become a chore next to a walkway? To me, they also look best when you can let them take their natural shape and not have to prune them too much. The best position I have seen them in were on the top of a retaining wall, and in front of a large rock, combined with evergreens of some sort. The small leaf would seem to be contrasted more by a large leaf. I have mine near an oakleaf hydrangea which is also a gorgeous burg/red color right now. Evergreens look great with them too. I will be interested to hear how others use them too. Thanks for bringing this up again mayalena. :-) Adam...See MoreRoot rot in jade plant I think--also is this giant thing a root?!
Comments (49)I found an absolutely beautiful Jade in a dumpster when I was tossing my trash. I pulled it out and after trimming a bit it was absolutely fantastic. I proceeded to over water it and practically kill it. It got so bad that I thought it was a goner...and then I did the unthinkable. I cut off the entire matted and ruined root ball. The whole thing. I let it air a few days and stuck it in an awful mixture of street dirt. 6-months later, it is making a huge comeback. I barely water it now and give it a shower every six weeks or so to blow away any mites or whatever crawlies happen on it. It is doing fine. I happened on another specimen with an 8-inch trunk and I broke it up to make about 5 new plants with 4-inch trunks (the 8-inch was rotting). I'm hoping to get at least 3 of those rooted using the same method. Re-rooting a 4-inch trunk gave me some confidence with Jades. They seem to be really resilient if you sorta be a little mean to them ;-)...See MoreUser
4 years agoUser
4 years agoUser
4 years agoUser
4 years agolast modified: 4 years agoUser
4 years agolast modified: 4 years agoUser
4 years agolast modified: 4 years agoUser
4 years agolast modified: 4 years agoUser
4 years agoUser
4 years agoUser
4 years agoUser
4 years agoUser
4 years agoUser
4 years agoUser
4 years agoUser
4 years agoUser
4 years agoUser
4 years agoUser
4 years agoUser
4 years agoUser
4 years agoUser
4 years agoUser
4 years agolast modified: 4 years agoUser
4 years agoUser
3 years agoUser
3 years agoUser
3 years agolast modified: 3 years agoUser
3 years agolast modified: 3 years agoUser
3 years agolast modified: 3 years agoUser
3 years agoUser
3 years agolast modified: 3 years ago
BillMN-z-2-3-4
6 months ago
bengz6westmd
6 months agoBillMN-z-2-3-4
6 months ago


Related Stories
GARDENING GUIDESNew Ways to Think About All That Mulch in the Garden
Before you go making a mountain out of a mulch hill, learn the facts about what your plants and soil really want
Full Story
LIGHTINGWhat to Know About Switching to LED Lightbulbs
If you’ve been thinking about changing over to LEDs but aren't sure how to do it and which to buy, this story is for you
Full Story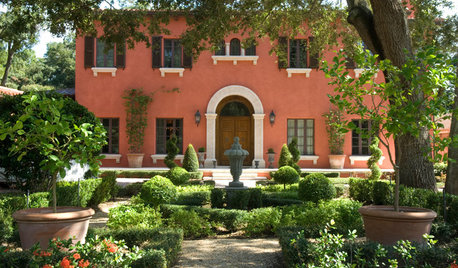
ARCHITECTURERoots of Style: The 3 Waves of Italian Renaissance
The 15th-century study of ancient Rome delivered an important 20th-century style that is seen again today
Full Story
HOUZZ TOURSHouzz Tour: An 1850s Ancestral Home in Texas Rises Again
See how exacting research and meticulous renovations gave a retired couple their dream home on a regained family plantation
Full Story
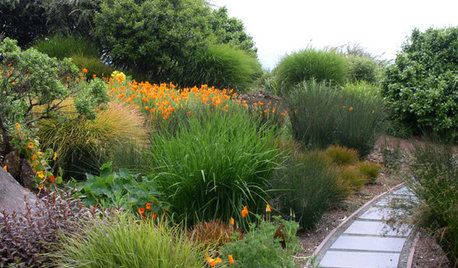
GARDENING GUIDESDesigning With Conifers: Find the Perfect Fit for Your Landscape
Conifers range from fairy-garden size to 70 feet tall. Here’s how to decifer the plant tag for the perfect long-term fit in your garden
Full Story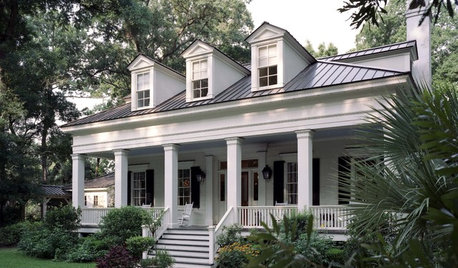
TRADITIONAL ARCHITECTURERoots of Style: Classical Details Flourish in 21st-Century Architecture
Columns, friezes, cornices ... if your home has features like these, it may have been influenced by ancient designs
Full Story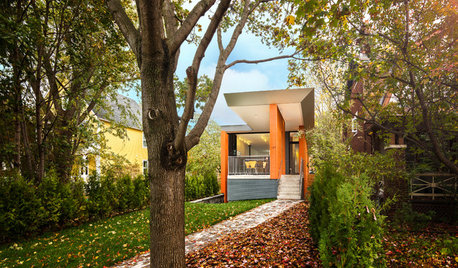
MODERN HOMESHouzz Tour: A Modern Home Rooted in Its Place
It's partially buried in the earth, but with a cantilevered roof and strong colors, this Ottawa home is anything but shy
Full Story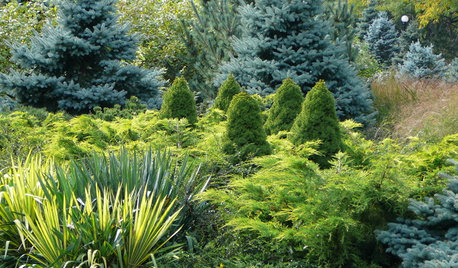
PLANTING IDEASDesigning With Conifers: Layers of Texture for Your Garden
Sharp and prickly or fine like ferns, richly textured conifers bring unexpected interest to the landscape
Full Story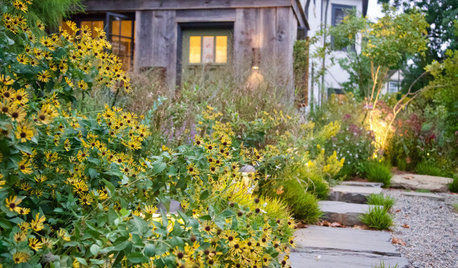
GARDENING GUIDESWhat to Know About Starting Your First Native Plant Garden
Fall is an ideal time to plant a sustainable garden that supports wildlife and looks good too
Full Story
ARCHITECTURERoots of Style: Where Did Your House Get Its Look?
Explore the role of architectural fashions in current designs through 5 home styles that bridge past and present
Full Story

BillMN-z-2-3-4