


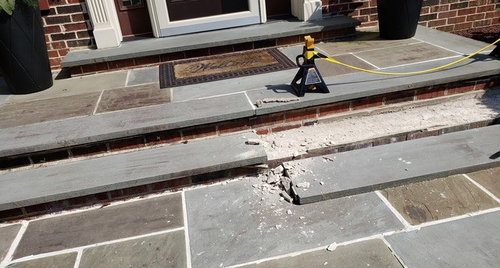
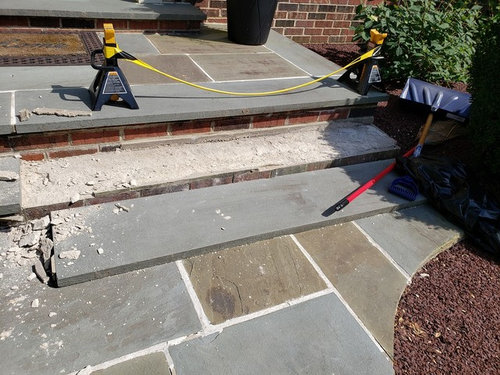
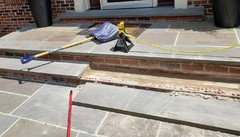
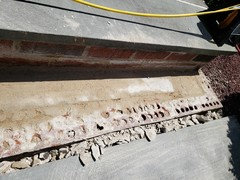
Need help on how to repair a flagstone step (pictures included)
Dave T
4 years ago
last modified: 4 years ago
Featured Answer
Sort by:Oldest
Comments (12)
 PRO
PROYardvaark
4 years ago PRO
PRORevolutionary Gardens
4 years agoRelated Discussions
Repair stone steps
Comments (6)Wow! Ideashare, that would be pricey!!! I've tried to figure out what I would do.1st thing Is to get some galvanized pipe 1 in diameter & make a railing on the left side of steps so at least you have something to steady yourself. Broken bones are expensive & time consuming these days. I just tried knocking off some concrete my dad had put on some rocks that bordered the fence in front of house. Mom just changed it & so they had to take them out. Is that concrete ever on those rocks good. So I would try to clean the rocks up to get moss off & blow dirt out from between the rocks. I have kids walking home from school that kick at my 1 row of brick at edge of sidewalk(holds in dirt & water for bushes. I redid 1 brick that was loose & wondered if it would last a week, It's been awhile now & looks like day I did it. Dad says you have to have a very good bond(reason why you need to try & get rocks as free of moss,dirt & weeds as possible) Mix together using equal amounts Morter cement & Portland cement so 1 bucket of each or what ever container you are using, gently measure it as don't want to breathe it in. Put the 2 cements in large wheel- barrel or cement mixing trough & mix the 2 dry ingredients together very well, that is the key, it has to be perfectly blended. Can use a clean hoe, easiest I think,when it is mixed, do it a little more just for good measure & then add 2 parts sand(from place that sells it for cement work)& mix it well again. it's like pie crust, if you don't mix it well it will crumble. When the sand & 2 cements are very well blended then you add water & move hoe through it until it is right ,too much water & you have problems so don't run a hose in the container. Use your bucket & keep adding & you will see it get thick & so you can put it on a trowel or whatever you plan to use. Putty knife or old butter knife, I have no idea how big your spaces are that need filling. If they will hold more than a cup of cement than you can use a trowel & 1 of those pointed kind of trowels for getting cement pushed down into cracks then wipe excess away with damp rag(wear waterproof gloves as very caustic on your hands) around rocks. I CAN'T TELL YOU HOW MUCH WATER AS IT DEPENDS ON HOW MUCH IS IN THE SAND & THAT CAN VARY FROM DAY TO DAY. GOOD LUCK, BUT GET RAILING IN 1ST, need about 3-4 1 in metal pipes with screw ends (galvanized) & then pieces to connect between them & T elbows & regular elbows 45 degree angle I think for the 2 ends. I haven't used the pipe for anything except to make clothes hanger for in garage. You can paint it later. Good Luck It's 1 part morter cement, 1 part Portland cement, 2 parts sand & the water little at a time. Hope it is clear....See MoreHow to best use space in laundry room? (pictures included)
Comments (10)Hailefinn brings up a point I hadn't thought of yet. I knew that DW would have to stretch to use the dryer controls if stacked (at least one stackable unit has the dryer controls on the bottom, but that limits us to a single model or small subset of models). Since setting the controls is pretty quick and easy I thought stretching or a small step stool might work for that. What we haven't yet tried is reaching in to the back of the dryer cavity. That might be difficult and standing on a step stool while pulling out clothes or stepping on and off could be dangerous. It looks like we may have to do the units side by side. About the sink: There's a bathroom about 3 feet from the potential laundry area. Is a sink still worth it?...See Morestep repair
Comments (5)If I'm reading your post correctly you are just talking about taking a rounded edge and making it into a sharp 90 degree edge. It's not hard to do, however, your probability of success depends upon the size of the round portion. In other words if the rounded portion is just at the very edge it will be difficult to get the new built up concrete edge to bond to the old concrete and not fall apart. If the rounding is more extensive, then the larger built up edge will hold better (more surface bonding area) and not disintegrate. You are on the right track with the form. The easiest way is to prop up a piece of wood against the vertical surface of the step. It's a good idea to "rough up" the surface of the existing concrete for a better bond. Then get some high strength patching cement (it can't hurt to add a bonding agent) and trowel it in the gap, level with the existing horizontal top of the step. You can make it so that the wood "form" is at the same level as the top of the step, but it's probably not worth the extra time and effort as you should be able to level it with just the trowel. After the concrete sets remove the wood and you are done. I hope this helps and that I'm understanding the issue correctly. Also, since it's such a small piece of cement, you should put a releasing agent on the inside of the wood so that when you take it off it doesn't affect your new edge....See MoreOld picture frame....need repair help
Comments (3)hi Take a wet warm/hot wash cloth and place it ot wrap it around a section and then rap in plastic ot foil or just a old bread bag and wait for a few hrs. I would think that over doing this will warp the wood and that you don,t want . I warm things up in my oven all the time because of the low heat provided by the pilot light I might try this also. use a little paint stripper in a small place with a rag the same way as the way just put some on heavily and wrap and wait . but I do know that moisture destroys the plaster because I have the oppisite prob. I have an old mirror from gmas house that was stored in her garage and pcs of the very ornate frame came off and will need replaced ,and moisture is what made them come loose. but as a wood worker I also know that just moisture in low levels(my basement) will warp dry wood and frames are not much good bent. if it all come loose I would definitly use a stripper for the final steps in finishing . Rick...See More
Dave T
4 years ago- PRO
Yardvaark
4 years ago  PRO
PROKD Landscape
4 years ago- PRO
Yardvaark
4 years ago Dave T
4 years ago- PRO
Yardvaark
4 years ago - PRO
Yardvaark
4 years agolast modified: 4 years ago Dave T
4 years ago- PRO
KD Landscape
4 years ago
Related Stories

WORKING WITH PROS5 Steps to Help You Hire the Right Contractor
Don't take chances on this all-important team member. Find the best general contractor for your remodel or new build by heeding this advice
Full Story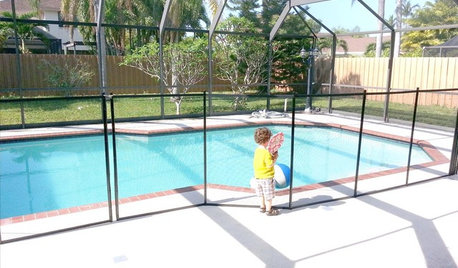
HEALTHY HOMEThese Steps Will Help Keep Kids Safe Around Pools and Spas
Implement several layers of security to prevent life-threatening accidents in and around the pool
Full Story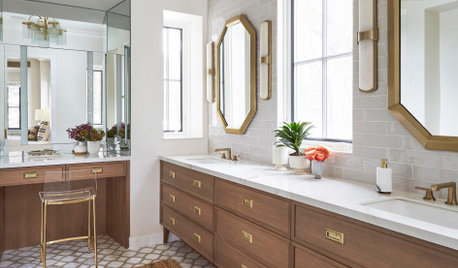
BATHROOM WORKBOOKA Step-by-Step Guide to Designing Your Bathroom Vanity
Here are six decisions to make with your pro to get the best vanity layout, look and features for your needs
Full Story
ORGANIZINGYou Can Do It: 6 Steps to Organizing Your Loose Photos
Are your old pictures stuck in dusty boxes? Here’s how to get them in order — and ready to tell your family’s story
Full Story
ORGANIZINGSmall Steps to Organizing Success
Take care of bite-size projects, and your home's big picture will be an organized dream before you know it
Full Story
GARDENING GUIDES6 Steps to Creating Your Butterfly Garden
Encourage these fanciful winged beauties to visit your garden while helping restore their fragmented habitat
Full Story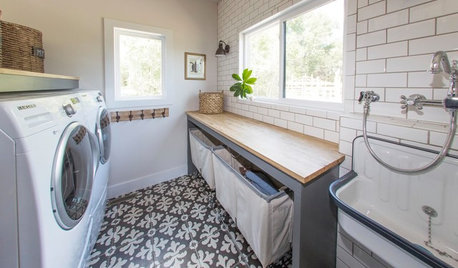
MOST POPULARThe Dream Laundry Room That Helps a Family Stay Organized
A designer’s own family laundry room checks off her must-haves, including an industrial sink
Full StoryKITCHEN WORKBOOK8 Steps to Surviving a Kitchen Remodel
Living through a kitchen remodel isn’t always fun, but these steps will help you work around a kitchen in disarray
Full Story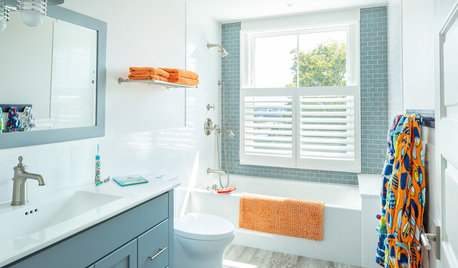
BATHROOM DESIGN8 Elements to Include in a Family Bathroom
These essentials will help ensure that your hardworking bathroom functions well for the whole household
Full Story
LANDSCAPE DESIGNEnhance Your Garden Journey With Natural Stone Steps
Consider these 13 ideas for natural stone steps that will help you slow down and enjoy your surroundings
Full Story


Dave TOriginal Author