


Just had a realization about the water heater in and out pipes
purslanegarden
5 years ago
Featured Answer
Sort by:Oldest
Comments (14)

klem1
5 years agoRelated Discussions
service from BOTH old water heater and tankless water heater ?
Comments (4)We don't want to shut off the water when the remodel to the room is finished. We just want to switch the water source . For example after finishing the hall bath, can water coming from the water heater in the attic be switched via the remodel process to the new tankless water heater that will not be in the attic? But still will need the old water heater for rooms not yet remodeled and whose plumbing hasn't been upgraded to copper,etc. Can both water heaters be running at same time? For example keeping the master bath and the kitchen still using the water heater in the attic because plumbing will not be complete yet that routes them to tankless. So we will have both tankless not in the attic and the old water heater in the attic working at the same time but just servicing different rooms. Can we do that? I didn't specify since I'm not a plumber but I can't help thinking that main issue is that you need gas going to both water heaters and water from the outside being routed into both water heaters. Not sure if this is possible to do. Then after 6 months or a year when all rooms are remodeled and have their galvanized pipes replaced with copper, etc. and have plumbing routed to new location of tankless, the old water heater in the attic can be shut down because it won't be used....See MoreHot water heater just went!
Comments (3)If you are replacing the water heater with another of the same size it is generally a pretty easy job. 1.Turn the Gas off. (Should be a shutoff within 6' of the water heater.) 2.Connect a hose to the drain valve and run it to a suitable drain or outdoors. 3.Sometimes its hard to get the flow started through a hose. I like to open the drain valve and use the water pressure to begin the flow but once you have flow to the drain, then turn the water heater supply cold water valve off and open a hot water faucett to allow air to vent in as it drains. 4.While the tank is draining you can disconnect the flue pipe from the draft hood. Inspct the pipe carefully. If it is severly rusted you should plan on replacing the damaged portions. 5. Disconnect the Temperature & Pressure Relief Valve discharge line. (If it is a soldered copper line you will need a tubing cutter to cut the line. Cut the line about a foot away from the tank. By doing so you won't need to worry about overheating the valve when you later reconnect the line by soldering a coupling. -You may also use a compression coupling here) Once the line is cut remove the threaded section from the T&P valve and clean the threads. You will need this section to attach to the new T&P valve on the male thread adapter, then set this pipe aside. 6. Disconnect the Gas line. Some codes require the gas line to be iron pipe all the way to the water heater gas regulator while others will permit a short flex line. If you have iron pipe it will have a union on the line. Begin by disconnecting the union then remove the pipe from the water heater regulator and set aside. NOTE: Whenever you are connecting or disconnection iron pipe fittings for gas or water you should use two (2) wrenches. One to turn the piece you desire to turn and a second wrench to hold the opposite piece steady. This prevents the possibility of the whole pipe rotating and loosening another joint upstream where it might go unnoticed and result in a leak. 7.Examine the hot & cold water lines on the top of your water heater. There should be a union within 12" above the tank. Carefully loosen the unions but remember that you are draining the entire hot water system in the house. Make sure it has drained down below the unions before you disconnect them completely. (If you are under the Uniform Plumbing Code both the hot and cold water lines are required to be insulated within 6' of the tank so you will need to remove the insulation before disconnecting the water lines. 8. As soon as its drained down sufficiently you can remove the hot & cold water lines from the old water heater. Set these aside because you will be using them on the new water heater. 9. With the flue pipe, gas line, T&P discharge line and both water lines removed you can now remove the old water heater and set the new one in place. (You may have a pair of Seismic brace support bands surrounding your old water heater. They are steel bands that surround the tank and are firmly secured to the house frame to prevent the water heater from moving in an earthquake, tornado or hurricane. They are not required everywhere, but if you live in an earthquake or hurricane region you may have them.) NOTE: If your water heater is sitting on a floor that can be damaged by water, I.E. On a wood floor, or wood sub-floor or in an attic space you are required to have a drip pan. If you require a drip pan but do not have one now, you need to set a drip pan in place before setting the new water heater in. Drip pans are required to have a " discharge line routed outdoors or to a suitable indirect waste receptor (floor drain). The drip pan MAY NOT be connected to the T&P discharge line. 10. Set the new water heater in place and align it correctly. If you have seismic straps tighten them in place. CONNECTING THE WATER LINES: 1. If you have copper water lines the plumbing codes prohibit directly coupling copper to iron pipe or an iron vessel and a water heater has an iron vessel so you will be required to first install Dielectric Nipples. Dielectric Nipples look like a 4" long piece of galvanized pipe with a plastic internal liner. Apply Pipe dope or Red Teflon tape to the male threads of the nipples and screw then into the tank tightly. (I much prefer pipe dope). You may then apply pipe dope or Teflon tape to the threads on the top end of the nipple and attach the copper risers you saved from the original water heater. With a bit of luck they should match up with the unions and you can just tighten everything in place. If not, you will have to cut or add pipe as necessary. 2. If you have PEX or CPVC water lines the plumbing codes prohibit plastic lines within 6" of the draft hood or the flue pipe. An easy solution here is to first install a 12" galvanized iron pipe nipple as a riser then attach the CPVC or PEX to the top of the galvanized pipe. (Be sure to apply pipe dope or Red Teflon tape to the male threads of the nipple before installing).- If you have plastic pipe you do not need the dielectric nipples. 3. In some jurisdictions you may use the Flexible copper lines to connect a water heater but if you use the flexible copper lines you will need to install the dielectric nipples before attaching the copper lines. CONNECT THE FLUE LINE 1.Install the draft hood per manufacturers instructions. 2.Connect the flue pipe to the draft hood. (Some codes require the flue to be screwed to the draft hood with a minimum of three self-tapping screws through the flue pipe and into the draft hood flange). CONNECT THE TEMPERATURE & PRESSURE RELIEF VALVE DISCHARGE LINE. CONNECT THE GAS LINE: Careful here- In some jurisdictions you must be a licensed plumber or gas fitter to make gas connections. In fact, in some jurisdictions even plumbers cannot make gas connections unless the hold a separate gas endorsement. 1. If your code requires pipe all the way to the water heater regulator begin at the regulator and work backwards towards the union. Make sure you apply pipe dope to all male pipe threads before tightening. (You may also use RED triple density Teflon tape or Yellow Double Density Teflon tape but be careful here. Originally all they made was single density Teflon tape then they came out with the double density type and many codes made it mandatory to use double density on gas lines. Later they changed the specs on Teflon tape so that single density is white, double density is yellow and triple density is Red. While the red is slightly heavier and is rated for gas many local codes still require double density for gas lines and often the double density Teflon tape is actually labeled as "Gas Tape". (Personally I find it much simpler to just use pipe dope) 2. If you gas is connected by means of a flexible connector for added safety I prefer to always discard the old flex line and install a new one. Some Flex lines have a ½" male NPT thread on the water heater end and a flare fitting on the opposite end while others have flare fittings on both ends. Just remember that all NPT (national pipe taper) threads require a thread sealant, pipe dope or Teflon but DO NOT apply any dope or Teflon to a flare fitting. Flare fittings are finely machined fittings that are made to seal directly and any attempt to apply a sealant interferes with the intended design of the fitting. Once you have the gas line connected you need to test all the gas line connections from the gas valve on down to the water heater. To test the fittings take a 1/2cup of water and add about two to three tablespoons of liquid dishwashing soap and mix it lightly. You then turn the gas on and brush that solution on all joints and fittings and look for bubbles. (ChildrenÂs bubble blowing soap makes an excellent solution for testing gas lines.) At this point you should have everything connected so you are ready to fill the tank. First make sure the drain valve is closed then open the cold water supply valve. You should still have a hot water faucet open which will allow the air to vent out as the tank fills. Continue filling until you have a full flow of water at the faucet. After you have a full flow at this faucet you will also need to go to each hot water faucet in the house and bleed off any residual air in the lines. After the gas line has been tested and you are sure the water heater is full of water you may then light the pilot and adjust the temperature on the thermostat. You are done at this point, so pick up the mess, put your tools away and write a bill for a couple hundred, then take the cash out of the household maintenance fund, grab your significant other and head out for a night on the town. Hopefully this was descriptive enough....See MoreHot Water Heater Sizing and Running out of Hot Water
Comments (5)I have a Triangle Tube Series 50 (45 gal.) in a 2,000 sf house with 2 bathrooms. My plumber said I should put in a smaller unit and I wanted a bigger one. We compromised on this unit, because he said a bigger one would consume a lot more energy. I take a 25 min shower with a 5 gpm shower head, and I get enough hot water from this unit, but it took some doing. The first thing I would suggest is to turn the temperature on the water heater all the way up. We have an L-shaped ranch with the water heater on one end of the house, and the master bath on the other (over an unheated crawl space). So we need to keep the water very hot to get enough hot water at the bathroom. The hotter the water is, the more cold water you'll mix in, and the longer your hot water will last. Despite this, I was still running out of hot water after about 15 min. As my shower valve doesn't have a volume control, I put a small valve on the shower arm which allowed me to slow down or shut off the water when I was soaping myself. This allowed the hot water to recover a bit before I finished my shower. The real breakthrough came last summer though, when I had a new boiler installed. The installer told me that the circulator pipes between my boiler and water heater were only 3/4", when they should be 1 1/4". He also set up the new boiler so that the water heater gets priority over heat to the house, and the boiler automatically heats up to 180 degrees whenever the unit calls for more hot water. Now I have plenty of hot water for a 25 min shower followed by a shave, even without turning the volume of hot water down during my shower. I think you should be able to get enough hot water out of this unit provided you use it to its full capacity. You may need to have someone do some work on your boiler though. One rule of thumb I live by, is to never let a contractor tell me how much water or hot water I need. Aside from this, do you have separate shower valves for your 2 shower heads, and are you satisfied with the water flow? Many newer shower valves limit the flow to 2.5 gpm or less. You can check your actual water flow with a 2.5 or 5 gal bucket and a stopwatch. If you're getting enough flow out of the shower arms, but not out of the shower heads, there are some places that sell shower heads with easily removable flow restrIctors....See MoreQuestions about venting condensing hot water heaters
Comments (7)What he is talking about with pitch is that they recommend 1/4" per foot slope. In reality you can get away with 1/8" slope just fine but I digress. In that rheem manual jake posted, it appears they recommend a downward slope away from the WH so it would have to slope from the top of the ceiling to the bottom of the rim joist. This is opposite a condensing furnace where you want the exhaust sloped towards the furnace so condensate drains back to the furnace drain. I see in that manual the WH has a drain for condensate so I dont understand why you couldnt pitch it towards the WH. Then he for sure could get the slope to work. Actually if you live in an area with snow accumulation you HAVE to pitch it towards the appliance because outside you have to elbow up and elbow out higher than snow would accumulate. You cant have condensate pitch towards outside in that condition because it will fill the exhaust at the elbow, possibly freeze as well. What type of WH are you looking at so we can look up the installation? No you couldnt share with the fireplace. But now that I look at that rheem manual more I see a lot of flaws..... Page 42 they show what I was talking about above, but dont say to slope back to the appliance. Fail. Then Page 43 they show a vertical installation and say to put a condensate trap on the intake?? It should be on the exhaust... And only the intake gets the two elbows at the termination, not the exhaust. So, I guess the WH doesnt want the condensate going through the unit so they could instead install this condensate trap if you wanted to slope towards the unit. It would fit for sure then....See Morepurslanegarden
5 years agoJake The Wonderdog
5 years ago
greg_2015
5 years agoklem1
5 years agodadoes
5 years agokudzu9
5 years agoklem1
5 years agokudzu9
5 years agoweedmeister
5 years agoklem1
5 years agopurslanegarden
5 years agoJake The Wonderdog
5 years ago
Related Stories
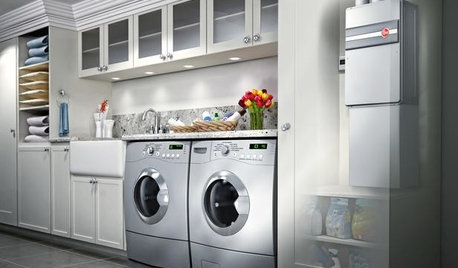
GREAT HOME PROJECTSHow to Switch to a Tankless Water Heater
New project for a new year: Swap your conventional heater for an energy-saving model — and don’t be fooled by misinformation
Full Story
GREEN BUILDINGJust Add Water: Rain Barrel Magic
Take your rainwater storage from practical to beautiful with a new breed of design-friendly rain barrels
Full Story
GREAT HOME PROJECTSHow to Add a Solar Water Heater
Lower energy bills without a major renovation by putting the sun to work heating your home’s water
Full Story
DECKSA Family-Friendly California Yard Wises Up About Water
Pavers and unthirsty plants replace Kentucky bluegrass in a Menlo Park landscape for a family of 4
Full Story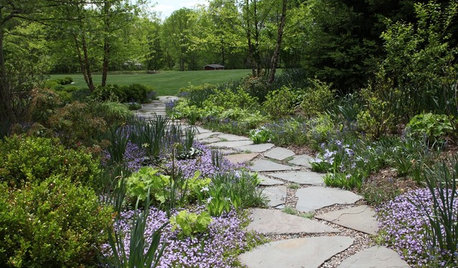
GREAT HOME PROJECTSWhat to Know About Installing a Walkway of Pavers and Pebbles
Find out how to get started, whom to hire, materials to use and costs to expect when adding a path of pavers and gravel
Full Story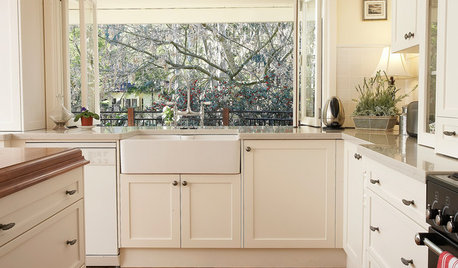
KITCHEN SINKSEverything You Need to Know About Farmhouse Sinks
They’re charming, homey, durable, elegant, functional and nostalgic. Those are just a few of the reasons they’re so popular
Full Story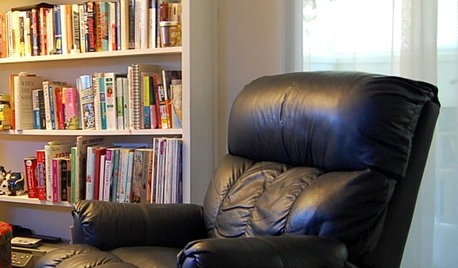
LIFEThe Beautiful Thing About Dad's Chair
My father had his own spot in the house. His father had his own spot. Now I have mine
Full Story
HEALTHY HOMEGet the Lead Out: Lead Safety at Home
Keep your family safe by properly testing for and dealing with lead in old painted surfaces, water and soil
Full Story
SAVING WATER11 Ways to Save Water at Home
Whether you live in a drought-stricken area or just want to help preserve a precious resource, here are things you can do to use less water
Full Story
HOUZZ TOURSHouzz Tour: Just Being Modest on Lake Superior
You don’t have to go all-out to have a retreat that’s all good, this Wisconsin vacation home shows
Full Story

kudzu9