


Ikea Sektion reviews?
rachelh916
5 years ago
Featured Answer
Sort by:Oldest
Comments (11)
Related Discussions
What are your thoughts on Ikea Sektion base cabinets?
Comments (51)Just chiming in - sorry for the lack of updates! It's been 2 years since our (very stressful!) kitchen renovation, but we're super pleased with how everything turned out. (I know you were asking about laundry-bathroom but just gonna write a general review in case others are interested.) We love our Sektion cabinets; the drawer-in-drawer came in super handy for storing things like medication, manuals/warranties, afternoon tea supplies, and lightbulbs/tools/odds&ends. On our stove side we use that drawer-in-drawer for lesser used or back-up cooking utensils (ice cream scoop, tongs, can opener, tea infuser, etc.). I did map out all of our storage when considering what size drawers/cabinets to get, and most everything fit pretty much as planned. For doors, we went with the Ringhult White. It was the most expensive at the time and made me super nervous, but we bought it during the kitchen sale and all the IKEA showroom staff said this was the top seller and best quality door they had. It also satisfied my need for a 'white-white' door, and provided a reflective surface that would help brighten up our lower level flat. No regrets. Easy to clean, no problems with scratching, steam, moisture, etc. I actually found some doors and drawers in the As-Is section at IKEA, so ended up saving $ by returning the brand new boxes for as-is items that were in perfect condition. (Hint: Even though the blue protective plastic on the doors might be scratched, when peeled off, the foil finish was still perfect / unharmed underneath.) We did have one problem with a faulty faucet leaking into the sink cabinet right after we installed it, unfortunately. This did create a little bit of bubbling in the particleboard but since no one is ever looking into the back of our sink cabinet except for future plumbers, and functionally the cabinet has held up just fine, I don't fault IKEA for this - I think any cabinet would have had some cosmetic damage if someone was pouring a cup of water onto it every night for two weeks. Also, we built all the cabinets and drawers ourselves, and screwed in all the handles as well. Though tedious, after the first few, you get the hang of it. There are a few details to watch out for (like how to position and nail in that plastic 'fat L' piece on the back) but overall this was inconsequential to the final result. Our contractor just helped us hang the cabinets on the wall (since I kept freaking out about how they could possibly stay up under all that weight)! Here are some After photos of our kitchen (a few are focused on the floor since I was writing a (very favorable) review on the wood-look tile we used). Pardon the mess... I wish we could live a Pinterest-worthy minimalist life, but alas... :P. Hope this helps and happy to answer any other questions! _____ P.S. One thing we forgot to get (that the IKEA kitchen staff forgot to tell us about) was the metal countertop support piece: https://www.ikea.com/us/en/catalog/products/70274628/?query=Countertop+support+fixture Most contractors are able to improvise if you forget about this -- we still ended up adding a sheet of plywood under the quartz -- but I think this helps 'lift' the countertop for sink installation and allows the drawers and doors to close properly. We ended up having to drive back to IKEA multiple times just to get enough of this $2.99 FIXA thing :(. My advice is to buy more and return the ones you don't use. Also, some of the hinges were annoying to install (mainly for the sink cabinet because our large sink got in the way) as were the soft-close dampers, but I had my local IKEA Kitchen department on speed dial, and also referenced many many YouTube videos. Good luck!...See MoreIKEA Sektion & Allstyle Cabinet Doors
Comments (42)@tmnca My floors are Goodfellow Original - Nature Series - Maple in Sierra The more you order, the more the price goes down. I paid a little over $4/sq.ft. It took me forever to find one I liked. I visited almost every flooring store in the nearby city. I literally spent months looking at samples. The sample of my flooring that I saw didn't have much variation but I like the colour. When I started opening the boxes for install, it had a ton of variation which was exactly what I was looking for so I was really happy. Opening each box was like Christmas for me haha! They look the best at night under my recessed lighting. It's almost as if it brings out features in the wood that you can't see in natural daylight. It does scratch easily though. Not scratches that you can see (although I did put a massive, extremely noticeable one in my kitchen but that was entirely my fault) but ones where if you look at them on an angle in the light they show up. Regardless, it's not going to stay perfect forever. I'm still in love with them. If you are installing flooring yourself and it has a lot of variation, it's not like just slapping down a floor. My husband and his cousins were doing it and I had to be there to select each piece to go down. It made it more time consuming but you don't want a bunch of plain pieces all bunched together. Just like the variations in the wood, you have to do variations across the floor. For places like the kitchen where the cabinets would be sitting, we put the most plain pieces down and saved the variation ones for places that you can actually see....See MoreHelp! Ugly plywood cabinets! Part II, Finally!
Comments (59)Note that wood filler will crack over time as the wood moves if you are intending to use it to fill cracks between wood pieces. You'll need to use caulk to avoid that and caulk can not be shaped and molded like the woodfiller. I had the plywood style cabinets you have, but in much much better shape and was just going to do a replace the doors and hardware and re-configure a bit because I saw in person how the added wood to the doors looked after a few years in my friends home (looked nice when just done and they did spend a lot of detail work on it). However since my boxes were built in large pieces I couldn't reconfigure and ended up completely replacing the boxes too.. This was my old house. In my current house we have plywood built cabinets that all looks nice on the surface, but are cheaply built IMHO. We've fixed slides twice, the doors are a bit warped, drawer boxes need some help soon. I also installed some IKEA cabinets in our dining room which holds all my daughters toys. They get as much use as our kitchen cabinets and have held up so much better as well, plus they have been handled by little people who are not careful. They are low VOC and has the nice bells and whistles of full extension soft close drawer glides and soft close doors. I really want to switch my kitchen cabinets to IKEA, but for me to do that I need to come up with a better layout to satisfy the other issues with my kitchen. Unfortunately for you it doesn't look like cabinet grade plywood was used on your cabinets due to the roughness which is another huge difference between yours and irmaly's starting point. If you insist on keeping the boxes vs. getting the nice bells and whistles you could with IKEA cabinets, then at least save yourself the frustration and get some new doors/drawer fronts and also some new drawer boxes. In my old house I used Scherr's to replace the doors in my 2 bathrooms and for a master vanity I built and used all wood in poplar - a cheaper paintgrade wood if you want to avoid the MDF. However having MDF as the center panel in a door makes the door more stable and less prone to wood changes with humidity. I agree with most though that starting from scratch would be worth it vs. the amount of time you'll spend on what you have and then how long it will last after that. You'd also have a better starting point with new cabinets and re-configuring the space. Sure you can do what you want and end up with it looking a whole lot better- but you said you were short on time and working with what you have is going to take a long time to make it look pristine. That is a lot of filling and sanding needed. Never mind how you plan to fix the edges so it looks good. That line would bother me to see the line between the applied wood and then the ratty edge underneath that will need a lot of work to made look good again. Sure you wouldn't see it when closed and looking straight at them, but when open or from the top or side it will be hard not to notice. Also are your existing doors the right overlap to be able to change to concealed hinges?...See MoreIkea Sektion Kitchen- Filler needs
Comments (5)"Everything you wished you knew about trimming out Ikea, but didn't know to even ask" regarding IKD, that's a great idea, bubblyjock. here is a photo from their website that demonstrates some filler/trim issues: https://inspiredkitchendesign.com/spacious-ikea-kitchen/ https://inspiredkitchendesign.com/wp-content/uploads/2018/01/After-3-1000x750.jpeg starting at the left side of the photo: 1. first cabinet to left of microwave There is a trim piece under the cabinet, also called "light rail' there appears to be a metallic customization on the light rail (I think...) I'll bet you can do this with automotive tape (??) would love to hear someone else weigh in on this. 2. microwave there is a thin end panel on both sides of the microwave, these are wall end panels. there is also a strip of filler between the microwave and the cabinet bottom, this can be done with thin end panels, light rail, thick end panel, or toe kick filler, depending on how you want it to look. You can recess this filler to the level of the cabinet box or bring it flush with the door fronts, in this case it appears to be recessed. *** this item is a customization, if you use the IKEA planner, there will be no way to place this trim piece, you will have to account for it and plan for it separately. You can use a strip of an end panel, leaving more finished edges for other creative uses. 3. over the sink each side of the over-sink cabinet has a side panel, and there is light rail trim under the over-sink cabinet. 4. ceiling there is filler above all of the cabinets at the ceiling line. This is generally done with toe kick, however, it is recessed to the level of the cabinet box. If you want a different look, you can overlay slivers of cabinet doors, or slivers of tall panels over this trim to bring it flush with the cabinet door - different look. 5. inside corner there is filler - either toekick or panels, at 90 degree angle on upper and lower inside corner. Again, here you may create a different look by overlaying slivers of cabinet door fronts or side panels. *** if you wish to do this pay attention to the thickness of the two types of side panels and the door fronts and make sure you are applying matching pieces, especially for a high end modern/uniform look. I did find it worth the money to buy additional door fronts for this type of filler (door fronts are > $$'s than panels/toe kick). *** if you are using wood grain, pay attention to direction of the grain on the panels/door fronts if you are concerned (read "obsessed") about uniform look (ask me how I know this...) 6. Fridge Notice the flanking tall panels, the over-fridge cabinet is a bridge between these panels. you may not notice that there is also a panel under the over-fridge box hiding the cam hardware that is used to put the cabinet together. *** this under cabinet panel is not included in Ikea planning software, you will need to account for it separately. Just as with the microwave, you can recess the front edge of this panel or bring it flush with the cabinet doors for a different look. *** be really careful when you order your fridge, make sure to look at how tall the TOP edge of the hinge is so that it clears the underside of the over-fridge cabinet, you may or may not have space for additional trim panel. the fridge in the photo looks short-ish. I also don't really like that huge gap between the fridge and the cabinet bottom. this can be trimmed out. 7. toe kick nothing to say, but you do need it. 8. buy at least 1 extra tall end panel if you have space to store it. This will accommodate possible future changes. It may also potentially save you from nuclear disaster. well, maybe not. 9. now that you have a new-found appreciatio n of filler/trim/panels, spend some time looking at Sneidero, Bulthaup, and other higher end European brand web sites and think about how they use their trim pieces to achieve certain looks. You can do the same with Ikea for a fraction of the cost....See More
rachelh916
5 years agonosoccermom
5 years agoUser
5 years agolast modified: 5 years agoUser
5 years agolast modified: 5 years agoMittens Cat
5 years ago
Related Stories
PRODUCT PICKSGuest Picks: 21 Rave-Review Bookcases
Flip through this roundup of stylish shelves to find just the right book, toy and knickknack storage and display for you
Full Story
KITCHEN CABINETSCabinets 101: How to Choose Construction, Materials and Style
Do you want custom, semicustom or stock cabinets? Frameless or framed construction? We review the options
Full Story
PRODUCT PICKSGuest Picks: Score Points With a Minecraft-Inspired Bedroom
Get rave reviews from your kids with bedroom furniture and accessories that stave off zombies and have winning style
Full Story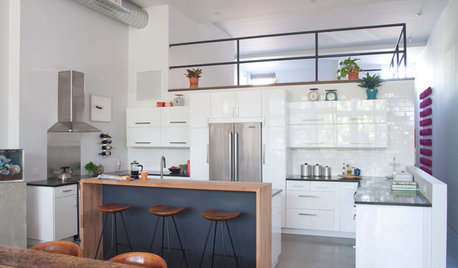
ROOM OF THE DAYRoom of the Day: Custom-Kitchen Look on a Budget
An artistic New York City family enlists the help of a skillful designer to create a customized built-in appearance using Ikea cabinets
Full Story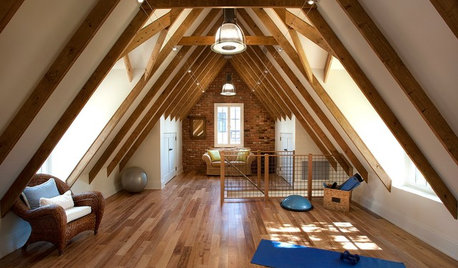
MOST POPULARHow to Refine Your Renovation Vision to Fit Your Budget
From dream to done: When planning a remodel that you can afford, expect to review, revise and repeat
Full Story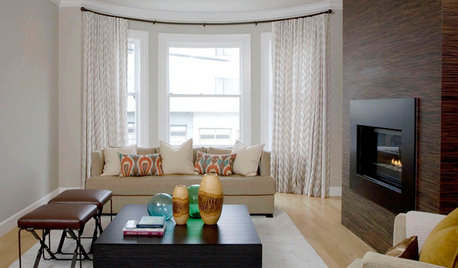
DECORATING GUIDES7 Home Purchases Worth the Splurge
Make buyer's remorse over furniture, textiles and more a thing of the past with this wise purchasing advice
Full Story
PRODUCT PICKSGuest Picks: Freshen Your Furniture With Slipcovers
Make a clean break with fussy, unwashable fabrics. These slipcovered furniture pieces let you keep things spotless with little effort
Full Story
TASTEMAKERSModko Litter Boxes Address the Mess
A design duo has reinvented the much-maligned cat box, with an award-winning result
Full Story
MOST POPULAR5 Remodels That Make Good Resale Value Sense — and 5 That Don’t
Find out which projects offer the best return on your investment dollars
Full Story
HOUZZ TOURSMy Houzz: Stylish, Family-Friendly Remodel in Pennsylvania
This family with four growing boys renovated their Victorian home to make it both functional and beautiful
Full Story
User