


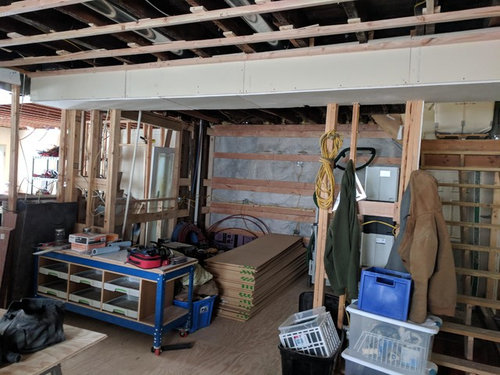
How to Make Ductwork/Soffitt/Bulkhead Less Ugly...
Emi C
5 years ago
Featured Answer
Sort by:Oldest
Comments (15)

ci_lantro
5 years agoRelated Discussions
Ugly 1973 bathroom finally gone! (pictures)
Comments (7)Thanks for the compliments. I'm pleased with the Moen fixtures. Moen has a good warranty, they stand behind their products, and parts are easily obtained if needed. The handles turn smoothly and the water pressure is perfect. The shower curtain is the old one, which can be seen partially in a couple of the before pictures. It is pretty and looks even prettier now. I might change it though. I have a luxurious looking white one I might use, see www.bedbathandbeyond.com/product.asp?SKU=14710922. The original vanity was 59" with two sinks. We were going to get a 60" with two sinks, and replace the pony wall with a narrower one. I saw a neighbor's similar bathroom that was remodeled earlier this year. When I saw how spacious it looked the with 48" one sink and no pony wall, I decided to do the same. I also considered how DH and I use the bathroom, which is never at the same time. Also removed were the bulkheads above the vanity/toilet and tub. The smaller vanity with one sink does have more counter space than the 59"/60" with two. Seems like there's more room for better organized storage. The one piece vanity top and sink is easier to clean too. There's also a place for a wastebasket on the left side of the vanity, instead of in front like before....See MoreNeed to install ductwork finally, your help is appreciated.
Comments (26)two things... we both live in extreme climates. 1)we don't put ducts in exterior walls because of heat gain, you for cold gain. 2)we install ductwork on interior walls and blow the air to the exterior walls. old school (25+ years ago) locating supplies in ceilings next to windows was standard. the grills would blow the air to the window. nowdays we have more knowledge..if we take advanatge of educating ourselves..and understand that blowing warm air on a cold window leads to condensation. with better supply grills we can put the air exactly where we want it to go. gotta love 4 way supply grills! putting ductwork inside conditioned space in false boxing over cabinets..or building boxing (fur downs) might work in your application. it mostly depends upon the layout. if the closet you plan to use is centrally located, the the bottom of the closet is return, the middle is equipment, and the top supply plenum & ducts. with this configuration you need to determine if there is a pathway to serve all rooms. having that simple drawing of the layout would be helpful. if you can't post it, email it to me & I'll post it for you. would a mitisibushi mini split heat pump meet your requirements? "an after thought if I can find the highest blower I can get maximum cfm could I get away with all ceiling registers?" how? build fur downs at ceilings for ducts? not quite clear on this after thought! how's the temps there today??..we are in mid 60's.. a little cool spell after high 70's last week. best of luck....See Morehiding ductwork for island exhaust hood
Comments (22)a false beam is a good disguise. We cannot say if it matches the rest of the house. If the galvanized steel ductwork has to be tacked on to the ceiling, then any dropped ceiling, or dropped section, or soffit-looking thingie, or beam-looking disguise, is a good way to cover it. You can paint it too. You can wrap it with anything and call it done. It's definitely a problem to work around. In your second post, ramica, you mentioned a 2 inch gap. I think this is a better problem to work around. I think this is worth a lot more attention. My hunch is that a good answer is somewhere here. If the ceiling is not a concrete slab, it is made of joists, and is almost entirely hollow between the joists. The direction the joists go is the same direction that your ugly metal duct can go, too, for the first few feet. It might not matter at all if that direction is perpendicular to the direction you want. When the duct nears a wall, a transitional piece of ductwork can turn the air stream 90 degrees. This transition piece matches up to a run of standard size duct work that travels along the wall-ceiling junction (which can be covered by a soffit) over to the exterior wall hole where the duct is to go outside. http://en.wikipedia.org/wiki/Soffit ....formed as a ceiling .... fix underneath .... underside of any construction element "boxing it in and painting it white" is a soffit. In a kitchen a soffit can become the place for pot lights directly overhead of the workspace (countertop). So, this is worth considering. A 3.5" by 10.5" rectangular duct is the right size for a flow of air much smaller than your 600 CFM flow. A 3.5" by 10.5" rectangular size of duct is good for rental apartments with electric coil stoves and cheap exhaust hoods. ( ... "I am told the ductwork should be 3 inches high by 10/12 inches wide." ...) A 600CFM stream will need a larger duct. The right duct size is specified by the manufacturer. It will be in their product's PDF on their web site. What size round duct is it? I'd say 8" is my guess. It could be another size. Transitioning to an appropriately sized rectangular duct is easy once you go get the right information. Snoonyb posted in the first reply you got in this thread, asking about joists. Your answer was the wrong one. The next post from someone was from loves2cook4six who asked the same question that snoonyb asked, although the question was worded SO differently that it might appear to be unrecognizable. Then you mentioned a new beam, going the other way from the joist direction. I believe there is a way to go through the support beam "from the addition" even though it is running the wrong way. In the remodeling forum you will get experts telling you how to reinforce a beam in such manner as to allow you to cut a hole through it. I believe there is a way to send the duct through the empty space above the new beam and between the joists. This may be the optimal path of study for you today. Remember that the new beam is perpendicular to the set of joists in the ceiling, and it does not fill the empty space that is still there and just as much available as it was before the new beam arrived. Hth...See MoreHow to make the kitchen look modern with little money?
Comments (51)Besides removing the bulkhead and valance, and painting the window frame, there are two items to focus on, the stove elevation and the island. Consider the following: At the stove area, remove the four overhead cabinets. Add open shelves where the far right and far left cabinets are and have a stainless steel backsplash cover the entire wall to the height of the sink window. See pic below. Consider not painting the cabinets dark, which will again date and confuse the space. Paint all the cabinets a light grey (as suggested above) or off white, no antiquing. The satin nickel bar pulls can stay, or you might want to consider brushed gold at a later date, an easy change. Add cabinets at the top of all the cabinets on the oven wall to the continue the horizontal line of the top of the sink window > stainless steel backsplash wall at the stove top > cabinets over the oven wall. On the other side of the kitchen, pop out those panels on the overhead cabinets only, and install clear glass and lighting. Replace the interior solid shelves in those over head cabinets with glass shelves. This to be done on this side of the kitchen only. For the island, consider a vibrant color or navy blue. Add a 15" deep wood counter ledge at the back end, mounted under the stone top and add 2 to 4 stools. Remove the hanging light over the sink, and install some overhead ceiling lights. Add great pendant lights over the island only. Grey and tan always look fresh and smart. With the tan floors and stone tops that color combo will work nicely. Focus on the stove area and the island and let everything else fall back. ^ ^ ^ Stove wall only. Backsplash on this wall can be stainless steel, dark tile or small "chicklet" glass tile. ^ ^ ^ Pale gray cabinets - dark island - interesting island pendant ^ ^ ^ Off white cabinets - medium gray island^ ^ ^ Navy blue island ^ ^ ^ Note great idea for ledge at island: Simple wood parsons table slid over island. ^ ^ ^ Note wood ledge detail ^ ^ ^ Consider bright color island and off white cabinets^ ^ ^ On opposite wall consider glass doors on upper cabinets at this wall only with interior lights, glass interior shelves and undercounter lighting. Paint lower cabinets same as all other painted cabinets (pale gray or off white). The reason to consider off white, instead of bright white, is to soften the transition to the existing floor and counters. Focus on the stove wall and island....See Morelisapoi
5 years agolast modified: 5 years agoci_lantro
5 years agoEmi C
5 years ago
Sammy
5 years agolast modified: 5 years agoci_lantro
5 years agofunctionthenlook
5 years agolisapoi
5 years agolast modified: 5 years agoSammy
5 years agolast modified: 5 years agolisapoi
5 years ago
tfitz1006
5 years agolisapoi
5 years ago- PRO
Patricia Colwell Consulting
5 years ago Lyndee Lee
5 years ago


Related Stories
BATHROOM DESIGNHouzz Call: Have a Beautiful Small Bathroom? We Want to See It!
Corner sinks, floating vanities and tiny shelves — show us how you’ve made the most of a compact bathroom
Full Story
KITCHEN DESIGNKey Measurements to Help You Design Your Kitchen
Get the ideal kitchen setup by understanding spatial relationships, building dimensions and work zones
Full Story
WORKING WITH PROSYour Guide to a Smooth-Running Construction Project
Find out how to save time, money and your sanity when building new or remodeling
Full Story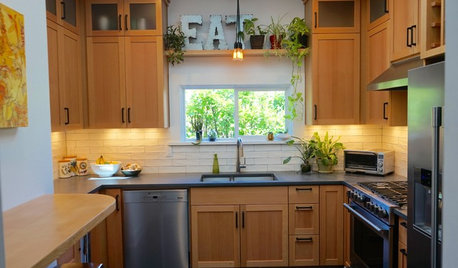
KITCHEN OF THE WEEKKitchen of the Week: Scads of Storage in 110 Square Feet
Farmhouse, modern and eco-friendly elements meet in this Pacific Northwest home
Full Story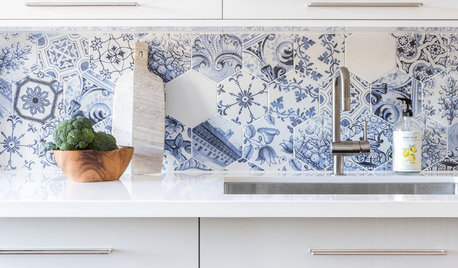
KITCHEN BACKSPLASHESNew This Week: 3 Wildly Patterned Kitchen Backsplashes
Looking to add a pop to your kitchen? Try introducing some bold color in a complex pattern
Full Story
HOUZZ TOURSHouzz Tour: Caribbean Villas Inspire a Toronto Home
Light textiles, white walls, distressed wood and clean lines capture the essence of the island style these homeowners love
Full Story
FLOORSFloors Warm Up to Radiant Heat
Toasty toes and money saved are just two benefits of radiant heat under your concrete, wood or tile floors
Full Story
lisapoi