


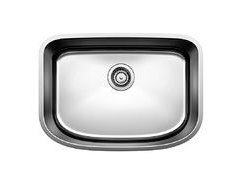
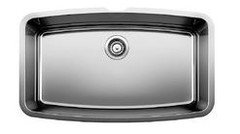
Help me find a SS undermount sink that's NOT zero radius
Renov8or
5 years ago
Featured Answer
Sort by:Oldest
Comments (9)
 PRO
PRORenov8or
5 years agoRelated Discussions
Bill V - Tile undermount sink help!
Comments (7)Unfortunately they don't offer any quarter round pieces that I could use to trim out a sink with. Well, have I gotta the gooda noosa fuhyou!! :-) Because you're using a thru- body color porcelain (which means it's unglazed and the body of the tile is the same color as the finish) you can bullnose the edge of it in exactly the same manner as marble or granite!! Now, I've never worked with a swanstone sink. The only thing I've ever undermounted was a stainless sink, which only has a flange about 1/16" thick, and can be "sunk" into the countertop substrate and epoxied in place, and then tiled over. if your contractor can come up with a way to mount that sink so it's flush to the top of the finished substrate, then I can tile over it to it's edge. For the sake of argument, I'll assume that the sink's in place and the countertop's ready for tile (I've posted a link to my backsplashes and countertops page below for instructions on how to make the counter's substrate strong enough). You want to get your exact tile layout and lay pieces in place where you want to make your cuts. Once you've done that, you want to take the template that comes with the sink, and lay it over the tile, so you can trace it out. You'd do well to use either a "china marker" in a color that contrasts the color of your tile to make your marks. Not only will it show up nicely and mark the tile easily, but it won't wash off under the wet saw, later. If you notice the red marks on the template in the picture above, that's from "sharpening" the china marker I was using. You want to make as accurate a mark as you can, because these marks will determine what the finished product will look like (If you look close, you'll see that the second pic was actually taken first, and in the first pic above, you can actually see the marks already drawn out). Once you've marked all the tiles, it's time to cut. Now, the straight cuts are easy. Anyone who knows how to turn a wet saw on and off and can follow a line can cut those. It's the radius cuts that take some patience and time. First thing you want to do is to is make as many straight cuts into the piece to remove the "meat" of the waste as possible. Start by going point to point, one side of the cut to the other. Then you can "V" cut into the middle of the radius. after that, you can cut "fingers" from the outside edge into the radius (cut strips 1/4" wide that can be knocked off by tapping them afterward). Once you've got as much of the waste cut out as you can, now it's time to move the saw tray out of the way, and grind the rest down to your lines, using the side of the saw blade's edge. One thing to keep in mind, and this is EXTREMELY important-- you want this cut to look EXACTLY the same from the back of the tile, as it does from the front. if it makes it any easier to understand what I'm saying, the radius of the blade is working against you. The reason for this is that it's actually the BACK of the tile that needs to show the cut to the line you drew, because that's what's going to show, once the piece is finished. The top edge is going to get "bullnosed" off. Once you've got all your pieces cut, now it comes time for the fun and interesting stuff. Normally, I'll tell people, when doing granite, to take their pieces to a stone shop, because the cost of the tools is so cost prohibitive. But with porcelain, you don't need granite pads. Marble pads which are MUCH cheaper, will work fine. All you need is any standard 4 1/2" single speed grinder (about 70.00), and a set of PVA Marble pads (about another 80.00). I'll post the web address where you can find them on line at the end here, because I don't know how to post "in text" links. Anyway, you want to take a couple of pieces of scrap and practice with them, because although you can't hurt the porcelain the way you can stone, it's still easy to screw up in several different ways if you don't get yourself used to using the tools and how it feels. Once you get started, you want to take the grinder with a dry diamond continious rim blade, and take a light pass just to knock the corner off the edge. Once you've done that, it's time to start going thru the pads. Start with the extra coarse to shape the bullnose. Don't try and finish the whole thing with that first pad. Just give it its rough shape, and then move up the line to the next pad. WIth each progressive pad, you should be able to see the bullnose edge begin to take shape. By the time you're into the medium pad (the 3rd pad in the set), you should be completely done shaping, and concentrating more on taking out the scratch marks from the previous pads, and once done with the medium pad you'll have a pretty good honed edge. Once they're done, it's just a matter of setting them in place. here's the web page that has the PVA polishing pads: http://www.masterwholesale.com/details/1155670447.html Here is a link that might be useful: my website's backsplashes and countertops page...See MoreHelp finding castiron undermount sink for 33" base
Comments (7)Still, I only have a 27 inch sink base and the Kohler web site contains a typo that I asked them to correct. They said my sink needed a 36 inch base, it is only 25 by 22. As it seems with everything in this project, I still received wrong info in an email from them so I called. After a long while on the phone, a tech confirmed the sink should fit in the 27 base, should, no guarantee. We did have to carve the cab, a big no no, but this is one of those things everyone does so I am told. A large sink and a DW was important to me and I have a small space. Why don't you call Kohler before you cancel anything. I really wanted a white sink and still feel it was a gamble but it did fit after Dh carved the cabinet. I did get words from the granite fab about how large the sink was but they are working around it. Something to keep in mind is how heavy a cast iron sink is. Mine is still supported by the cab. There is also some good info on this forum about getting the bigget sink into the cab that you can. Good luck!...See MoreSS Undermount Sink/Farmhouse Feel
Comments (11)Can you explain what you meant by "Because of the width and length of the kitchen, I have opted to do an undermount sink instead of a farmhouse"? Does that mean that you think an apron front sink's size is an issue? You can get an apron front sink with a more farmhouse/traditional feel in several widths if your comment meant that size was a concern. I am thinking specifically of the Kohler Whitehaven sink which is enameled cast iron, and comes in 30", 33", and 36" widths. Furthermore, the Whitehaven apron front sink comes in both the traditional/typical apron sink height, as well as a shallower apron height for a less massive look. The corner drain also is great. I've had stainless steel sinks in past homes, and didn't like the scratches, water spots, and that it never again looked sparkly after about the first week or two. Kohler Whitehaven sink line...See MoreUndermount SS sink - silicone adhesive reapplication?
Comments (15)SmileyGirl -- In the grand scheme of things, that wasn't even on my radar (which gives you an idea of how badly things have gone!). I guess if this method holds the sink up, that's all I need. Big IF! (While poking around, I noticed that one of the four strips wasn't actually touching/supporting the sink flange up top.) I still plan on installing a HUSH per Trebuchet's past recommendations. I know this is something the installer should be doing, but it's very hard to argue with these guys who generally take a "we'll have to agree to disagree" attitude....See More- PRO
Renov8or
5 years ago


Related Stories
BATHROOM DESIGNHow to Choose the Right Bathroom Sink
Learn the differences among eight styles of bathroom sinks, and find the perfect one for your space
Full Story
KITCHEN DESIGNWhere Should You Put the Kitchen Sink?
Facing a window or your guests? In a corner or near the dishwasher? Here’s how to find the right location for your sink
Full Story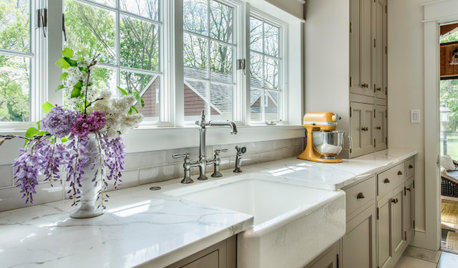
KITCHEN DESIGNHow to Choose the Best Sink Type for Your Kitchen
Drop-in, undermount, integral or apron-front — a design pro lays out your sink options
Full Story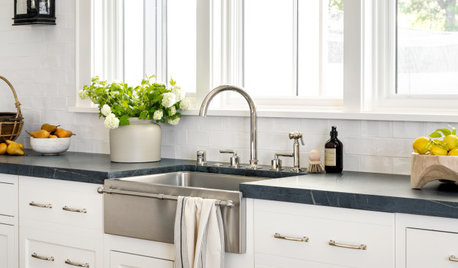
KITCHEN DESIGN8 Kitchen Sink Materials to Consider
Learn the pros and cons of these common choices for kitchen sinks
Full Story
KITCHEN DESIGNWhite Appliances Find the Limelight
White is becoming a clear star across a broad range of kitchen styles and with all manner of appliances
Full Story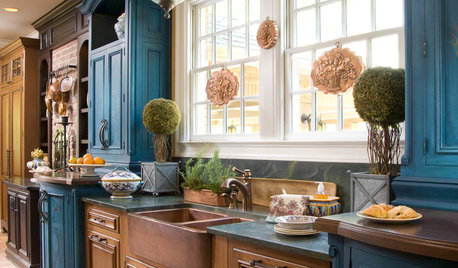
KITCHEN DESIGNKitchen Sinks: Antibacterial Copper Gives Kitchens a Gleam
If you want a classic sink material that rejects bacteria, babies your dishes and develops a patina, copper is for you
Full Story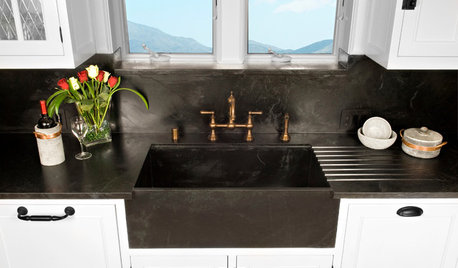
KITCHEN DESIGN8 Apron-Front Sink Styles for Kitchens of All Kinds
Simple or showy, matching or contrasting, apron-front sinks are popping up in kitchens far from the farm
Full Story
KITCHEN SINKSWhich Type of Kitchen Sink Should You Choose?
Learn the pros and cons of common kitchen sink styles and materials
Full Story
MOST POPULARHow to Choose the Right Kitchen Sink
Learn about basin configurations, sink shapes, materials and even accessories and specialty sinks
Full Story
KITCHEN DESIGNKitchen Sinks: Stainless Steel Shines for Affordability and Strength
Look to a stainless steel sink for durability and sleek aesthetics at a budget-minded price
Full Story

vinmarks