


Pre-fab triple plaster wall without studs
millycs
5 years ago
last modified: 5 years ago
Featured Answer
Sort by:Oldest
Comments (9)
Related Discussions
Screwing in picture rails to studs so we can hang heavy pictures?
Comments (19)Quite frankly it would be easier to make the drive and hang the mirror / picture/ piano or whatever than to write a step by step description on hanging a cleat system but here goes ONE: Locate and mark a level line where object is to be hung on wall, TWO: Pre-drill the wall side cleat for the number of anchors that is determined to be used, for a 40# mirror that is lets say 24" wide I would suggest 3 alligators. http://www.toggler.com/products/alligator/installation.php or sharkies: http://www.powers.com/product_07585.php One in the center and one on each side 3" - 5" inches from the ends, place the cleat at the the marked location and using a pencil through the holes mark the wall then set the cleat aside and using a 1/4" masonry bit drill through the plaster ( if you are lucky you could hit lath and wont have to use the anchors, just drywall screws ) insert the alligator and gently tap in with a hammer until flush to the wall (check the manufactures instructions). Using flat head screws tighten the cleat to the wall. THREE: Locate the other half of the cleat to the object being hung and attach it using an appropriate sized flat head screws and place your object just above the wall cleat slide it down and your done. Make sure that you understand the cleat system: http://www.google.ca/search?q=%22french+cleat%22&hl=en&num=10&lr=&ft=i&cr=&safe=images I have literally used thousands of the alligator wall anchors in all sorts of materials and as far as I know there was never any failures with them. Stud attachment isn't necessary for this hanging system... the plaster literally does the holding...See MoreWhat would you do? Plastic tile on old plaster walls
Comments (18)I had the same plastic tile in a rental! After I took it off, it took about a gallon of joint compound to level the walls, and even then...those were my newbie days. So dumb I used ready patch instead of mixing up some good stuff that I could breathe while using. The house had been moved three blocks in the 50's and the walls were really off, above and beyond anything my simple patching could do, so I added textured wallpaper in a nod to the lincrusta/analgypta style (except it was the 12.50/roll stuff from HD because my landlord was thrifty-minded): Wish I had a picture without the sagging oak leaves and with the chair rail we eventually added. We enjoyed that bathroom for a good three years until we finally bought our own fixer. And I was glad for the practice on that place; gad what a newbie I was (and I'll be saying the same thing of myself now in 5 years). but at least thanks to casey, worthy, brickeyee, and macv, I use the right stuff on plaster now (bonding agent, durabond, and sometimes easysand, depending on the situation). Anyway the lincrusta look worked very well for us. We painted it with BM blue lapis, then bought the bottom of the color strip (darkest, I think it was simply called Navy or Blue), mixed 50/50 with glaze, and rolled on, then wiped off with paper towels until we had the tone-on tone look we were going for. Man I loved those walls, and got lots of compliments. They were inspired by the bar in the the British show As Time Goes By, if you ever saw that one. Except those were a brownish red instead of blue....See MoreRepairing holes in plaster from plumbing repair work.
Comments (12)Zenpotter, I would never try to discourage you from repairing your bathroom walls with authentic lime putty, reinforced with horsehair, and smoothed out with a wooden float. My understanding is that 100 per cent lime putty takes about one year to fully cure. Regardless of what type of finish is applied, it will be necessary to fasten some sort of lath, such as wood lath, or wire lath, or rocklath, to the structure of the house. This is generally done with nails. You might have to actually remove more of the original plaster, in some places, to get good access to a wooden beam or stud, in order to securely attach the lath as needed. If you decide to use sheetrock as your backing for finish plaster, then it will be necessary to coat the sheetrock with an adhesive, after it is installed, but before the finish coat plaster is applied. However, if wood lath or wire lath is chosen, then you can apply a modern base coat plaster, pre-mixed. The pre-mix base coat will very likely contain chopped fiberglass to improve its strength, instead of horsehair. Since chopped fiberglass is not so good to breath, you should use come care when mixing this with water, to avoid raising a cloud of dust. Base coat plaster will set up in less than an hour, and can be coated with finish plaster the same day, if necessary. There is no great skill involved in application of base coat plaster. You have to mix it with reasonable care, and press it in place with sufficient force that it penetrates the lath, and binds firmly to the wall or ceiling. It needs to be troweled reasonably flat, and should be slightly below the intended surface plane, so there is some allowance for finish coat plaster. Base-coat does not have to be perfectly flat, or free of tool marks. Finish coat plaster is made from slaked lime and gauging plaster(aka plaster of paris). High quality type S finish lime, made from dolomite limestone, is easy to work with and gives good results. Finish coat plaster application is a learned skill, and not easy to describe in detail. As soon as the plaster is mixed, it begins to set up, and will harden in less than 30 minutes. You have to work fast, and there is a limit to the size, in square feet, that can be done in one mix. If the base-coat plaster is fresh, and still damp, then no misting will be required. If the base-coat has thoroughly dried out, it will rob moisture from the finish coat plaster, and interfere with both application and cure. Misting the base coat with water, before troweling on finish coat, will prevent this problem. If you decide to teach yourself how to apply finish coat plaster, my suggestion is to start with an area around one square foot, for your first trial. With initial success, you will gain confidence, and can begin make larger mixes, and plaster larger areas. The wall doesn't care if it gets plastered in small increments or in one fell swoop....See MoreDo the studs in a 1950 colonial house have rough or milled studs?
Comments (21)I have found stud finders to be less than reliable There are two types of stud finders. The 'simple' ones are just a magnet that twitches when it gets close to a nail. Those are pretty reliable, but you are finding the nails, not the stud. The other type is electronic and I believe it detects the density of what it's placed on (or something like that). With those types, you usually choose the thickness of your drywall and then you can locate the exact edges of the studs. I've had great success with this type on drywall, but in my experience they don't work very well with plaster. Maybe the plaster/lath is too thick for the detector to differentiate between it and the stud? Or maybe I just didn't have a good enough stud finder....See More
millycs
5 years agomillycs
5 years agomillycs
5 years ago
Related Stories

REMODELING GUIDES11 Reasons to Love Wall-to-Wall Carpeting Again
Is it time to kick the hard stuff? Your feet, wallet and downstairs neighbors may be nodding
Full Story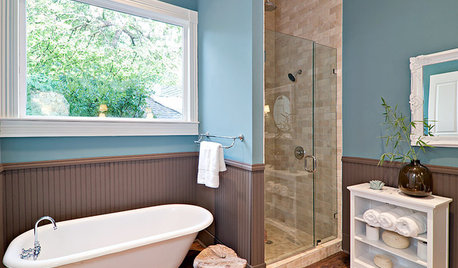
4 Easy Ways to Renew Your Bathroom Without Remodeling
Take your bathroom from drab to fab without getting out the sledgehammer or racking up lots of charges
Full Story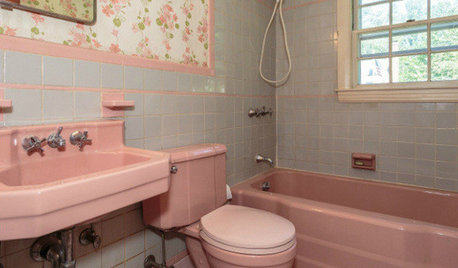
BATHROOM COLOR8 Ways to Spruce Up an Older Bathroom (Without Remodeling)
Mint tiles got you feeling blue? Don’t demolish — distract the eye by updating small details
Full Story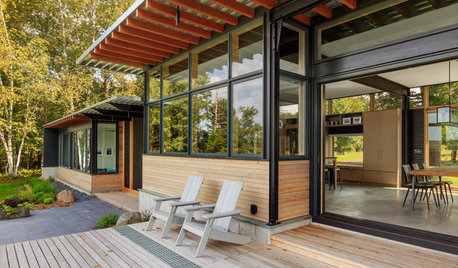
LIFE6 Ways to Cool Off Without Air Conditioning
These methods can reduce temperatures in the home and save on energy bills
Full Story
REMODELING GUIDESOne Guy Found a $175,000 Comic in His Wall. What Has Your Home Hidden?
Have you found a treasure, large or small, when remodeling your house? We want to see it!
Full Story
NEUTRAL COLORSHow to Bring Beige Walls to Life
Go for sprightly instead of snoozy by pairing beige walls with higher-octane hues
Full Story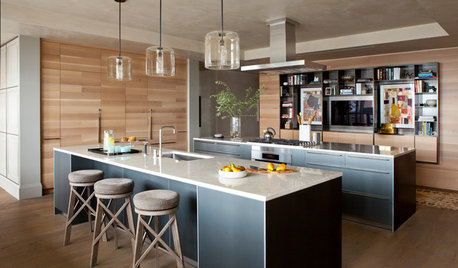
KITCHEN STORAGENew This Week: 3 Kitchens With Hardworking Storage Walls
Push storage components to the wall to free up space for a large island with a big work surface
Full Story
HOUZZ CALLEver Found or Left a Note in the Wall the Way This Couple Did?
The remodeling couple whose note from previous homeowners went viral tell us about their fun find. What’s yours?
Full Story
KITCHEN DESIGNSingle-Wall Galley Kitchens Catch the 'I'
I-shape kitchen layouts take a streamlined, flexible approach and can be easy on the wallet too
Full Story
DECORATING PROJECTSDIY Project: Wallpaper Goes Mobile
Paper Plywood Panels for a Great Look That Can Move When You Do
Full Story


tatts