


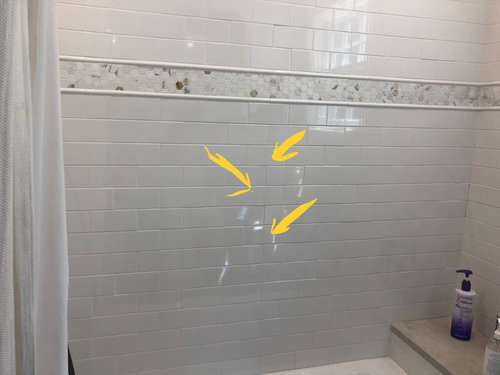
Hairline crack on shower wall (vertical)
Celine Sellam
5 years ago


Featured Answer
Sort by:Oldest
Comments (65)
 PRO
PRODragonfly Tile & Stone Works, Inc.
5 years ago
chiflipper
5 years agolast modified: 5 years agoRelated Discussions
Hairline cracks in grout in shower walls
Comments (3)It's not anything to really worry about, in that being grouted, it's guaranteed to crack due to movement. However, yes, you should call your GC and let him know you want ALL the grout removed from those corners, and replaced with a siliconized latex from the same company as the grout, and in the same color. DO NOT allow him to simply caulk over the grout, because it'll just peel right back off within a few weeks....See MoreHairline cracks in tile shower floor...
Comments (7)Staceyneil, thanks for the reply. I actually called the tile guy that regrouted my walls. He basically said the same thing as you. That the pan should take care of any water getting through the grout. But since living in the house for a year I have found things that the builder either did wrong or he cut corners. So I was just worried about how he built the shower. So I really have no idea what he used to build the pan with. As for the shower door. Once more thing that I did after blowing up the balloon to test the pan was to put a shower curtain on the inside of the door. This way when I showered no water could hit the shower door. When I did this the toilet paper stopped getting wet. So that is how I knew it was related to the shower door. So I started looking at the shower door. Well sure enough the previous owner has caulked over the weep holes in the shower door. So I thought to myself, where is the water going that gets into the bottom door track?? The threshold that the door sat on was not tile, but one continous piece of corian. There was caulk on each side of the threshole where the corian met the tile wall. So when I took the door off there was a small hole in the caulk right where the bottom track of the door met the vertical track of the door that goes up the tile wall. There was also a small gap between the bottom track and the wall track of the door. So to make a long story short. I think what was happening was water was getting into the bottom track of the door, leaking through the small gap between the bottom track and wall track, through the small hole in the caulk, and then leaking into the drywall....See MoreHairline cracks in brand new shower tile
Comments (10)Not a pro grout job. I had something similar, only worse, and it turned out that the backer board was not properly installed. It wasn't firmly attached to the studs. There was some movement and the tile cracked. The contractor come back and redid the whole wall, on his nickle. YMMV...See MoreHairline crack in shower wall tile
Comments (1)It's probably gonna fill with contamination and look nasty, but if your waterproofing is done correctly it's not going to leak. Try filling it with thin super glue before it gets bad. Did you get a plastic valve cover? That's how large the hole should be. I'll bet your tile is covering your escutcheon screw holes. If you've gotta recut the hole, you may as well replace the tile....See MoreCeline Sellam
5 years agochiflipper
5 years agoCeline Sellam
5 years agochiflipper
5 years agolast modified: 5 years ago- PRO
Dragonfly Tile & Stone Works, Inc.
5 years agolast modified: 5 years ago User
5 years agolast modified: 5 years agoci_lantro
5 years ago- PRO
Dragonfly Tile & Stone Works, Inc.
5 years ago Celine Sellam
5 years ago- PRO
User
5 years ago - PRO
GannonCo
5 years agolast modified: 5 years ago ci_lantro
5 years ago- PRO
Patricia Colwell Consulting
5 years ago Celine Sellam
5 years ago
millworkman
5 years ago
greg_2015
5 years agoci_lantro
5 years ago PROCeline Sellam thanked Franks Home Maintenance and General Contracting
 PRO
PROJoseph Corlett, LLC
5 years agolast modified: 5 years agoCeline Sellam thanked Joseph Corlett, LLCCeline Sellam
5 years ago PRO
PROHALLETT & Co.
5 years agoCeline Sellam
5 years agoUser
5 years agocat_ky
5 years agoCeline Sellam
5 years agomillworkman
5 years agolast modified: 5 years agoCeline Sellam
5 years agoCeline Sellam
5 years ago- PRO
User
5 years ago - PRO
HALLETT & Co.
5 years ago 
acm
5 years agoJeff Meeks
5 years agolast modified: 5 years agoCeline Sellam
5 years ago- PRO
HALLETT & Co.
5 years ago Jeff Meeks
5 years agolast modified: 5 years ago- PRO
Dragonfly Tile & Stone Works, Inc.
5 years agolast modified: 5 years ago - PRO
Celine Sellam
5 years ago- PRO
Franks Home Maintenance and General Contracting
5 years agolast modified: 5 years ago Celine Sellam
5 years ago- PRO
millworkman
5 years ago- PRO
Celine Sellam
5 years ago- PRO
Franks Home Maintenance and General Contracting
5 years agolast modified: 5 years ago Jeff Meeks
5 years ago


Related Stories
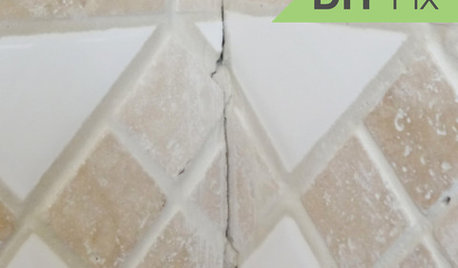
BATHROOM TILEQuick Fix: Repair Cracked Bathroom Grout
Banish an eyesore and safeguard your bathroom from water damage in 30 minutes or less with this DIY repair
Full Story
URBAN GARDENSBring More Green to Your Patio or Side Yard With a Living Wall
See vertical gardens that offer attractive — and creative — solutions to common design dilemmas
Full Story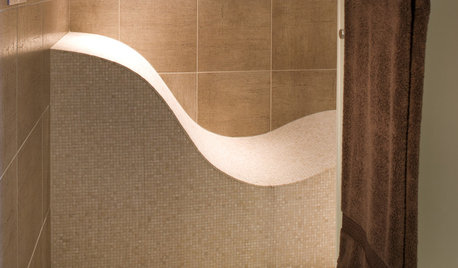
REMODELING GUIDESTop 10 Tips for Choosing Shower Tile
Slip resistance, curves and even the mineral content of your water all affect which tile is best for your shower
Full Story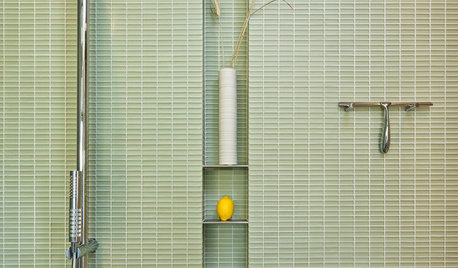
SHOWERS7 Stylish Ways to Stash the Shower Squeegee
Glass shower enclosures make this accessory a must, and there are many smart placement options
Full Story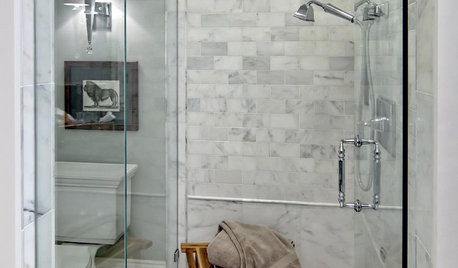
BATHROOM DESIGNHow to Settle on a Shower Bench
We help a Houzz user ask all the right questions for designing a stylish, practical and safe shower bench
Full Story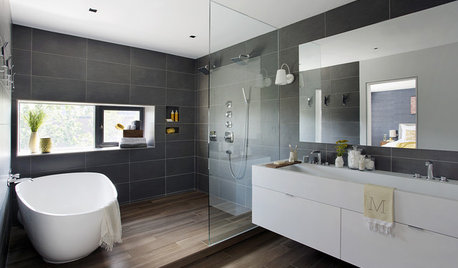
SHOWERSYour Guide to Shower Floor Materials
Discover the pros and cons of marble, travertine, porcelain and more
Full Story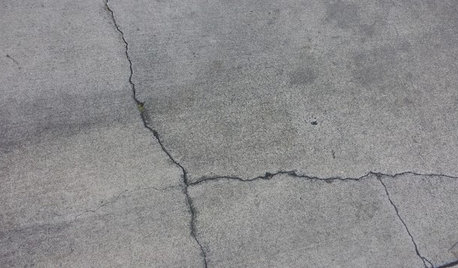
CONCRETEWhy Concrete Wants to Crack
We look at the reasons concrete has a tendency to crack — and what you can do to help control it
Full Story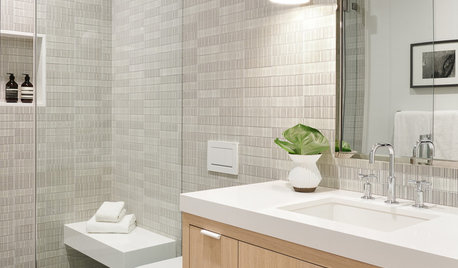
MOST POPULAR10 Stylish Small Bathrooms With Walk-In Showers
Get inspired by this collection of compact bathrooms that make a splash with standout design details
Full Story
MOST POPULARPhoto Flip: 50 Showers That Create a Splash
Find fresh inspiration in these bathrooms with mosaic and large-format tiles, pebble flooring and more
Full Story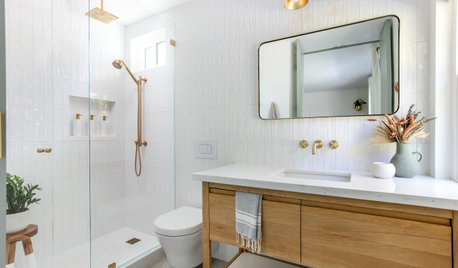
SHOWERS7 Steps to a Stellar Shower Design
Know the important things to consider before tackling your shower remodel
Full Story


Dragonfly Tile & Stone Works, Inc.