


Lighting Sources - Off The Beaten Path?
Holly Stockley
5 years ago
Featured Answer
Sort by:Oldest
Comments (89)

Holly Stockley
5 years ago
Kristin S
5 years agoRelated Discussions
Insulator pathway lights
Comments (15)kathyjb, Thanks for sharing. BUT, you almost need to be a bonafide electrician to figure that all out. Here's what hubby and I came up with. I got the cheap ($4 a fixture~~plastic connecter wire and bulb)) Malibu light from Walmart. Got a transformer ( enough to power up all each 3W bulb) and the landscape lighting wire (that can be buried in the ground. WE used 1 1/2" or 2" pvc pipe connected to go around the pond with "risers" for each insulator malibu light. We threaded the landscaping lighting wire up and continuously through each riser. We then took just the innards of the malibu light set up and connected them up to the wire (they fit just perfectly inside the risers). Topped with the insulator. Connected the landscape lighting wire to the transformer--and then plugged that into an outlet and WALLA---Insulator Malibu Lighting. I've only changed a couple bulbs since installation about 3 years ago. All I do is take off the insulator and change out the bulb. I'd love to do this in my front yard but do not want to invite vandals. I have everythign I need for it. Love, Jules BTW: Malibu Lights are a brand name. It was the original maker of outdoor landscape lighting. Here is a link that might be useful: Julie's Insulator Malibu Lights...See MorePermanent paths in intensively-gardened space
Comments (17)The issue Nancy describes of making the beds accessible is not unimportant, and that is why it is handy to have a garden cart that is sized to run over the beds. Some carts have a set of legs in front that don't permit this, but there are others that do, and it's not hard to fabricate something that will work. If you go to the Carts Vermont website and look at the different leg configurations between the medium and large sized carts you will see what I mean. Two wheeled garden carts aren't always a better choice than wheelbarrows, but in many cases, including capacity and balance, they are a vast improvement. In intensively gardened hoop-house operations they are an excellent tool. Both Eliot and I use drip and spray irrigation. The hose you see in the picture is a thin tube that runs from a larger feeder line, and the head is designed to create a fine circular spray pattern, for some crops, these are a good choice, but it is important that you are able to ventilate properly so the foliage doesn't remain wet for too long. With a little experimentation you will discover what height and pressure will allow you to irrigate the beds but keep the paths relatively dry... this all started with the paths, remember? Sprays also offer more cooling effect, which can be a real advantage when the greenhouse is hot but the outside air temps are colder than one would wish, so ventilation for cooling purposes is less than ideal. Drip irrigation is better for less dense plantings, where you have water emitted for individual plants. You can set up your sprayers with a quick-connect system that alternates with the drip tape, or you can install a Y-fixture with shut-off valves, or you can get much more elaborate. Timers are definitely handy. If you use drip irrigation, you will frequently have to remove it when you are doing certain chores. I generally just lift the far end and pull it over one of the support bars that form the roof trusses over the beds. When I'm ready to put it back I just stretch it back out over the soil and pin the end with a wire anchor to keep it in place. In winter, your will need to do very little irrigation - air and soil moisture levels are typically much higher, and transpiration rates lower. This is good, because it means your less likely to be experiencing the joys of frozen pipes. When you won't be using the drip, it is best to drain it and store it away from sunlight and extreme temperatures, and it will last for years. I prefer the perforated tape to the "weeping" hose, but your mileage may vary. If snow is an issue, and especially wet heavy snow, you may want to explore the possibility of having two layers of plastic with air blown in between the layers. This reduces light transmission slightly, but it provides a lot more insulation and adds a surprising amount of strength. Because the greenhouse stays warmer, the snow slides off more readily, and you will spend less time removing it. The best method I've found is to use a nylon-bristle broom to brush off the snow from the inside. Outside the greenhouse, it is good to leave a layer of snow up against the foundation, it actually provides good insulation, but you don't want it too high, because it puts a lot of pressure on the plastic. You must be VERY CAREFUL when shoveling anywhere near the plastic not to tear it, and should keep a roll of repair tape handy (but don't let it freeze). Somewhere towards the back of the Winter Harvest Handbook there's a picture of a bunch of people in one of Eliots' greenhouses amongst a swath of fabric row covers - I think it's on page 198, but my copy is loaned to someone right now, so I can't be sure. Among that crowd there's a guy standing off to the side with bushy hair and blue jeans and a white sweater vest, looking down at the ground - that would be me. The link below is to some quick-connect fittings that are durable and don't leak. They aren't the most affordable ones, and there is likely a cheaper source - I use this company for woodworking tools - not cheap, but excellent quality products. Here is a link that might be useful: quick-connect hose adapters...See Moreoutdoor path lights doing strange things
Comments (4)Hello David, From what you have described, the issue is more than likely related to either the photosensor you are using or, the low-voltage transformer itself. Considering that more than one light is being affected, this leads us to believe that the source of the problem stems from the power source portion of the design. I would recommend trying out a new photocell device before attempting to replace your transformer or any fixtures. Hopefully this helped to provide some insight! -Evan K. Industry Liaison - VOLT® Lighting...See MoreFAQ: Aisle Widths, Walkways, Seating Overhangs, Work/Landing Space etc
Comments (3)Workspace, Landing Space, Other Items . Work Zones…There are three primary work zones: Prep Zone (70% or more of kitchen work/time) Cooking Zone (10% of kitchen work/time), and Cleanup Zone (20% or less of kitchen work/time) Of these, the Prep & Cooking Zones work best when either next to each other or across from each other. The Cleanup Zone usually works best if it's separated from the Prep & Cooking Zones. Sometimes that means different parts of the kitchen (usually with a prep sink in the Pep Zone); other times it means the only sink in the kitchen separates them...Prep & Cooking Zones on one side of the sink and Cleanup Zone with DW on the other side of the sink. [See the FAQ thread "Kitchen Work Zones, What Are They?" for more information about work zones.] . Trash & recycle pullout...works best in the Prep Zone, near the Cooking Zone, and, if only one is possible, near the Cleanup Zone. Far more trash & recyclables are generated while prepping and cooking than while cleaning up. So, if you have to choose, put the trash & recycle in the Prep Zone instead of the Cleanup Zone. [That's the biggest mistake I made, I put it in the Cleanup Zone across a 6' aisle from the Prep Zone...it's my biggest regret by far in my kitchen.] Prep sinks...should have an interior size of no smaller than 12" x 12"...and bigger is better - I recommend no less than 15" in each direction, 18" would be better, IMHO. Anything smaller is not very useful for prepping. Those smaller sinks are often called "bar sinks" because they're really only big enough for filling a glass with water or dumping a glass. They're not big enough to clean veggies/fruit or draining pasta in a colander. Zone protection...strive to protect the Cooking Zone from traffic - both through-traffic as well as in-kitchen traffic. While cooking, you are dealing with very hot pots/pans/food and you don't want to be tripping over or dodging traffic, open DW doors, etc. This usually means putting the Cooking Zone in the most "secluded" area...but not always, it depends on the workflow in your design – but keep it in mind when designing. After the Cooking Zone, the Prep Zone should be protected. In general, no major traffic patterns should cross through the primary work zones. If you must put the Prep Zone or Cooking Zone on a major thoroughfare, then consider extra wide aisles so people can give the zone(s) a wide berth when someone is preparing a meal . Work/Landing Space...Be sure you have adequate work and landing space near/around appliances and in zones. Note that sometimes combining work & landing spaces is required when it's a small kitchen. [The following items are from the "NKBA Kitchen Planning Guidelines With Access Standards"] Prep Zone...36" continuous counterspace at least 24" deep for the prep zone workspace and be immediately adjacent to a water source. [We recommend at least 42" of continuous counterspace.] Cooking Zone...See Cooktop/Range Cleanup Zone...See "Sink (Only or Cleanup Sink)" Sink (Only or Cleanup Sink)...At least 24" of counter frontage to one side of the primary sink, and 18" on the other side (including corner sink applications) with the 24" counter frontage at the same counter height as the sink. The minimum allowable space from corner to the edge of the primary sink is 3". Sink (Prep)...At least 3" of countertop frontage on one side of secondary sinks, and 18" on the other side (including corner sink applications) with the 18" counter frontage at the same counter height as the sink. [We generally recommend at least 12" on one side and 42" on the other side. This minimizes splashing on the floor and accidentally knocking things off the counter.] Refrigerator...At least 15" counter space on the latch side of the refrigerator or on either side of a side-by-side, or at least 15" of landing space no more than 48" across from the refrigerator. If an oven is next to [the] refrigerator, [the] refrigerator should be the one placed next to available countertop. Ovens (Wall)...At least 15" of landing space, at least 16" deep, next to or above oven if it opens into a primary traffic pattern. If it does not open into a traffic area, at least 15" x 16" of landing space needed [(i.e., it can be across or next to it). We do not recommend putting an oven where it's in a major traffic path.] MW...At least 15" of landing space, a minimum of 16" deep, above, below, or adjacent to a microwave oven Cooktop/Range... Open-ended kitchen: at least 9" of counter space on one side of the cooking surface and 15" on the other, at the same counter height as the appliance. [We recommend at least 18" on the open end for safety reasons.] Enclosed kitchen: at least 3" of clearance at an end wall protected by flame retardant material; 15" on the other side of the appliance, at the same counter height as the appliance. [Be sure there is sufficient space for elbow room and pot/pan handles on both sides – we recommend at least 9".] Island or peninsula: Countertop should extend a minimum of 9" behind the cooking surface, at the same counter height as the appliance, in any instance where there is not an abutting wall/backsplash. [We recommend 18" to 24" behind the cooktop/range for safety and aesthetic reasons] Combined countertop for 2 adjacent locations...For two adjacent work centers or landing spaces, determine the longest of the two required lengths and add 12". NOTES on cooktop/range spacing: Experiences here have shown some of us that the above is actually too little for an island or peninsula setup or when the cooktop/range is at the end of a cabinet run. For safety reasons, you need at least 18" on each side. This does not include workspace -- 18" is far too little for workspace. For behind the cooktop/range in an island or peninsula, there should be a minimum of 18" behind if there is no seating behind the cooktop/range and 24" behind if there is seating. For functionality, at least 24" on each side is better, regardless of location of cooktop/range. This space can be shared with the Prep Zone on one side; if it is, then there should be at least 48" on the side shared with the Prep Zone. [36" + 12" = 48"; 36" for the Prep Zone + 12" for the overlap with the Cooking Zone. See above about "combined countertop for 2 adjacent locations".] In the case of a range/cooktop next to a door or wall, check your local Codes, they may dictate more space b/w the door or wall and cooktop/range....See More
beckysharp Reinstate SW Unconditionally
5 years agoHolly Stockley thanked beckysharp Reinstate SW UnconditionallyHolly Stockley
5 years agobeckysharp Reinstate SW Unconditionally
5 years agolast modified: 5 years agobeckysharp Reinstate SW Unconditionally
5 years agolast modified: 5 years agoHolly Stockley
5 years agobeckysharp Reinstate SW Unconditionally
5 years agoHolly Stockley
5 years agolast modified: 5 years agobeckysharp Reinstate SW Unconditionally
5 years agonancyjwb
5 years agoHolly Stockley
5 years agobeckysharp Reinstate SW Unconditionally
5 years agonancyjwb
5 years agoHolly Stockley
5 years agobeckysharp Reinstate SW Unconditionally
5 years ago
aprilneverends
5 years agobeckysharp Reinstate SW Unconditionally
5 years ago PRO
PROVirgil Carter Fine Art
5 years agobeckysharp Reinstate SW Unconditionally
5 years agobeckysharp Reinstate SW Unconditionally
5 years agoHolly Stockley
5 years agoHolly Stockley
5 years agoHolly Stockley
5 years agobeckysharp Reinstate SW Unconditionally
5 years agoHolly Stockley
5 years agoHolly Stockley
5 years agobeckysharp Reinstate SW Unconditionally
5 years agoriverrat1
5 years ago
tartanmeup
5 years agoHolly Stockley
5 years agoHolly Stockley
4 years agoHolly Stockley
4 years agobeckysharp Reinstate SW Unconditionally
4 years agoHolly Stockley thanked beckysharp Reinstate SW Unconditionallybeckysharp Reinstate SW Unconditionally
4 years agoHolly Stockley
4 years agoHolly Stockley
4 years agobeckysharp Reinstate SW Unconditionally
4 years agobeckysharp Reinstate SW Unconditionally
4 years agoHolly Stockley
4 years agobeckysharp Reinstate SW Unconditionally
4 years agotartanmeup
4 years agobeckysharp Reinstate SW Unconditionally
4 years agolast modified: 4 years agotartanmeup
4 years agobeckysharp Reinstate SW Unconditionally
4 years agolast modified: 4 years agoHolly Stockley
4 years agobeckysharp Reinstate SW Unconditionally
4 years agoHolly Stockley
4 years ago


Related Stories

Off the Beaten Path: Delightful Alcove Spaces
Create a mini retreat within your home with a recessed nook, dormer or under-stair hideaway
Full Story
LANDSCAPE DESIGN17 Wandering Paths That Take Joy in the Journey
Explore secondary paths that are full of nuance and add intrigue to the landscape
Full Story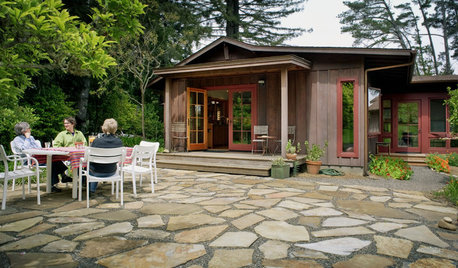
GREEN BUILDINGBuilding Green: The Paths, Beds and Decks That Define Your Landscape
You can make your outdoor area more sustainable by carefully designing your hardscape and selecting materials
Full Story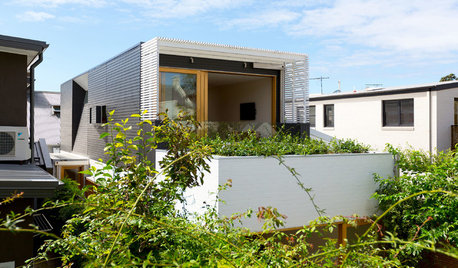
MODERN HOMESHouzz Tour: Seeing the Light in a Sydney Terrace House
A narrow row house gains lots of interior sunshine and a connection to the outdoors without sacrificing privacy
Full Story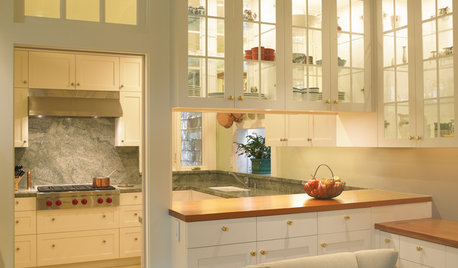
KITCHEN DESIGNHave Your Open Kitchen and Close It Off Too
Get the best of both worlds with a kitchen that can hide or be in plain sight, thanks to doors, curtains and savvy design
Full Story
GARDENING AND LANDSCAPINGThe 3 Top Ways to Light Up Your Landscape
Whether you're lighting a small side garden or a wide swath of yard, you'll be in the dark without understanding these essential elements
Full Story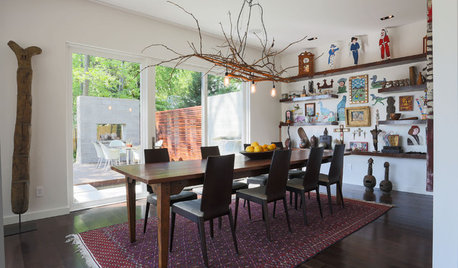
CONTEMPORARY HOMESHouzz Tour: Foresight Pays Off in Atlanta
Seeing the growth potential leads to a couple’s creative live-work space in a newly desirable neighborhood
Full Story
MOST POPULARHouzz Tour: Going Off the Grid in 140 Square Feet
WIth $40,000 and a vision of living more simply, a California designer builds her ‘forever’ home — a tiny house on wheels
Full Story
GREAT HOME PROJECTSHow to Add a Skylight or Light Tube
New project for a new year: Increase daylight and maybe even your home’s energy efficiency by opening a room to the sky
Full Story
LIGHTINGGet Turned On to a Lighting Plan
Coordinate your layers of lighting to help each one of your rooms look its best and work well for you
Full Story

beckysharp Reinstate SW Unconditionally