


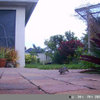
Coontie cycad ("palm") help needed
(Jay/Jax FL/Zone 9a)
6 years ago
Featured Answer
Sort by:Oldest
Comments (11)

(Jay/Jax FL/Zone 9a)
6 years agolast modified: 6 years agoRelated Discussions
Have you Started Coonties (Cycads) from Seeds?
Comments (8)I have started coontie and cardboard plants from seed. Be warned, it takes forever for them to germinate, and another forever for them to get any size on them. My ex was a "cycad expert" and this is what he did: strip the fleshy seeds from the pod. Soak them in a bucket of water overnight and the orange fleshy goop will come off. You will be left with hard seeds. He had a germination bed just for coontie and just threw the seed into it and covered slightly with soil. Then you just forget about them for about 4 to 6 months. Nothing will make them sprout any sooner. Apparently they must have a rest period before they will grow. Then one day, you will look and there they are! We transplanted when they were about 3 inches high. Good luck with yours....See MoreLooking for coontie palm for atala butterfly
Comments (3)perrenialfan, There's one ZAMIA FLORIDANA, THE COONTIE PALM, SMALL GROWING CYCAD on eBay 'buy it now' $6.95 S/H $7.50 US Postal Service Priority. It's from Marianna, FL. I hope this helps, Lou...See MoreLarge Sego Palm Pup (Cycad) Help!
Comments (2)This is what my friend's website says about taking offsets. I would say that there is a risk by removing the offsets, but if you treat all wounds properly with the tree paint, it is most likely that the mother plant would be fine.I have removed 100s of offsets and never killed a plant, and you have a better chance of doing it right in California than we have in Florida. Most Frequently Asked Questions How do I remove the offsets at the base of my sago, and what do I need to do grow them into plants? This is probably the question I get the most. I am going to describe the method I use. Most people do not have to go through as much trouble as this, but to make sure that every one has a good chance , it doesn't hurt to make sure to do it right. Cut all the leaves from the offset plants. If you do not cut the leaves off, they will draw moisture and energy out of the offset before it has a chance to produce roots. The secret to all this is the starch content in the offset. It can live on this starch until new roots are formed. This is another reason why the offset does not need to be watered like you would a cutting, I will get into that later. Remove all the soil from around the offsets. After I have removed most of the soil, I like to spray the area with water to wash off every bit of soil so I can see what I'm doing and also to keep everything as sterile as possible. Use a very sharp tool to remove the offsets from the main plant. Make sure to make a clean cut. Do not pull the offset off the main plant. Sometimes the offset will pull out a small, round piece of stem when you do this, and this makes a hole for fungus to get into. Also the more jagged the cut, the more there is a chance to have a place for fungus to get into. Sometimes I have to cut the offset again, once it is removed to make a cleaner, smoother cut. Tools that seem to work the best are very large knives, very sharp shovels, machetes, and if you remove offsets on a regular basis, there is nothing like a reciprocating saw, or otherwise known as a "sawsall." Once you have removed all the offsets, spray or brush the wounds of the offsets, as well as the wounds on the main plant, with a fungicide. I like to use Daconil. You can add a rooting hormone to the fungicide that you use on the offsets if you want. It seems to help a little. Once this has dried, I paint all the wounds with black tree paint, or also known as tree sealer. Once this has dried, the offsets are ready to plant, and the soil can be placed around the main plant once again. "Advanced method" If you have done this before, and are good at starting offsets, you can try this advanced method. When you cut the offset, the more area that is cut, the more roots that will be produced. Most offsets are attached to the main plant by a narrow attachment point, instead of the width of the entire offset. By making another larger cut on the offset you can get at least 5 times the roots. This larger cut also has a larger wound to heal, so it is better to get used to rooting offsets before you try this. This is where the tree paint comes in very handy. Now that you are ready to plant the offsets, place the offsets in containers with the cleanest sand you can find. I use course builder's sand. Any organic material can increase the chance of fungus getting into the offsets. Some people use pumice, or perlite, instead of sand. I try to place an offset in a container that is close to the diameter of the offset. I put the small ones in a community pot. Place the containers in the shade, the sun can dry out the offsets if it is too extreme. The most important thing to remember is that there are no roots or leaves on these offsets. They don't lose very much moisture, and can't take very much up without roots. This means that you don't water these offsets like you would a regular plant, or a cutting. Moisten the offsets maybe once a week or once every other week just to keep them from desiccating. The offsets live from the starch contained in them so there is no need to treat them like cuttings. The offsets will root in faster if it is warm, but even during the warm months, it may take up to 8 months to root in and produce leaves. Once the offsets are fully rooted you can plant them in your normal medium, and put them out in your growing area....See MoreLooking for coontie palm for atala butterfly
Comments (4)Atala butterflies feast on Coontie. When the coontie was farmed almost to extinction they were thought to be extinct as well but have colonized in South Florida, thankfully enough. There was just a nice article on our local paper about this. Good luck. I'm sorry that I do not have any for you....See More
plantsman56
6 years ago
dirtygardener
6 years agoplantsman56
6 years agodirtygardener
6 years agoplantsman56
6 years agodirtygardener
6 years ago(Jay/Jax FL/Zone 9a)
6 years agolast modified: 6 years agojudyk_2008 9a DeLeon Sprs. (NW Volusia)
6 years ago


Related Stories

LANDSCAPE DESIGNCelebrate a Sunny Climate With the Right Leafy Palm for Your Site
So you get freezes or floods. So your garden is small. These palms send excuses riding off into the tropical sunset
Full Story
ARTWhat Sculpture Brings to the Garden
See 10 ways garden art earns its place in our personal outdoor spaces
Full Story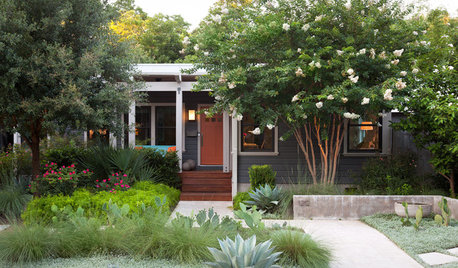
LANDSCAPE DESIGN6 Front Yards That Balance Privacy With Curb Appeal
Selective screens, layered plantings and low walls boost privacy but still keep yards welcoming to neighbors
Full Story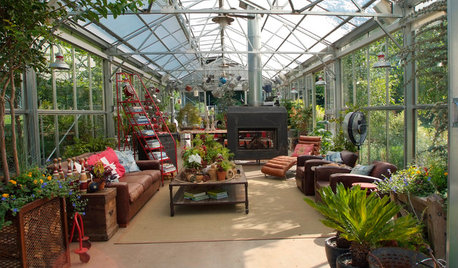
GREENHOUSES7 One-of-a-Kind Greenhouses for Gardening and More
These greenhouses are personalized to their owners’ interests, whether vegetable growing or tea drinking
Full Story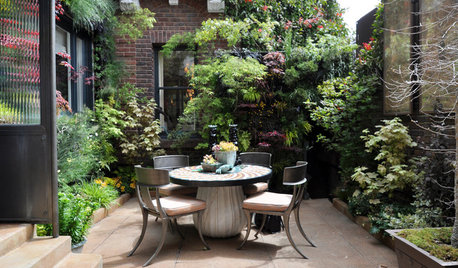
LANDSCAPE DESIGN8 Ways to Grow More Plants in Small Spaces
Use plants to bring your pocket garden to life
Full Story

dirtygardener