


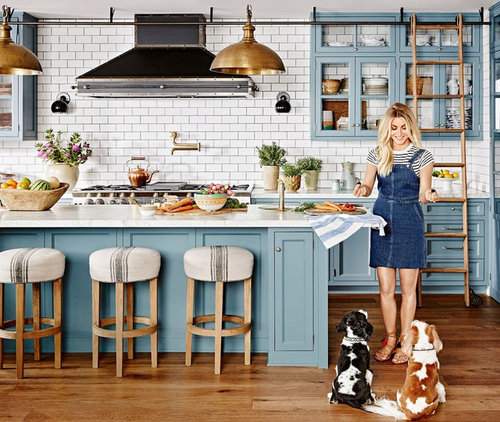
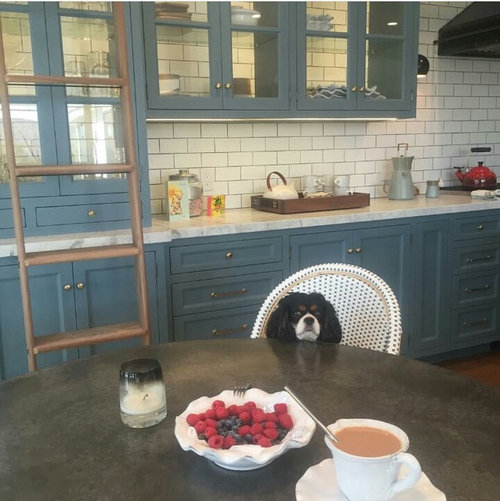
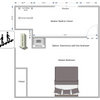
How to hang backless kitchen cabinets over tile?
Alicia
6 years ago
Featured Answer
Sort by:Oldest
Comments (31)

miss lindsey (She/Her)
6 years ago
apple_pie_order
6 years agoRelated Discussions
Glass door backless cabinets hung on window
Comments (15)How funny that I just decided to take a browse over here. The cabinet in front of windows is really beautiful, especially if you're trying to let in additional light, which we were. Yes, you do have to take it all out about every 6 months to clean (3 if you're really really clean). My daughter just did ours this weekend. Ours faces west and is SO pretty as the sun sets in the evening. Our cabinet maker framed the inside, and from the outside, it looks like a picture window. Here's a couple of close-ups. Under Construction...See MoreIkea kitchen - the cabinet over the fridge
Comments (11)We did this with our Ikea cabinets. You can still use the rail system, which is designed to support the cabinet 100% without having to attach it to any side support (which standard cabinets require). You just have to build out a "box" on the rear wall to make up for the needed 8" of space (really 7.5", because the doors on the front of your cabinet will be 1/2" deep). The "box" or structure that you build needs to both (1) give a solid piece on which to mount the rail and (2) include a build out at the bottom against which the lower rear of the cabinet rests -- just like it would against the flat wall. If you skip (2), you end up with a cabinet hanging from the rail and then tilting forward from the top while the bottom of it swings back toward the wall to find something to lean against. Regarding side panels, the 36" x 8' tall side panels are what you need (which at one point weren't in the planner and your Ikean had to add them at the time of the order). Make sure you order these, and not the ones that are only 24' deep and 88" tall. The correct panels: http://www.ikea.com/us/en/catalog/products/70022758/ In our particular install we didn't use side panels, because (1) the panels are only 8' tall, and our installation was meant to go flush to a ceiling higher than 8' -- so there would be a gap at the top or bottom if we used Ikea's panel, or (2) we would have to create our own panel and try to match the finish and the horizontal grain. Our solution was to create a fridge "alcove" and ignore the panel issue altogether. The fridge was already flush against a bumped-out pantry wall on one side. DH simply built another wall on the other side and we finished it with drywall and painted. The cabinet and fridge then went in the alcove. For our install, this worked nicely, as there were no upper cabs on the rest of the run (in the rest of the kitchen, actually) and it separated this vertical "column" in the overall look of the room. It also eliminated the ageless argument of how to end the backsplash behind the fridge. We lost the 5-1/2" of space the new wall took up, but in the end we didn't miss it at all. It actually helped us keep the rest of that wall symmetrical. We mounted the cabinet about in the center of the vertical "space" available above the fridge and used trim pieces at the top and bottom. This trim was cut from one of the 36" x 8' panels, the remainder of which was used to cover the ends of our island. Re attaching the panels, you'll want to screw through from inside the cabinet into the panel. You'll need to buy screws for this and make sure they are long enough but not too long to fit through the cabinet side and at least half way into the cover panel. Consider also using adhesive on the cover panel where it abuts a cabinet. Although we didn't have cover panels on the fridge, we had them on the ends of our island. We used adhesive and screws. One last thing: If you've created sort of a boxed-in area, make sure you slide the cabinet bolts onto the hanging rail BEFORE you secure the haning rail in place. There's noting like getting it secured and then going "wait a minute . . . " and taking it down again. I'm sorry I don't have a picture of the box or the process, but here is what I have. I hope this helps! The wall before: The wall after: Cover panels on island:...See MoreTextured Wallpaper over kitchen tile reno - How To?
Comments (17)@cpartist I can't remove the tile, one, because I dont want to, two, I'm not skilled in doing that and don't want to mess up the wall and I also don't want to know what's behind the tile. I'm trying to make the wall look better without actually restructuring it. I wanted to cover the tile because I saw a lot of kitchens with the beadboard wallpaper and i thought it would be an inexpensive way to redo the walls. Also, there is one wall that does not have the tile on it. What can I do to "redo" the white tile to make it look new?...See MoreKitchen window over sink - distance to cabinets 1" difference.
Comments (12)Painting not done yet and original unpainted cabinet areas are there to confuse. The one inch - Looks barely noticeable here, and after a second look in person feel same. Anyway will still appreciate any helpful ideas just in case things change once the walls are painted. Thanks for any advice....See More
Hillside House
6 years ago
Alicia
6 years agogeoffrey_b
6 years ago PRO
PROCarolina Kitchen & Bath
6 years agoUser
6 years ago- PRO
Carolina Kitchen & Bath
6 years ago Alicia
6 years agoAlicia
6 years ago- PRO
Carolina Kitchen & Bath
6 years ago 
mark_rachel
6 years agogeoffrey_b
6 years ago
shead
6 years agoUser
6 years agogeoffrey_b
6 years agoshead
6 years ago PRO
PROBeverlyFLADeziner
6 years ago
millworkman
6 years ago
highdesertowl
6 years ago
Joe
6 years ago
Judy Mishkin
6 years agoAlicia
6 years agoJoe
6 years agoshead
6 years agoAlicia
6 years ago PRO
PROJoseph Corlett, LLC
6 years agolast modified: 6 years ago
Shweta K
3 years ago
Matt Ahlert
3 years ago


Related Stories
KITCHEN CABINETSHow High Should You Hang Your Upper Kitchen Cabinets?
Don’t let industry norms box you in. Here are some reasons why you might want more space above your countertops
Full Story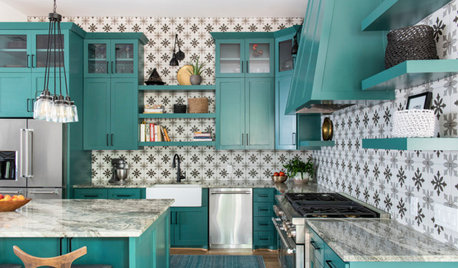
KITCHEN MAKEOVERSGreen Cabinets and Bold Tile for a Remodeled 1920 Kitchen
A designer blends classic details with bold elements to create a striking kitchen in a century-old Houston home
Full Story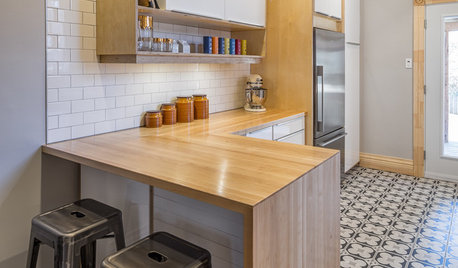
KITCHEN OF THE WEEKKitchen of the Week: Ikea-Hack Cabinets and Fun Floor Tile
A designer turns an uninspiring kitchen into an inviting and functional contemporary space
Full Story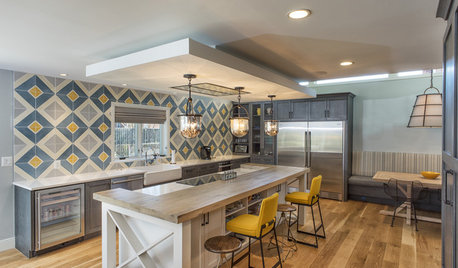
KITCHEN DESIGNKitchen of the Week: Tile Sets the Tone in a Modern Farmhouse Kitchen
A boldly graphic wall and soft blue cabinets create a colorful focal point in this spacious new Washington, D.C.-area kitchen
Full Story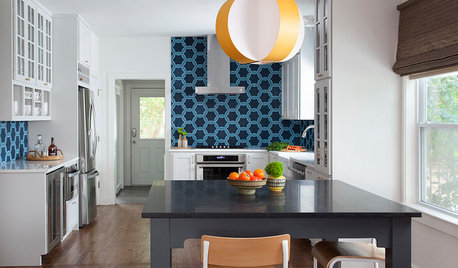
KITCHEN BACKSPLASHESThis Kitchen’s Geometric Blue Tile Steals the Show
An Asian-inspired island, newly stained floors and white cabinets complete the look
Full Story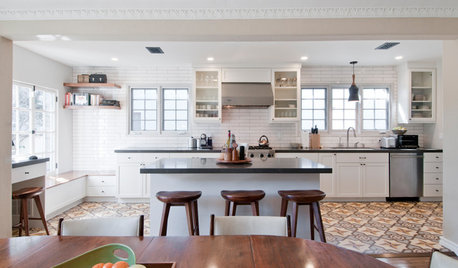
KITCHEN OF THE WEEKKitchen of the Week: Graphic Floor Tiles Accent a White Kitchen
Walls come down to open up the room and create better traffic flow
Full Story
INSIDE HOUZZTop Kitchen and Cabinet Styles in Kitchen Remodels
Transitional is the No. 1 kitchen style and Shaker leads for cabinets, the 2019 U.S. Houzz Kitchen Trends Study finds
Full Story
KITCHEN DESIGNPatterned Tile Showcases an Open Kitchen’s New Minibar
A couple’s kitchen update puts the focus on entertaining by inviting guests in for a drink
Full Story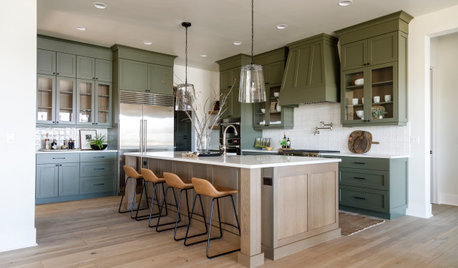
KITCHEN LAYOUTSMove Over, 3-Zone Kitchen. Meet the 5-Zone Kitchen
With open-plan kitchens so popular, has the classic kitchen triangle had its day?
Full Story
KITCHEN DESIGNEcofriendly Kitchen: Healthier Kitchen Cabinets
Earth-friendly kitchen cabinet materials and finishes offer a host of health benefits for you and the planet. Here's a rundown
Full StorySponsored
Custom Craftsmanship & Construction Solutions in Franklin County


BeverlyFLADeziner