


How to remove hundreds of tulip bulbs?
samayyz
6 years ago
Featured Answer
Sort by:Oldest
Comments (10)

Mrs Pete
6 years agolast modified: 6 years agoRelated Discussions
Will tulip bulbs rot when planted with roses?
Comments (8)Angela88: Although I mainly concur with the several responses already posted, I'll contribute my thoughts as well. 1.) It has been my experience that Tulips - generally - have a "bad" habit of rapidly dividing. When I substantially re-constructed my first new garden area (see the story below), I noted that many tulips that I had planted three years previously had whittled down to the size of the end of my small finger. Obviously, at that size they didn't have sufficient energy to come into bloom; 2.) In conjunction with this "habit" of "rapid" division - rapid in comparison with daffodils, these tulips were attempting to "grow" and "re-bloom" in a clayish soil structure; not the ideal soil structure; 3.) Under such soil clayish conditions no amount of "horticultural drug dealing", especially methods of "overdosing" - excessive water and fertilizer is going to make them "perform" year after year as well as they should; 4.) I therefore came to the conclusion that I should provide them with the best possible soil conditions and went to the lengths discussed in the story below; 5.) I also came to the conclusion that I am going to limit my use of tulips in the garden. Although I thoroughly enjoy their company in the spring, they are, after all, much like pregnant women on the way to the hospital delivery room - i.e. they are guarenteed to bloom in their first year. By the second year, they will most likely diminish in bloom stature and quantity; and by the third year, they will diminish even further; 6.) Thus a deeply prepared, humusy and sufficiently well drained soil is absolutely necessary for their potential survival; 7.) The planting of tulips in a compacted and poorly drained soil structure will also potentially cause the bulbs to rot away - depending upon the amount rainfall provided by Mother Nature or your own watering efforts. 8.) The use of organic mulches - given a good soil structure might go a long way to provide the needed moisture requirements for your summer flowering plants while, at the same time, keep the tulips "happy". 9.) For that and all of the other reasons above, I am not certain that I would plant tulips in the same bed as roses - simply because their summer care is different. Tulips and many other spring flowering bulbs are not heat tolerant and thus "disappear" or go dormant until they make their return visit in our gardens. 10.) Since you also mentioned the fact that "many of my roses did not survive our Michigan winter" makes me wonder if you had planted "grafted" rose bushes and/or mostly modern roses such as the Hybrid teas. 11.) Having experienced far too many disastrous encounters with Mother Nature on the central Illinois prairie, I - long ago - made the more rewarding switch to what is known as the "Antigue" or "Old Garden Roses" grown on their own roots. Now that I am living in northwestern Michigan, I have opted for own root roses and have planted several OGR's and David Austin Roses. They have been in the ground for three years and have suffered minimal cane loss, if at all. If you are unaware of the range of "Antique" or "Old Garden Roses", I would highly recommend the reading of The Fragrant Year by Helen Van Pelt Wilson and Leonie Bell. Although it has been out of print for a few years, it is still one of the best introductions to this world of roses. And as an additional treat, there is an excellent chapter on the making of the old rose dry and moist forms of potpourri. In addition to this excellent gem, you might also explore the following links - they are just a few of the sources avaiable to you. Heritage Roses Group High Country Roses Heirloom Roses Ashdown Roses David Austin Roses Griffith Buck Roses FYI - Griffith Buck roses are also available from several of the sources listed above as well. Now for the "story". The story below was written in response to a garden question posted in the "Perennial" Forum. I thought you might enjoy one of my own "learning experiences" in the garden while I was living on the tallgrass prairie of central Illinois. Hope all of this information is most useful. Bill When I posted the following sentence from a lengthy quotation from Lewis Mumfords "The City in History": "One works co-operatively with the Âmaterials of othersÂ, perhaps guiding them, but first acknowledging their existence and understanding their purpose: the other, that of the baroque despot, insisting upon his law, his order, his society, is imposed by a single professional authority, working under his command." I was using the phrase the "materials of others" etc. with regard to gardening from the siting of the garden area, to good, deep soil preparation, to the plants selected for the area, to their planting, care, and nurture. etc. When "gfult" posted her comments about "removing the grass and digging out the soil was so much work", I thought IÂd offer the following story about my own efforts on soil preparation. Several decades ago - when Crockett was still hosting "The Victory Garden" - my daughter, Heather, and I spent much of a day "planting" a semi-circular bulb garden around a lamp post in the front yard. The diameter of the garden was 14 feet and its radius was 7 feet. A semi-circular "fan" shaped design around a lamp post that was topped by an electrified old steam locomotive signal lamp that my father had obtained. My fatherÂs brothers and brother-in-laws had a history of being engineers and/or telegraphers. Prior to the actual digging out of this newly planned garden area, I had poured over a half dozen or so bulb catalogs and books on gardening - noting the bloom sequences, the height, the color of each bulb that I wanted to add to our newly planned garden area. When the plan actually came into fruition, I had every bulb situated - in my head - and knew where it was supposed to go - once we had prepared the soil. So one day in the fall, we spent part of a late morning "preparing" the soil by digging down to a depth of about 8 - 10 or so inches; then adding a few 40 pound bags each of peat moss and cow manure and then with the aid of a spade and spading fork attempted to mix all of this meager stuff into the clayish soil we had just dug out. We then went to "work" with two of those typical bulb planters that are - sometimes - of little or no use and planted the bulbs - leaving enough space for other plant material - of course. Because of the poor structure of this "soil", we often had to use both hands, some good muscle power, and a great deal of body weight/strength to work the bulb planter into the ground in order to plant the bulbs. Far too much work in my mind - now. When we completed our very tiring work, we went inside, made supper, relaxed and ate our dinner while watching Crockett's Victory Garden then still on the air. Wouldn't you know it; his program that early evening was on the planting of bulbs and he, of course, described and showed how "easy" it was to plant bulbs with the use of the bulb planter. Heather and I just looked at each other in some disgust - at least, Crockett's soil had been deeply and well prepared so that his bulb planter cut through the soil with the ease of a warm knife cutting through room temperature butter. WouldnÂt it be nice, if the garden we had just worked at planting had that kind of soil structure. Indeed it would be nice. Well - true to their nature - many spring flowering bulbs are much like pregnant women on their way to the hospital, our bulbs came up tried and true and bloomed very well in their first spring. We couldnÂt have been more pleased with our "hard" efforts. In their second year, the bulbs were much less in number and the bulbs that remained didn't bloom as profusely. By the third year, many of bulbs with the few exception of daffodils had simply petered out or had disappeared - altogether. Obviously, "something" was wrong with this situation. Of course, those three years did not lack in increased knowledge and/or gardening experience. I had by that time read John MadsonÂs book "Where the Sky Began: Land of the Tallgrass Prairie" (an important read for those gardening on the tallgrass prairie) and the Brooklyn Botanic GardenÂs wonderful little book on "Handbook on Soils" (a gem that should be never out of print). John Madson - "Where the Sky Began: Land of the Tallgrass Prairie" Unfortunately, this little gem is currently out of print, but hereÂs the link to their wonderful array of publications: Brooklyn Botanic Garden - Publications Buried within the pages of the BBGÂs "Handbook on Soils" (70's edition), was a revealing photograph of the significant difference between the root growth of plants growing in a deeply and well prepared soil and those growing in a compacted soil. I have often sought a similar photographic comparison on the web, but havenÂt as yet been able to located such a wonderful comparison. John MadsonÂs book made me fully appreciate and realize the weather and soil conditions - to name a few -under which I was then gardening. For that area of the country, I came to realize the necessity and the preference of planting rootstock material in the late summer or early fall with in ground fertilization techniques - mostly to substantially aid the new plants sustain their first hot and humid prairie summers. What I also came to realize was the fact that our house was situated about 1.5 to 2 feet above the street level. Since the house was built in the late 1930's this area - just west of Peoria, IL - the land upon which the house was built used to be old farm land and that the golden soil of good deep prairie loam lay beneath the garden. I also came to learn that tulips have a bad habit of dividing more profusely than daffodils and because of the structure of the soil, many of them had simply divided down into a diameter much less than the size of the tip of my smaller fingers. Daffodils faired a tad bit better, but they didn't increase in number either. And because of the clayish structure of the soil, a goodly number had simply died, because the structure wasn't loose enough and/or deep enough to allow for good root growth and the obtainment of good nourishment for future bloom. In effect, our bulbs were planted with a clay soil "straight jacket" around them. Under such soil conditions, no amount of "horticultural drug dealing" would have offered a "cure" to the "ills" of a poorly prepared or structured soil. Although I didnÂt entirely look forward to the project, I knew that I didnÂt want to look forward to more "horticultural disappointments" By that time, I had also come to the conclusion that being a "horticultural drug dealer" was not the way to go. If the plants donÂt have access to a very good soil structure, no amount of chemical "encouragement" is going to make them perform well. So in the late summer of the third year, I outlined two garden areas - the former semi-circular one noted above and another garden area - 16 feet in diameter and went to work once again and kept on digging and digging and digging until I hit the good deep prairie loam that I knew lay beneath the clay soil - the "remains" of the basement of my parentÂs house. A few people driving by our slow street stopped and inquired as to whether I had a "water" problem of some sort. When I informed them that I was deeply and well preparing the soil structure of two garden areas, I believe that they were either dumbfounded by my efforts and/or thought me to be slightly nutty. Oh well, at least my gardening efforts "entertained" some folks in their travels. Once I reached the good prairie loam beneath the clayish soil - about 22 to 24 inches down - I, obviously, had a new "problem" to confront. And that "problem" was: How on earth I am going to easily create a loose, friable, humus, and well prepared soil structure without too much effort? The prospects of adding some of the clay soil and mixing it with some aged cow manure, sphagnum peat moss, a little coarse sand with the aid of only a shovel and spading fork didnÂt greatly appeal to me. But then a "lightbulb" went off in my head and I thought of the idea of renting a cement mixer to rapidly mix the new soil ingredients. Before I actually employed the cement mixer, I obtained 14 six cubic foot bales of sphagnum peat moss. A friend of mine lent me his small pickup truck and informed me of a farmer friend of his who would gladly "share" two truck loads of aged cow manure. Since I knew that the addition of fine sand to a clay soil would make for a good Âconcrete mix especially under dry conditions, I was able to obtain a small truckload of coarse sand from a local sandpit located a few miles away. At the time, I didnÂt realize how heavy sand could be and had some difficulty navigating RogerÂs truck back from the sandpit with semi-flattened tires. But I made it. Once all of the "ingredients" were available, I then rented the cement mixer and took a small rubbermaid wash tub and a less than 1 pound coffee can and began to create the new soil structure. A can or two of the original soil, a can or two or three of the sphagnum peat moss, a can or two of the aged cow manure and mixed the ingredients all together until I got the soil mixture that I wanted. I then "translated" the coffee can proportions into shovefuls, turned on the rented cement mixer and went to work. After the cement mixer had more than sufficiently done its job, I off loaded the mix into a wheelbarrow, dumped the contents into the large holes and went back to work mixing up another batch of soil. When I finished with the last of the mixture, Heather and I went back to "work" the next day and literally "played" in the soil to plant our bulbs, old fashioned roses, peonies, etc. It was 'child's play' and we performed our work far easier than had James Crockett in planting bulbs. Without exception, we planted everything with our bare hands - the new soil was that loose, friable, and humusy. Since the soil structure was now deeply and well prepared, all that was or is really needed is the application - every year or so - of some good organic mulch - ala Ruth Stout - and, perhaps, some fertilizer now and the. In my personal case, I made use of the organic mulch - provided cheaply or without cost - by our local light & power company - the ground up leaves, branches and stems of the trees they pruned during the summer months. Of course, with this type of organic mulch you will have some "weed" problems, but with 4 - 6 inches of it around the garden, it is quite easy to gently pull of the emerging weeds and thus remove them from the garden. So hereÂs another interesting book you should read and enjoy. It will make your post soil preparation and future gardening efforts all that much easier. Ruth Stout - "How to Have a Green Thumb Without an Aching Back" Well, now that I have reached the young age of 64, I am not entirely certain that I want to involve myself in another extensive soil structure project; IÂd probably hire it done, if needed or do a Mark Twain thing and talk an unsuspecting student into such a project. ;>) But since I moved from central Illinois to northwestern Michigan, I find that our soil here in Michigan is a mixture of fairly decent garden loam mixed in with some clay and sand. Not too bad for most planting material that I wish to include in our garden. The "moral" of this story is basically doing your "homework" as well as possible from the beginning before the actual implementation of a new garden area. Obviously, not everything will go "exactly as planned", but a thoughtful consideration of the "materials of others" will go a very long way in insuring the successful rise of a worthwhile garden endeavor. Again, my very best wishes in your creative efforts of nurturing life in its many dimensions. Bill...See MoreTulips in bulb "lasagna" - how to replace?
Comments (4)I agree with all that Camp says and add that some tulips can come back. The Darwin and species types have been successful for others here. Good idea of Camp's just to pull out the non-performers! I agree that in a well soaked ground (if you have clay like me that won't let anything go otherwise), you can give a plant a wiggle while pulling gently upwards and with patience and wiggling, it should come out. If the bulb is down far enough, I sometimes need a thin trowel to dig down close to the bulb and loosen things out while pulling. I kind of wiggle the trowel around while pulling on the foliage (and wiggling the foliage as well!) For daffodils that are half a foot down - forget it - I have to dig a huge chunk of dirt out and pry them out as the foliage just breaks off if I pull (ask me how I know....)....See MoreHow practical is it to remove bulbs after flowering (to reuse later)?
Comments (15)Tulips do brilliantly well on my allotmen (both species and a surprisingl diverse assortment of garden hybridst...but only because I can replicate their natural conditions to near perfection. Totally free draining, sandy soil and a completely open summer baking in my semi-arid climate. The main reason for loss is viral...while doubles, fancies and a few in the Triumph group are also problematic. This would not work 350 miles on the opposite side of the country at all...but I would go for sinking pots of bulbs in the ground and moving them rather than digging them up (I do this with lilies...don't even bother to sink them, just stuff them behind another shorter plant....See MoreMethod of easily removing fall bulbs
Comments (2)You can lift them before they disappear. Wait until the foliage is yellow but you can still see it. Then pull or dig the bulbs and let them dry off in a shed. You can leave the stems on until it's completely dry then cut it off. My MIL did this every year....See Morelaceyvail 6A, WV
6 years ago
mad_gallica (z5 Eastern NY)
6 years agobossyvossy
6 years agolast modified: 6 years agoken_adrian Adrian MI cold Z5
6 years agofloral_uk z.8/9 SW UK
6 years agonandina
6 years ago
Paul MI
6 years agoperennialfan275
6 years agolast modified: 6 years ago
Related Stories
GARDENING GUIDESWhat to Do After Spring Bulbs Have Bloomed
Here’s how to care for daffodils, tulips, hyacinths and other bulbs when they’re done blooming
Full Story
GARDENING GUIDESHow to Plant Bulbs in Fall for Spring and Summer Blooms
Follow these step-by-step instructions for planting daffodils, irises, tulips and more
Full Story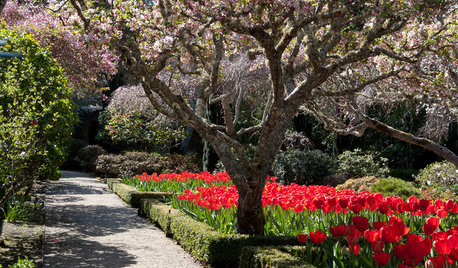
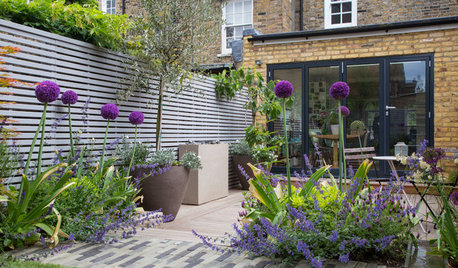
PLANTING IDEASEasygoing Tulip Ideas From a Grand California Garden
Gather up these ways to use tulips to make a spring garden of any size overflow with beauty
Full Story
BULBSPlant Tulips for March-to-May Blooms
Learn the basics of growing these favorite spring bulbs
Full Story
FALL GARDENING6 Splendid Blue-Flowering Bulbs
How do you blue? With colors from sky to cobalt, these bulbs will greet you merrily in a spring garden
Full Story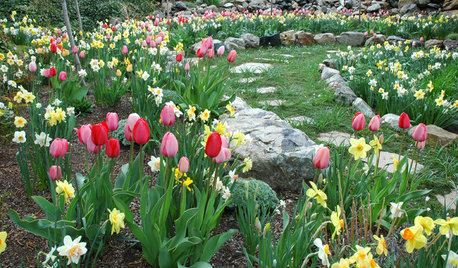
GARDENING GUIDESGardening With Kids: How to Plant Bulbs
You don't need expertise to get flowering bulbs in the ground in fall — but kids will feel like gardening pros come spring
Full Story
GARDENING GUIDES10 Beautiful Ways to Landscape With Bulbs
Planting bulbs wisely in fall can turn a spring garden glorious with joyful colors and profuse blooms that last through summer
Full Story
FALL GARDENING7 Delightfully Different Bulbs for Your Spring Garden
Fall planting: Stray from the standards for a more exotic spring garden that draws applause
Full Story
FLOWERS11 Classic Bulbs for Spring Blooms
Plant these ever-popular bulbs in fall to ensure a garden bursting with colors in spring
Full Story
GARDENING GUIDES6 Unsung Bulbs for Fall Planting
Don't hang up your spade after summer — plant these unusual bulbs in fall for a spectacular spring show
Full Story


josephene_gw