


Can anyone give me some background or information on red violets?
neineb
6 years ago
Featured Answer
Sort by:Oldest
Comments (19)

aegis1000
6 years agolast modified: 6 years ago
dviolet1
6 years agoRelated Discussions
Does anyone only have one African Violet?
Comments (51)When my grandmother passed away in 1999 I rescued an AV from her kitchen table. Her house had already been closed up for a few weeks when we went to clean it out, and it was mid-summer, so the poor thing had essentially been in an oven. It was all brown and dried out, and my heart went out to it. I had no idea what it was, but I took it home... and promptly killed it by over-watering it. Enter AV #2, because clearly I needed to prove to myself that I could take care of one and not kill it. So for a little while, yes, I had only one AV. However, AVs #3, 4, 5, and 6 followed closely thereafter. Then I moved from Boston to LA. My apartment I was moving into didn't get any light and I was worried the AVs would die during the road trip, so I left them all with my mother. That was years ago and she's taken wonderful care of them. She always shows them off to me when I visit them. I mean her. :0) Now for the most recent round of obsession... Three years ago I rescued an AV off of a co-workers desk after she quit unexpectedly (that's the one that's never bloomed until now). For a few weeks, yes, I owned only one. But then I happened to see one with girl foliage at the supermarket, and found it so unusual that I had to buy it. For three years I had just the two AVs, but now I'm in full-on obsession mode again. It started when I moved into my condo over the summer and had all this sunlight flooding in... and, well, you can imagine the rest!...See MoreMongo, would you give me some specs on your fab bath??
Comments (11)I thought I had a more comprehensive series of photos, but I might have not brought them over when I bought new computers a few weeks ago. The following are not pretty, but they might help: ABOVE: This shows a couple of things I had to work around. High over the toilet is a jog of the vent pipe, it comes into the room because it jogs around a load bearing beam in the wall. Lighting: You see two illuminated light bulbs. Those are the sconce locations for the "new' design. The original design had two sinks, two wall mirrors, and three wall sconces. The old wall sconce locations are the covered up junction boxes. I redid the wiring so there is no live wring in those now unused j-boxes. Outlets: Look at the middle shelf in the closet on the left. In the back right corner you can see a box. I built that to house a couple of electrical outlets. Two outlets for inside the closet, another outlet that is on the closet sidewall facing the sink, you can barely see the cover plate for that box on the closet wall to the left of the drill. More electrical: In the 48" tall cabinet that hides the toilet, there are four outlets in the upper part of that cabinet box. There is one outlet that faces the sink, there is another on the opposite side that faces the toilet. There are two inside the upper cubby to provide power to items in the upper drawer. To protect those outlets, there is a false back wall in the rear of the upper cubby of that toilet cabinet. The cabinet itself is about 32" deep, the false back wall is about 10" out from the cabinet's back, affording roughly 22" of depth for the upper toilet drawer. The cabinets: Nothing fancy, 3/4" birch plywood boxes. Horizontal shelves/tops/bottoms are recessed into the cabinet sides in a 1/4" deep dado. Titebond glue and screws. Cabinet backs are 1/2" MDF, recessed into the cabinet sides/top/bottom. Glued and screwed. Recessing the cabinet backs into the cabinet helps keep the cabinet perfectly square. I typically use a 2" wide vertical stile on my cabinet face frames. I prefer my frames to be flush with the edges of the cabinet sides. With the cabinet sides being 3/4" thick, two of them make 1-1/2". So I'll use a strip of 1/2" filler between adjacent boxes to get that 2" thickness. With my face frames being flush with the inside faces of the cabinet sides, to get square face frames you need square cabinet carcasses. You can't disguise sloppy construction with this method. Toekicks: Under the cabinets you see scrap pieces of 2x4. Those were eventually covered with wood and painted black. They simply limit the depth of the hole under the cabinet to round 8", giving dust bunnies less room to hide. ABOVE: This shows the same run of cabinets with the face frames installed. You can see the electrical outlet on wall of the left closet, facing the sink. You can see the outlet on right side of the toilet cabinet, facing the toilet. ABOVE: Everyone needs a place to keep their "to do" list. I know I'll never lose this list. At least not until I cover it with the teak top. ABOVE: Remember that really small vent pipe that jogged into the room? Well, I covered it with this really big soffit. Nothing like overkill, eh? I actually used it to balance out the visual weight of the upper part of the closet on the left side of the sink. Visually, it centers things to the open area over the center of the sink. Might sound like a lot of silly voodoo design, but visually it feels comfortable to me. The band around the upper walls is backer for the crown molding. ABOVE: Speaking of teak...this is 4/4 teak, or "four quarter" teak. If you go t a lumberyard and by a "one-by-four", it'll be 3/4" thick by 3-1/2" wide. If you go to a lumberyard and order 4/4 lumber, it'll be 1" thick. For 4/4 thickness or less, I'll use one row of biscuits. For 5/4 and thicker, I'll use a double row. In this bathroom the tub deck is 2" (8/4) thick, the sink countertop is 1-1/2" (6/4) thick, and the toilet cabinet teak top is 1" (4/4) thick. ABOVE: I usually use epoxy with teak. I thought I read a recent article that the newer titebond forumations work well on teak, but hey, when you buy epoxy by the gallon, you may as well use it, right? Except that I buy Titebond 4 gallons at a time. Hmmmmmm.... Okay, anyhow, I use epoxy. Teak is an oily wood, so prior to using epoxy I'll wipe down the edges to be glued with acetone. The acetone removes the oils. I mix the epoxy, apply it to the biscuits and the edges with an acid (flux) brush, sap it all together and clamp it up. Biscuits are designed to absorb moisture from water-based glues like Titebond and expand within the cut slots, they really lock the pieces together. Although there is no moisture in epoxy for the biscuit to absorb, it still provides more surface area for the epoxy, plus the biscuits help register and align the teak during the clamping process. ABOVE: After the epoxy has cured. I'm getting ready to belt sand these with 80-grit to smooth it out. Top photo is for the "toilet" cabinet, the bottom photo is a teak window sill for the window behind the tub. So...not the greatest series of "how to" photos. But hopefully they'll help a bit. Mongo...See MoreCan anyone give me a lesson on Pinterest?
Comments (8)Mush, if you haven't already.. go to the red Pinterest sign in the middle , click on it, pick out the board or subject that interests you and click on it. If you find something you want to PIN on your board , click on the repin on the left corner. Put it on one of your boards..You make your own titles. So if you want a food board or a sweets board, title it that way. My memory is so bad , this is a great way to keep all their (and my) favorite ideas, photos, (what ever!) in one place. it's so much fun to see so much imagination in one place....See MoreRed African Violets
Comments (44)I began gardening about 8 years ago, starting with annuals, rose bushes, expanding to Gailardias, Daylilies, Hydrangeas and Coneflowers.. I'm not quite there but my garden is almost established. I thought I had an edge having the net, which I did, but I never expected it would take 8 years to get to the place I wanted to be. My grandfather without any electronic resources and a far larger garden and upkeep fared better than I ever will. He's what sparked my interest and I marvel especially being in his 70's what he mastered. I don't have that green thumb and as much stamina as I have, I can never accomplish what he did. It's challenging, it's a hobby I thought I'd 'never' explore but I found it to be very rewarding. In the winter months we allow for extra spending but I couldn't think of anything but getting more African violets and chocolate :) I began AV's last spring, I think. The winter months were always daunting and I quickly realized that African Violets can give me joy all year round. My husband also tolerates my hobby and surprisingly helped me in the garden last year. Only he needs to understand that the leaves on roses shouldn't be saturated during watering and you don't just dig a hole and plant.. Hopefully he'll forgive my criticism and give me a helping hand next year. I actually think he sort of likes it ;) Thanks for the help, happy holidays!...See More
Jeff Zenner
6 years ago
Rosie1949
6 years agofortyseven_gw
6 years agolast modified: 6 years agoirina_co
6 years agoJeff Zenner
6 years agofortyseven_gw
6 years agolast modified: 6 years agofortyseven_gw
6 years agolast modified: 6 years agoJeff Zenner
6 years agoirina_co
6 years agoJeff Zenner
6 years agoirina_co
6 years agofortyseven_gw
6 years agoJeff Zenner
6 years ago
perle_de_or
6 years agoirina_co
6 years agoJeff Zenner
6 years ago


Related Stories
BEDROOMSThe Cure for Houzz Envy: Master Bedroom Touches Anyone Can Do
Make your bedroom a serene dream with easy moves that won’t give your bank account nightmares
Full Story
MUDROOMSThe Cure for Houzz Envy: Mudroom Touches Anyone Can Do
Make a utilitarian mudroom snazzier and better organized with these cheap and easy ideas
Full Story
GRAYChoosing Color: Give Me More Gray Days
Layer On the Grays for a Sophisticated Look in Any Room
Full Story
DECORATING GUIDES7 Bedroom Styling Tricks Anyone Can Do
Short on time or money? You can spruce up your bedroom quickly and easily with these tips
Full Story
KITCHEN DESIGNThe Cure for Houzz Envy: Kitchen Touches Anyone Can Do
Take your kitchen up a notch even if it will never reach top-of-the-line, with these cheap and easy decorating ideas
Full Story
LAUNDRY ROOMSThe Cure for Houzz Envy: Laundry Room Touches Anyone Can Do
Make fluffing and folding more enjoyable by borrowing these ideas from beautifully designed laundry rooms
Full Story
BUDGET DECORATINGThe Cure for Houzz Envy: Entryway Touches Anyone Can Do
Make a smashing first impression with just one or two affordable design moves
Full Story
KITCHEN DESIGN6 Clever Kitchen Storage Ideas Anyone Can Use
No pantry, small kitchen, cabinet shortage ... whatever your storage or organizing dilemma, one of these ideas can help
Full Story
DECORATING GUIDES10 Ways a Red Lamp Shade Can Sass Up a Room
Energize a neutral palette, refine a rustic look ... where a red shade goes, liveliness is sure to follow
Full Story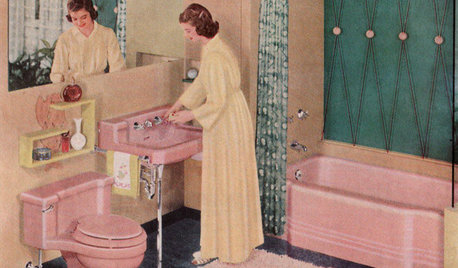
MOST POPULARHomeowners Give the Pink Sink Some Love
When it comes to pastel sinks in a vintage bath, some people love ’em and leave ’em. Would you?
Full StorySponsored
More Discussions

irina_co