


Smelly Subfloor
J. PT
6 years ago
Featured Answer
Sort by:Oldest
Comments (7)

emilyam819
6 years agonumbersjunkie
6 years agoRelated Discussions
Low odor stains and finishes
Comments (35)We have color! I am in LOVE with the Pallmann's Magic Oil finish we put down. Because I was trying to avoid a strong odor during the refinishing since we would be staying in the house during the process (sleeping downstairs), I decided to go with a colored Pallmann's Magic Oil rather than staining using Minwax or DuraSeal first then using the clear Pallmann's. To find a color I liked, I ordered several samples of Pallmann's from the distributor that is closest to me, in Dallas, and the samples are called "pucks." I got black, dark brown, and red brown. Straight out of the can, the colors weren't what I was looking for, but when I started mixing them, I found a great combo. I just took a plastic solo cup and a plastic teaspoon and mixed in various ratios until I got what I wanted. First was 3 spoonfuls of dark-brown and 1 of black, but that was too dark, so I added 2 more spoonfuls of dark brown (for a 5:1 ratio) and that was perfect. I was also mindful of how much total finish I needed to buy (6 liters for my project) so tried to mix in ratios that would minimize waste, and 5:1 was perfect for that. We mixed all six of the Part A containers (colored oil) in a 5 gallon bucket and stirred thoroughly, then used a small measuring container (from the paint section of HD) to measure out a small amount of the colored oil to mix with the Part B (accelerant) which is what makes it harden to a very durable finish. I think the colored Pallmann's has a different ratio of Part A to Part B than the clear, but just follow the directions on the box. Ours was 4:1, I think, so I would fill the container up 16 ounces with color, then top off to 20 ounces with the accelerant, stir with a stir stick, then trowel apply per the directions and video UFloor (the distributor/mfr.) has on YouTube. To prep, we screened the entire floor upstairs at 100 screen (we'd sanded it previously with a sanding sequence of 60, 80, 120 but had a week's worth of foot traffic and moving the last bits of furniture out so wanted to make sure the wood fibers were all the same to accept the stain evenly. Perhaps overcautious, I don't know). Screening is MUCH harder than using the vibrating square buff sander - it took lots of muscle to figure out how to control the buffer. There were a few times initially where I didn't think we were going to be able to do it - mostly when the buffer was going airborne like an ice skater doing a triple Lutz. Eventually got it under control, but managed to leave lots of marks on our freshly painted walls from the buffer handle pushing us around. Got some touch up to do. It looks so easy on YouTube but it was HARD! Then, we swept up tons of sawdust. Then, we shopvacced all the dust we could, carefully carrying around our shop vac canister so it wouldn't leave wheel marks on the floor's fibers. (Again, overcautious much?) We tacked the floor with old towels misted with paint thinner. This was stinky but my husband did it while I was at Home Depot exchanging our buffer for a new one - the first one's wheel was messed up and it was really annoying to work with. All the prep work takes forever, but I figured it was better to do it now than spend two months installing the floors and messing them up in the final stretch. Before sanding and screening, we also had taped over all the light switches, electrical outlets, covered vents and air returns - and turned off the heat - taped plastic over the ceiling fans and lights, removed all the blinds, etc, and then removed all that stuff so that when we were doing the clean up, all the sawdust would be on the floor so we could get it up before we applied the finish. OK, still with me? We are back to applying the finish. We started with the side rooms so that if we had to stop, we could end along a doorway with a full plank of wood. The first room we trowel applied - I used the trowel (which was a 10" stainless steel drywall trowel that I just took a piece of sandpaper and rounded the edges on) for the majority of the floor and my husband took a piece of the buffer pad and did the edges - like cutting in when you are painting a room. We got about 1/3 through the room and needed to stop and buff (there is a time limit on how long the product is workable, we set our phone's alarm and stopped to buff whenever it was time). The first bit was frantic as I was really worried about hurrying and the time and everything, but I calmed down soon enough and figured out this is a marathon, not a sprint. We followed the buffing sequence the instructions specified and didn't have much problem, The first buff is really "grippy" and you need to use some muscle to control the buffer or it will throw you around. The final buffs with the white pads were pretty easy, and I did those to give my husband a break. Per the tip from the Pallmann rep, we applied two coats back-to-back before moving on to the next room. Trowel application: The second room, we thought we'd try the other application method, the buffer method instead of hand-troweling. Big mistake! Maybe if we were more experienced with the buffer we could have done better, but as it was, that buffer through us both around like a rodeo bull. Grabbing the liquid oil made it really careen around, no matter how carefully or lightly we dipped into the oil pool. I had the honor of putting the first hole in the drywall - at which point DH thought he'd better take over. He was doing better than me at first, but then the buffer got the best of him and he put two more holes in the drywall in the same room! We decided to finish that room using the buffer method but to go back to troweling after that. There is no real difference in how the finished product looks, and it really wasn't faster to do the buffer with the way it was flinging us around. The only thing was my wrist was practically crippled by the end of the project, as we did almost 1500 sf in a 10 or 12 hour marathon. I was switching from left to right hand, and DH even had to take a turn troweling, but I've had to wear my wrist brace all week to give my poor arm a chance to rest. This is reaching the length of a novel, so I will just post some more pictures of the final product. We still need to do the stairs (at 2:30am we called it quits because we needed to get up for work in four hours) and baseboards and shoe molding, so these aren't the final final product, but we are getting close. It's been an adventure! We did have a few problem areas that we need to address, I will come back and post about that soon. Buffer application: Back to troweling:...See MoreOld hardwoods and animal smells: Help! (xpost w floor)
Comments (7)In the past I've solved animal urine odor problems in rental properties by removing the carpet and sealing the wood underneath with 2 coats of oil-based floor enamel. (Do they even make that stuff any more?) I think the key is that the finish must cure by chemical reaction, not by solvent evaporation. In this case of course you don't want enamel, but rather a clear finish. I'm not an expert on floor finishing, but maybe something like a good traditional spar varnish would work....See MoreSmelly cabinet is back! odor came back as soon as doors were closed
Comments (15)When I lived in Baton Rouge, LA in a house with two bathrooms over a crawlspace, I learned - after living there for about 3 years - that the bathtub we never used except to bathe the dog had a broken drain pipe. It emptied into the crawl space. The only way I learned this was that I just happened to open the water heater closet while the tub was emptying. The closet had a screened opening in the floor in order to provide fresh air for the gas-fired appliance, and I could hear the water splashing onto the visqueen (plastic) on the floor of the crawlspace. When the plumber went down there to reconnect the pipes, the missing connector was not there, so he assumed that the guys who installed the visqueen before we closed on the sale of the house must have knocked it off and it got lost under the visqueen sheets. There was only a small lake from washing the dog, luckily! I think we just left vents open so it could dry. I was so lucky that I happened to go into that utility closet that day, or we would have used that shower daily a few months later, not knowing there was no plumbing connection. You could have a leak or a similar plumbing issue. You do say that the crawlspace was inspected, though. If the cabinet that smells was one that had the mold in it when you moved in, it may be that you will have to sand it and paint or seal it in order to get rid of the smell. Some of us can really smell certain molds that are not obvious to others. Be sure to wear a good mask or respirator when you sand....See MoreAdvice please - dog urine smell and hardwood floor dilemma
Comments (16)"Given the high moisture level, I would guess, yes, during the 3 month closing period" I would think that your real estate agent should have suggested this, but have you contacted a real estate attorney to inquire about suing the seller for the cost of all repairs? If you had a signed contract to purchase I would think the seller would have some sort of legal obligation to keep the property in the same, if not better, condition that it was in when you signed the purchase contract. To allow that much dog urine seems willful and deliberate. I'm really sorry you're going through this....See MoreUser
6 years agokhrisz
6 years ago PRO
PROCarolina Kitchen & Bath
6 years ago
Godswood
6 years ago
Related Stories
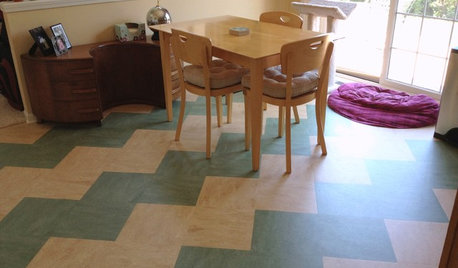
REMODELING GUIDESLinoleum, the All-Purpose Flooring Wonder
Dashing in a rainbow of colors, able to be cleaned with ease and courteous to budgets everywhere, linoleum is a super choice for floors
Full Story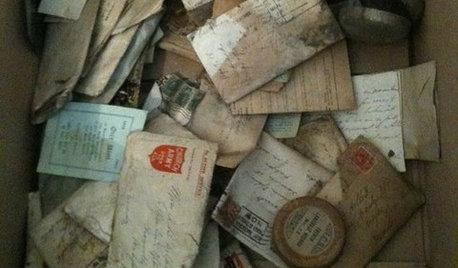
REMODELING GUIDESYou Won't Believe What These Homeowners Found in Their Walls
From the banal to the downright bizarre, these uncovered artifacts may get you wondering what may be hidden in your own home
Full Story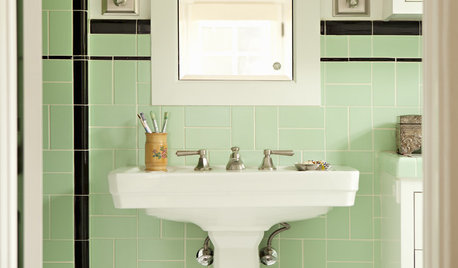
BATHROOM DESIGN9 Surprising Considerations for a Bathroom Remodel
Don't even pick up a paint chip before you take these bathroom remodel aspects into account
Full Story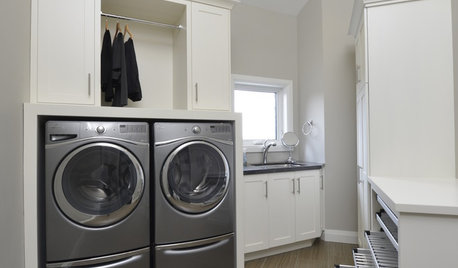
MOST POPULAR10 Smart Ideas for Your Laundry Room Remodel
Make washing and drying easier and more comfortable by considering ergonomics, storage and special features
Full Story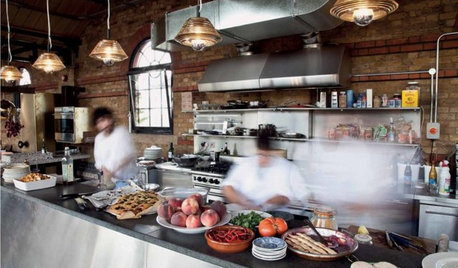
KITCHEN DESIGN16 Practical Ideas to Borrow From Professional Kitchens
Restaurant kitchens are designed to function efficiently and safely. Why not adopt some of their tricks in your own home?
Full Story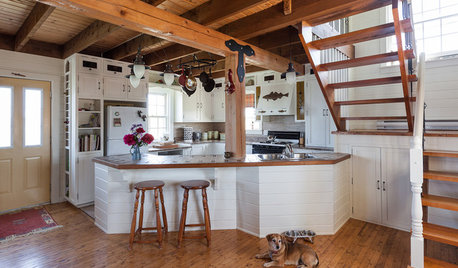
KITCHEN DESIGNOpen vs. Closed Kitchens — Which Style Works Best for You?
Get the kitchen layout that's right for you with this advice from 3 experts
Full Story
ECLECTIC HOMESHouzz Tour: Renovation Gives Toronto Family a Special Gift
Their purchase of a fixer-upper pays off years later with a remodel that tailors the home to their needs
Full Story
PETSDealing With Pet Messes: An Animal Lover's Story
Cat and dog hair, tracked-in mud, scratched floors ... see how one pet guardian learned to cope and to focus on the love
Full Story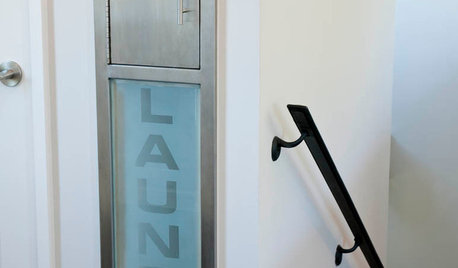
GREAT HOME PROJECTSHate Hauling Laundry? Give Dirty Clothes the Chute
New project for a new year: Install a quick route to the laundry room
Full Story
REMODELING GUIDES11 Reasons to Love Wall-to-Wall Carpeting Again
Is it time to kick the hard stuff? Your feet, wallet and downstairs neighbors may be nodding
Full Story


J. PTOriginal Author