


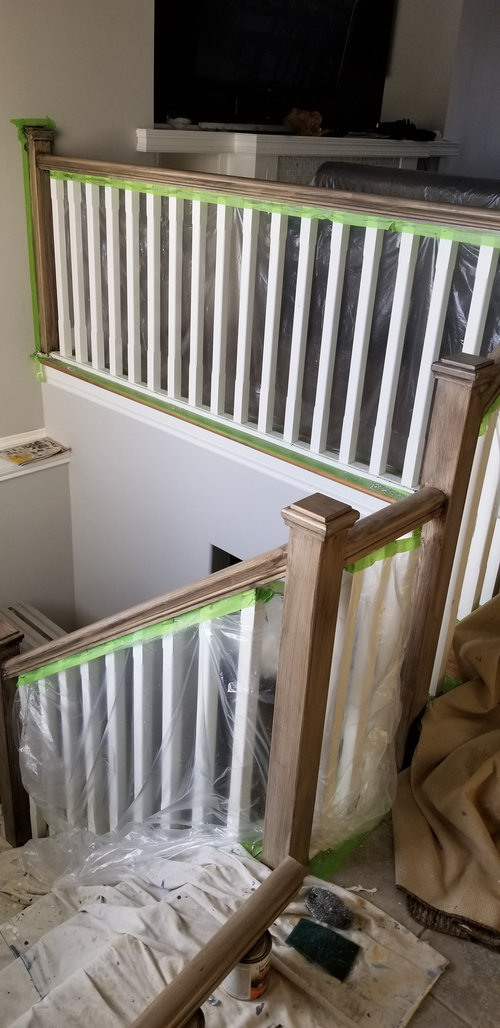
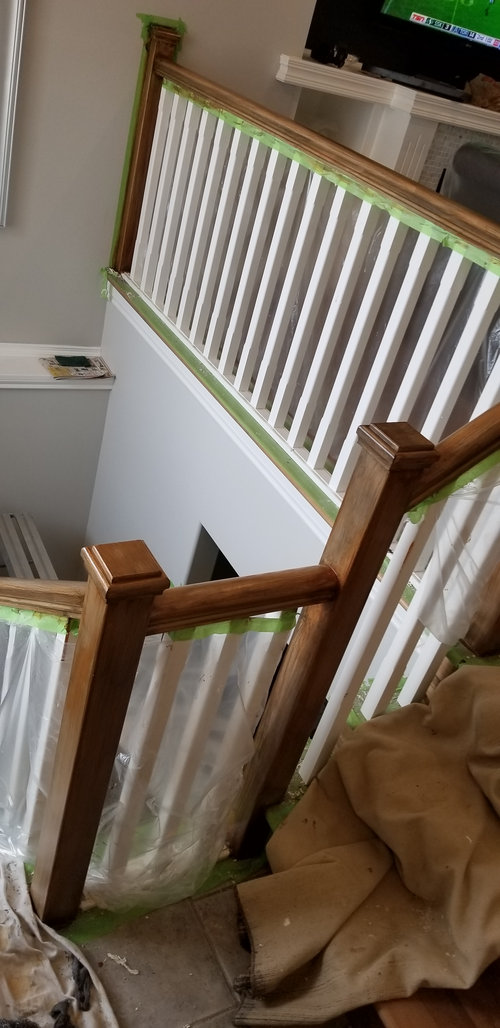
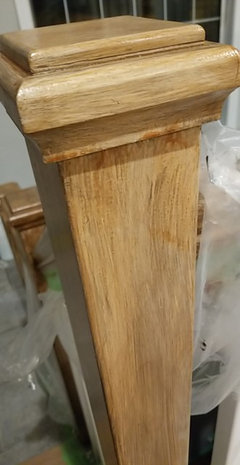
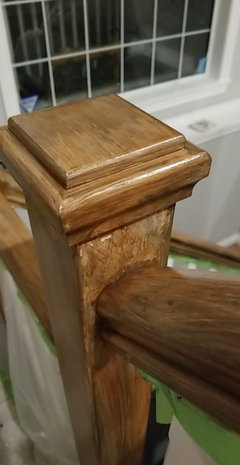
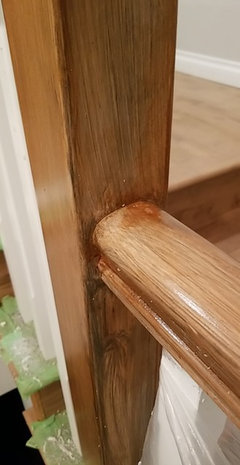
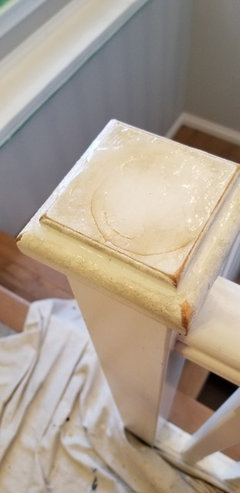
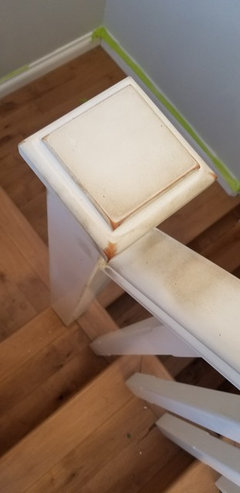
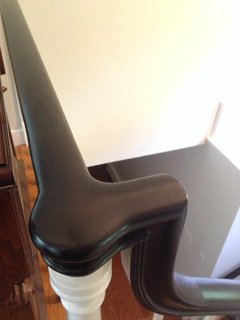
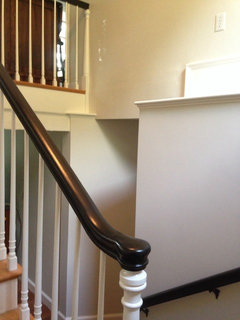
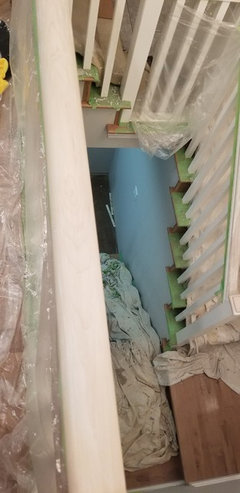
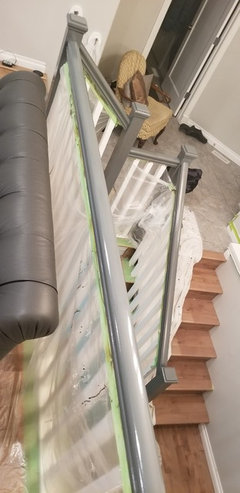
hand rail before after not done help
Luv Soda
6 years ago

Featured Answer
Sort by:Oldest
Comments (28)

Luv Soda
6 years agoLuv Soda
6 years agoRelated Discussions
Before and After Pics of My (not quite done) Decluttered Basement
Comments (8)It is kind of annoying how ivillage adds the hyperlinks to our text with advertising... Easy to think someone is a spammer when they might not be. Here's some updated final pictures showing the full basement with a "walkaround" of each corner: http://herbygoodness.blogspot.com/2011/02/final-before-and-after-pictures-of-my.html I still need to do some work on my craft area, but basically otherwise, the basement decluttering and organizing is DONE!!! Waaaa hoooo!!!! One of my future projects will be making it look a little more homey, by adding an area rug to my craft area and adding a LARGE exercise mat under that area. I'll be watching thrift shops and flea markets and craigslist and whatnot for cheap stuff. For this project, no, I really didn't purge a ton. In looking through my before pictures when I started, I had estimated I might get rid of no more than 20% of my stuff. I did take about 4 boxes of stuff to goodwill and 1 box of stuff is designated for the habitat for humanity restore store that is opening in our area in a few weeks. We're also taking an old tv to the electronics recycling event in our town this Saturday (nobody on freecycle wanted it). I put our nordictrack ski machine up for sale on craigslist. If it doesn't sell, I'll donate it somewhere. I had three large garbage bags worth of trash and a number of boxes/etc. for recycling. Mostly though, the stuff that was down there just needed to be better organized and put away somewhere. I bought a few more shelving units (I so agree with you on the infrastructure, talley_sue - if you don't have "a place" where you can put things, it all ends up piled on the floor so your choices are purge and/or make storage options!). I lucked out in that my neighbor redid his garage this summer and threw out three 5 shelf shelving units (one matched our basement shelves, one matched our garage shelves, one didn't match at all - I shared that one with a friend who I have been helping with decluttering her basement) and one 2 shelf shelving unit and two 3 shelf shelving units. So that definitely helped me a lot. Those 5 shelf shelving units (24" deep) that I LOVE LOVE LOVE are from Home Depot. They are plastic and just snap together easy peasy. Cost is about $41 each right now, so they definitely aren't cheap. I really strongly prefer them over the metal shelves. They are so much stronger, easier to assemble and move, and nicer looking, in my opinion, unless you can afford the stainless steel restaurant quality shelving. The one caution I would give anyone starting out in buying organizing supplies is to put totes on the shelves at the store before buying. A lot of totes didn't fit well (just barely too wide to put two side by side or just barely too tall to go on shelf). I did also invest in some new totes (on sale at Home Depot for $1-$5), including a bunch of sweater boxes and shoe boxes. I had a mish mash of assorted totes I had picked up over the years. I'm happy to say I was able to use up a large number of those in this project. I am trying to transition as much cardboard into plastic as possible, just in case it ever floods down there. Finally, I put labels on everything, since in my world, out of sight is out of mind and with totes I can't see through, I might never find things again if I hid them all away. :) Eventually we want to finish the basement, but that's a long way off and even when we start, it will likely be done in stages for financial reasons. For now though, at least our basement is a whole heck of a lot more useable than it was. Here is a link that might be useful: Final Pics of Basement Decluttering...See More99% done- before and after pics, DIY kitchen
Comments (51)Cleo- the original stovetop fit in a bigger hole than the "new" one, so that piece of stainless was jammed in there to cover the hole. Needless to say, it did not stay very well! The tile backplash and counter were original to the home, built in the early 50's, and those switches on the wall were the controls! That is not grout- that was how the tile was glazed or painted or whatever. Heheheh, so many people used to comment on the "retro" decorating, and liked to play with the switches. raehelen- yes, I got a great deal on the granite. The slabs were discounted from 20/sf to 4.99/SF because there were irregular areas in them that limited the useful squarefootage, and they'd been sitting around for a while. There was a stack of reduced slabs, and I asked to see some of the ones hidden in the back of the stack, and low and behold, there were three slabs hidden back there that were gorgeous....... Even the granite guy said something about how that stack had not been touched for a while. I had even been to that granite yard twice before, and not thought to ask to look deep in that stack. I bought 2 slabs, for $464, and there was a bit of waste, but I still have enough left to make a bathroom vanity countertop! The fabrication was $2285. I was quoted between $1800-4500 by other fabricators. Oh, and the cabinets are santos and santa maria mahogany, no stain....See MoreKitchen Reno done! Before and after
Comments (48)Phaedrus29 - we are thrilled with Snow Storm. We found the counters to be the hardest choice, since we knew we wanted green shaker cabinets. We wanted something that wasn't too stark white, not too yellow, and didn't have veining like "fake marble" but some kind of texture to it. Snow Storm is PERFECT. It wears beautifully and cleans easily, and the very subtle tonal circle pattern is really nice. It is a very neutral white - neither grey nor yellow, but a little bit warm. It is perhaps the thing we are most happy with which is great since it was such a hard find! I can send you some more photos if you like, do you have an email?...See MoreKitchen almost done! Before and after
Comments (41)I'm sincerely so very happy for you and your family! its beautiful! I love all of it and imagine the space is serving your family very well now. What a fun place to live! i giggle at the thought of you touring folks around your new house and showing them the powder room as where your kitchen used to be--it wasn't much bigger! Most people who post a request for layout help don't expect to get a comment that recommends rearranging their whole main floor. I'm so glad you considered it. And you did it! The sight of your pictures made my heart flutter a bit. Your home is lovely and I had so much fun contributing to part of it and seeing the "afters." Thank you, DC!...See MoreLuv Soda
6 years ago
Milly Rey
6 years agolast modified: 6 years agoLuv Soda
6 years agoLuv Soda
6 years ago- PRO
Patricia Colwell Consulting
6 years ago felizlady
6 years agoLuv Soda
6 years agoMilly Rey
6 years agolast modified: 6 years ago PRO
PROJoseph Corlett, LLC
6 years ago
CC
6 years agoLuv Soda
6 years agoBri Bosh
6 years agoLuv Soda
6 years ago
gm_tx
6 years agoLuv Soda
6 years agoLuv Soda
6 years agoLuv Soda
6 years ago PRO
PROGARY FINLEY
6 years agoLuv Soda
6 years agoMilly Rey
6 years agolast modified: 6 years agosuezbell
6 years agolast modified: 6 years agoLuv Soda
6 years agoLuv Soda
6 years agoLuv Soda
6 years agoLuv Soda
6 years ago


Related Stories
MODERN HOMESBefore and After: 5 Modern Makeovers Done With a Light Touch
These thoughtful remodels introduce contemporary updates while preserving historic features
Full Story
ENTRYWAYSBefore and After: New Mudroom Helps a Family Get Organized
A designer improves functionality while adding modern farmhouse style to a family’s landing zone and laundry room
Full Story
BEDROOMSBefore and After: French Country Master Suite Renovation
Sheila Rich helps couple reconfigure dark, dated rooms to welcome elegance, efficiency and relaxation
Full Story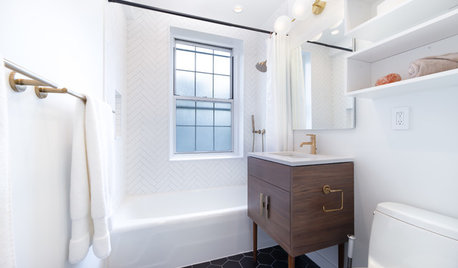
BEFORE AND AFTERSBefore and After: Stylish and Streamlined Small Bathroom
A design firm helps a New York couple update a 45-square-foot bath and avoid surprises by limiting material choices
Full Story
LIVING ROOMSBefore and After: Living Room Goes From Blah to Bright in 4 Days
See how a designer helps her client surprise his wife with a living room transformation for her birthday
Full Story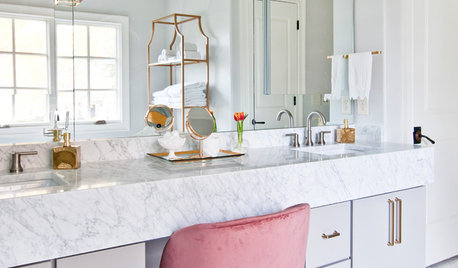
BEFORE AND AFTERSBefore and After: 5 Bathroom Makeovers With Fresh Palettes
See how pros helped homeowners update these spaces with new colors and materials
Full Story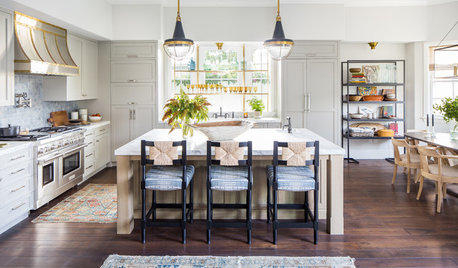
KITCHEN DESIGNBefore and After: 5 Open Kitchens That Work With Adjacent Spaces
Repeating colors, finishes and shapes helps these open-plan kitchens blend stylistically with the spaces nearby
Full Story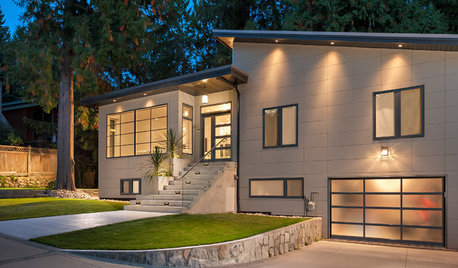
EXTERIORSBefore and After: 5 Striking Exterior Makeovers
By the time these designers were done, it was hard to believe these were the same houses
Full Story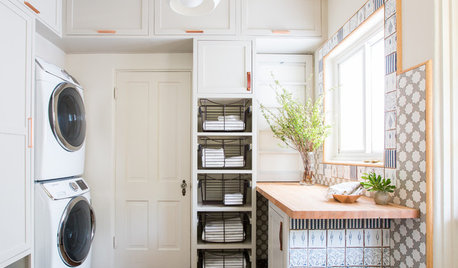
MOST POPULARBefore and After: 5 Laundry Rooms That Make Washday More Fun
Pretty wallpaper, pullout baskets and a bed for the pup help these laundry rooms work for their owners
Full Story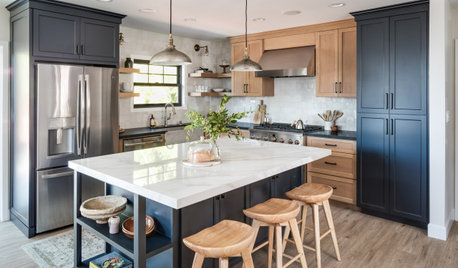
KITCHEN MAKEOVERSBefore and After: 5 Kitchen Remodels Under 160 Square Feet
New layouts and lighter palettes help these smaller-than-average kitchens feel more open and bright
Full Story


Diane