


Took out my camera - some citrus photography
Laura LaRosa (7b)
6 years ago
Featured Answer
Sort by:Oldest
Comments (10)

Laura LaRosa (7b)
6 years agolast modified: 6 years ago
Susanne Michigan Zone 5/6
6 years agoRelated Discussions
Camera settings for butterfly photography
Comments (17)One of the finest pieces of marketing, ever, has been the coining of the phrase "Point-and-shoot" camera. In three simple words it promises the ease of operation of an old Kodak Brownie and that you will be able to produce National Geographic quality photographs. Few of us ever produce pictures of such high quality...but we could! The new digital cameras have capabilities beyond our imagination! Unfortunately, the operator's manuals are written by the brilliant young engineers who have grown up with the technology and the language that surrounds it. They fail to understand that many buyers of cameras received their education somewhere around the middle of the last century...many (most?) of the terms in the manual did not even exist at that time. The language discourages these readers so the manual gets lightly scanned, or ignored. When this happens, the camera is used poorly and often with the wrong settings. This mini-tutorial is my attempt at simplifying the language while suggesting the "tweaks" that I use to customize my camera. My goal is to be able to walk outside, observe the weather conditions, make one setting adjustment to compensate for the existing weather and then to "point-and-shoot" all day with reasonable expectations of high quality photos. The camera manufacturer has to produce a camera that is set up to take average pictures in almost any area but it is NOT set up to take OUTSTANDING pictures of anything. Whether the customer will be using it for architecture, landscapes, sports, portraits, or for butterflies, the many settings will have to be set for that purpose. When all the settings are correctly tweaked, the digital camera becomes capable of coping with the special requirements in a simple and straight-forward manner. There are two settings that are paramount in achieving quality, regardless of the subject matter. The first of these, and the most critical, is usually referred to as the IMAGE RECORDING QUALITY. In my opinion, it is a setting of the past that has outlived it's time. When digital cameras first came out, storage capacity (same as number of shots on a roll of film)was quite low. For example, the memory space within your camera might allow only twenty-five high quality pictures before running out. To boost that, they added software that would allow you to increase the number of shots that your camera could store up to a hundred shots. The trade-off was that in order to do so, they had to reduce the size of the file for each picture which, in turn, reduced the quality drastically. You ended up with 100 lousy pictures. The high quality that your camera (and you) had shot is gone forever...you can not get it back! Regardless of whether you shoot landscapes or butterflies...this one is a no-brainer, select the option for the HIGHEST QUALITY SETTING available. Set it now and never, ever change it, regardless of what you are shooting. The second setting actually occurs within your editing software. It is a setting that is also designed to allow for smaller picture files (read lousy quality pictures) to reduce memory space usage on your hard drive. This option is based on the same as above...smaller files require less storage space...smaller files equate to reduced quality. Most of us utilize some form of post-camera software to edit our photos before we SAVE them. After you have completed the editing and wish to close and save this file to a folder, it will query you to select the quality level at which you would like it SAVED. No-brainer time again...save at highest quality offered. I have all my photos, at the highest level of quality stored on the same hard drive that I have used for the last four years and that houses everything from my computer. According to my pie-chart of available space, I still have room for over 40,000 photos! Summarizing these two critical options, choose the highest quality for IMAGE RECORDING QUALITY...choose the highest quality when SAVING from your editing software. If you select less than that, you can never get it back! The below montage shows the quality difference that occurs as a result of the above two options. These two photos were shot with a camera on a tripod and with all but two settings identical. The photo on the left was shot with IMAGE RECORDING QUALITY at it's lowest quality option and it was SAVED in editing to it's lowest quality option. The photo on the right was shot with both options at the highest level. Now for the settings that will customize your camera for shooting butterflies. We need to determine the characteristics of butterfly photography that are problematic. They are tiny creatures that rarely fill the frame of the camera...they are defensive in nature which causes them to "spook" as we approach...they can fly...and they are cold-blooded which means that most photos will be taken in full sunlight rather than in easier to handle lighting situations. In my opinion, the qualities that cause a photo to be less than good are poor focus (includes motion blur) and poor exposure. FOCUS:Most cameras have an option for operating in the AUTO focus mode or the MANUAL focus mode. I strongly urge you to opt for the AUTO focus...it is faster, refocuses for each shot and, try as I might, I can not better it's accuracy or consistency. When you select AUTO focus, there are usually about three options from which you must select one. The first is a setting based on shooting still subjects. The second option is for shooting moving subjects and the third is a combination of the two. I get my best results when the "still subjects" option is selected. The butterflies are usually perched when photographed. With my Canon, this option is called ONE SHOT AF. I set it here right after I bought it when I did the initial camera settings and have left it there. EXPOSURE:The amount of light that reaches the sensor of your camera is based on the size of the opening that lets in the light (the aperture) and the amount of time that the light is allowed to come in (the shutter speed). When operating in FULL MANUAL, the operator must select and set both the aperture and the shutter speed. This requires lots of experience and/or a metering device if it is to be accurate. This is NOT my preferred operational mode! On some rare occasions, manual is the best but only rarely! Neither is FULL AUTO my preferred mode. There are two other modes that offer equally accurate exposure but allow for better control of other factors such as stopping movement and depth-of-field. These are called APERTURE PRIORITY or SHUTTER PRIORITY. They are based on the operator selecting either one of these controls and allowing the cameras software to select the other. Without getting into the technical aspects (they are tutorials of their own) the size of the aperture controls depth-of-field (the portion of the photo that is in sharp focus) while the speed of the shutter can "stop" the blurring effects of motion. Thusly, for me, when I go outside to shoot, if the breezes are blowing I select SHUTTER PRIORITY, set the shutter speed at 1/400 second (which is usually enough to eliminate the movement of the flowers that the butterflies are on) and make no further changes unless the wind goes away. If the wind is not a concern, I select APERTURE PRIORITY and select f/5.6 or higher so I get an acceptable depth-of-field. One of the toughest things to overcome in butterfly photography is the required meter readings for proper exposure. The difficulty arises due to the cameras desire to measure the full frame area while the area occupied by the butterfly is only a small fraction of that area. The skittishness of butterflies has taught us to shoot our first pictures when we get to about six feet away. We can ease in further and sometimes we will be allowed to get quite close but we are usually faced with a small bug in a big garden. This requires that we "tweak" the metering settings to conform with reality. With most cameras the metering settings consist of three or more options that serve as choices which control the parts of the image area that will be considered when setting exposures. The first is usually from nine to more than forty somewhat evenly spaced points that are "read" and averaged to arrive at the exposure. This is essentially useless for any small subjects. The second option is called "center weighted" and uses a circle around the center that comprises about 30% of the image area for the metering...better than the first option but still not the best. The final option is the best choice for butterflies...it is called SPOT. It is based on about 3%-4% of the area in a circle right around the middle of which our butterfly is a prominent part. This is how I keep my camera at all times regardless of what I am shooting. It is my belief that this setting is used to influence the auto focus function even though the manual does not specifically state this. One of the main settings for me is one called EXPOSURE VALUE or EV. The person(s) who wrote the software for your camera had to, at some point, make a decision as to what constituted the "correct" exposure. It will approximate the middle-of-the-road point that is not too dark and not too bright. It can vary slightly from camera maker to camera maker since it is a judgmental call. They have all set up an EV adjustment (usually as a slider)that is graduated in 1/3 f/stop increments from -2 full stops to +2 full stops. The camera comes out of the box set to shoot with the exposures that yield a photo that would come with shooting at 0 adjustment. When you adjust to the left or right of zero, you are altering the aim point to either an overall darker image or an overall lighter image. Your camera will still do it's superior job of metering and setting exposures...it's just that you have told it "I like what you are doing but I would like it a little better if your results were just a tad darker". My personal results fit my taste better with -2 increments (-2/3 f/stops).One of the reasons that I select a slightly darker image is that most of my shots are in full sun and the chance of overexposure is great with the vivid colors of the flowers that they nectar on. The second reason is that editing software can correct for considerable underexposure but a picture that is overexposed is mainly lost forever. Burned out highlights are irretrievable. I occasionally shoot a photo that appears a little "off" when I review it on the monitor. When I do, I usually shoot two more photos of the same subject...one that has one increment more than the original and another with one increment less. This is called "bracketing" the exposure. When I edit them, I keep one and trash the other two. A small group of settings that I consider personal taste modifiers include contrast, saturation and brightness. I keep these all at +1...your taste may differ from mine. I do not alter the sharpness setting. I leave it at the manufacturers settings and make any adjustments in my editing software. ISO:These settings serve to modify the sensor's sensitivity to light. Increasing the ISO number allows your camera to arrive at the proper exposure in low-light situations. The trade-off is that you lose quality in proportion to the increase in the ISO number. The reduced quality manifests itself with softer focus, color faults and the introduction of tiny specks of color that increases progressively with the increase in ISO number. Most cameras yield pretty good results up to ISO400...above that can be less than good. I keep my camera at it's lowest ISO setting-ISO 80. When you increase the ISO setting the camera must adjust the aperture or shutter speed. Shooting in full sunlight with high ISO settings can cause your camera to be unable to correct to a proper level of exposure. WHITE BALANCE: This refers to your camera's ability to correct from tainted light sources. Pure sunlight produces shades of yellow, red and other colors at different times of day and based on many other factors. Incandescent and fluorescent lights vary greatly from daylight sources. The internal software of most digital cameras when set on AUTO does a superb job of this. A few years ago, the digital cameras had difficulty with vivid colors like dark red and purple but that is history. The recent cameras capture the toughest colors with ease. If spot-on color is called for, most digitals offer a CUSTOM setting which really works...it is cumbersome but will get the job done. In my experience, improper exposure is more often the cause of poor color than is tainted light sources or improper white balance settings. Recap of Settings: IMAGE RECORDING QUALITY:The highest level available. SAVE QUALITY:The highest level available FOCUS:AUTO with STILL OPTION OPERATING MODE:Aperture Priority if wind is not a problem Shutter Priority if wind is a factor DO NOT SELECT MANUAL EXPOSURE VALUE:(-2) increments=(-2/3) f/stops METERING:Spot WHITE BALANCE:Auto ISO:Lowest number available CONTRAST:(+1) SATURATION:(+1) BRIGHTNESS:(+1) SHARPNESS:Make no change Motion blur appears as a blurry, or improperly focused photo. It is a function of movement that usually is generated at the camera. The best solution that I have found is a good old-fashioned sturdy tripod. Many of today's cameras or lenses have image stabilization capabilities...if your's does, keep the switch ON! It can really help. I sincerely hope that your results give you as much pleasure as mine has given me. Bob ....See MoreJust for fun..Storm cloud picture my citrus braved out!
Comments (46)Peter: It is a whole other world taking pics like that during the day. My friend is trying to figure that out although he gets some great cloud formations before and after the storms. Nice work. I hope to see more pics by you. Jojo: I have heard the monsoons can be quite dramatic! I have even seen the storm drains dug all around the outskirts of peoples home but never saw them fill up. I can only imagine that. I have seen lightning from a distance and been very frustrated chasing them because the roads there a long and straight with no way to turn down another for miles to catch up to it..lol Been there done that. Have you ever seen lightning drop from the clouds over the prairies or horizon? It must be majestic! It is nice to meet Peter. It is always nice to see new faces. I would never come there without visiting some very nice people here if the offer is there. Going there to see people I know would be so nice. We would have to visit the Indian Reservations though, Saguaro Cactus Preserve, and look for turquoise jewelry..lol I have danced with the Navaho tribes once before! I hope many others come here with nice pictures. I would of loved to have sene the hail storm ones that some here have experienced! Mike...See MoreWind Took Out Most of My Peach Tree
Comments (15)Tom, Why *before* the dormant stage? Why not *during* the dormant stage? For the same reason we cut back the citrus after fruit production. Since we get little in the way of frost the extra growth prior to the dormant season will theoretically make the tree stronger through the dormant season and give it an extra kick after the end of the next dormant period. Tom - should I prune the branch back as noted below? Bill, don't cut it off flush at the trunk, leave 6" of the fork, exposes the tree to more disease with a flush cut and weakens the tree. The real point is that if left with that much asymmetry the tree will either topple in high winds or continue to break off due to the imbalance in weight....I see another tree to the left in your picture, no problems with it? I grew up just south of Ulmerton, my sisters went to Largo but after they built Seminole I was in their district...now I'm out here near Weedon Island. Tom...See MoreSome pics with my OLD camera
Comments (5)Well, I checked the status of my camera, and it's really confusing. It was scanned for departure from NY at 12:27am yesterday, and then scanned for arrival at San Carlos, CA at 12:28. How could it have arrived in one minute? Must be a boo-boo! LOL Ron, I wonder if that's what's wrong with my old Sony. It's like the lens just isn't opening. Everything else was functioning. Altho I tried kinda smackin' it few times to see if I could knock something loose or whatever, and now the nightshot light stays on. So, I might've screwed it up more. My son thinks we should put it up on EBay and see if anyone might buy it for parts, since it's obsolete. Can't hurt I guess, and maybe someone else can use it, or fix it. It was a $900 camera! Snowheather, I can't wait to get the new one. I'll post some pics right away. Sounds like you got a good camera. I looked at a few Canons, but that was when I was looking at the DSLRs and once I discovered that I didn't need those, I found the Sony. I guess I've always just like Sonys. My computer is an 8yr old one that's still as good or better than some of the new computers. I just wish Sony's newer ones were better than they seem to be. Not getting good reviews lately. That can wait tho. Can't afford it now anyway! Carol, you're so right. These pics are so grainy! SANKA is really beautiful. That's why I had to try and capture it even with the crappy Kodak!...See MoreLaura LaRosa (7b)
6 years agolast modified: 6 years ago
cory (Zone 7a, NJ)
6 years ago PRO
PROHome
6 years agolast modified: 6 years ago
sunshine (zone 6a, Ontario,Canada)
6 years ago
kcandmilo
6 years agoLaura LaRosa (7b)
6 years ago
myermike_1micha
6 years ago
Related Stories

HOW TO PHOTOGRAPH YOUR HOUSEHow to Compose Your Shot for Stunning Home Photography
A photo pro shares secrets like camera height, lighting and lens type for creating images that do your home justice
Full Story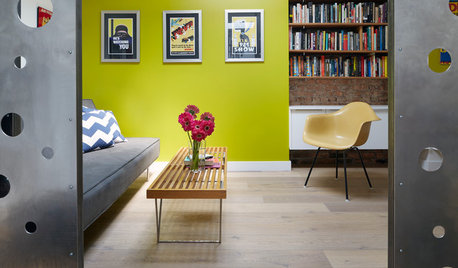
COLORColor of the Week: 10 Tangy Ways with Citrus Green
Add some zest to your home with a little — or a lot of — lively lime
Full Story
GARDENING GUIDESHow to Keep Your Citrus Trees Well Fed and Healthy
Ripe for some citrus fertilizer know-how? This mini guide will help your lemon, orange and grapefruit trees flourish
Full Story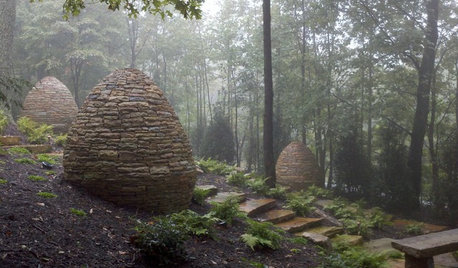
GARDENING AND LANDSCAPINGDesign Photography: When the Fog Rolls In
Foggy days allow the imagination to step into photos of homes and landscapes
Full Story
HOW TO PHOTOGRAPH YOUR HOUSEAttract Home Buyers Easily With Great Photography
Show your home's best face in real estate listing photos to have potential buyers knocking down your door
Full Story
HOUZZ PRODUCT NEWSHow to Capture the Beauty of Your Work Through Phone Photography
In this webinar, a pro photographer offers tips on staging spaces and using phone settings to get good project shots
Full Story
LIVING ROOMSLay Out Your Living Room: Floor Plan Ideas for Rooms Small to Large
Take the guesswork — and backbreaking experimenting — out of furniture arranging with these living room layout concepts
Full Story
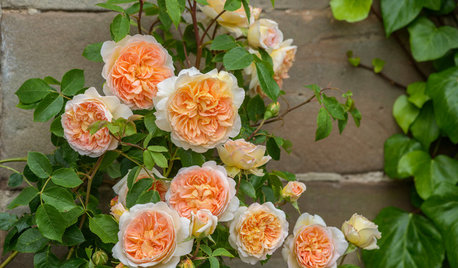
FLOWERSSneak a Peek at Some of Next Year’s Irresistible New Roses
Here are top 2018 picks for beautiful blooms, lovely fragrances and exceptional disease resistance
Full Story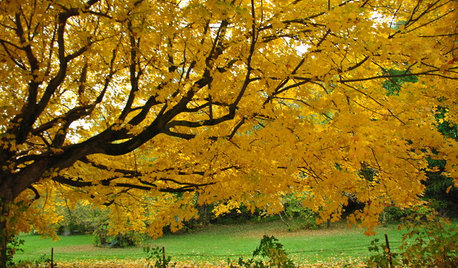
MOST POPULARBrilliant Scenes of Fall Color Indoors and Out
Celebrate the season with Houzzers’ photos of fall
Full Story
Laura LaRosa (7b)Original Author