


Camera settings for butterfly photography
bob_71
13 years ago
Featured Answer
Sort by:Oldest
Comments (17)

minrose
13 years agolast modified: 9 years agoimabirdnut
13 years agolast modified: 9 years agoRelated Discussions
Really Off the Beat Topic: Photography
Comments (22)Ok y'all! So the Photography presentation last Firday night went fine. I had fun doing it. I would say there were only about a dozen ladies there but all seemed to enjoy themselves. After I did my presentation I scrolled through all my 214 (yes, I know--a Lot of photos) and talked just about every one! I'm long winded. BUT, I was in my MOMENT. As I went though I shared with them about the rocks I name. There were a couple that I hadn't officially named and they helped me with another name for one....Penguin Rock. To me it looks like a podium-they showed me a penguin. :-) I think they had fun thinking about it. IT was kind of like we were all laying on the grass looking up to the sky to see what formations the clouds were making! My whole intent was to get people to see the greater beauty and peace in nature all around us--even the small things! It's so easy to get caught up in the hustle and bustle of life. I knew I did that for at least two of the ladies there. OK, so the Fair Photos. I went last Sunday there to the Fair. Out of the 9 I entered 1 won 3rd place. The one that won was my poppy photo. It was interesting as I viewed all the photos. A lot were good especially the ones that won. But then sometimes I couldn't figure out what the judges were looking for. I know they want a photo to "pop" and the poppies did in color. They have volunteers there who watch the building and make sure the photos are monitored. I spoke with one of the gals there and it just happened to be Kay Hendrickson, one of our local photographer/artists. She is known for her poppy photos. I think she said they received about 1800 photos this year. So, anyways, just want to say Thank You to all for your encouragement and specific comments. I'm still taking pictures and have some set for next year! :-) Hope all is well in your lives. That loved ones and you are in good health and spirits! Love, Jules...See MoreWhat's the best way to learn photography?
Comments (19)Quote:"your area is so full of wonderful subjects" Years ago I drove 18 wheelers covering the entire U.S.A. Every year Labor Day seemed to open the flood gates as people began their annual vacation migration in search of something to see. But what I found most amazing is that for every person that heads out of your community there is another traveling vast distances to come see your town. To that end I used to offer people a challenge. Take out a road map of your state and locate where you live then take a simple drawing compass and scribe circles at 5, 10, 20, 30, 40 & 50 miles. Now locate all the communities within those circles and contact their chamber of commerce for information on sites to see in their community. You will find a vast wealth of sites to see, all within a short one hour commute of your house, and many of them are absolutely free of admission. Now consider how much money you can save in fuel, food and lodgings and you have just saved enough to pay for that camera or new lenses you been dreaming about, not mention that you can continue that project year around instead of trying to pack it all into two weeks. Now in regards to how long it takes to edit 1300 photos. Actually the problem is not as difficult as it might seem. I began my interest in photography with a Pentax Spotmatic, which was the first 35mm SLR to have a built in through the lens light meter. (The Nikon F offered a light meter in an accessory viewfinder and Canon had not yet got into the professional SLR market). Lenses were manual focus, manual aperture and exposure was controlled by manipulating the shutter speed and lens aperture to center a match needle indicator in the view finder. As if that was not enough, in those days most films had an ASA (ISO) rating ranging from 64 to 325. I can vividly remember when AGFA introduced a 1000 ASA B&W film for the first time, and Fuji film almost took over the industry with a 500asa high resolution color print film. In those days getting the correct exposure was at best a bit iffy so it was common practice amongst the pro's and advanced amateurs to use a technique called "Bracketing" In fact, Bracketing is an automatic feature on most DSLR's but most people fail to use it. Bracketing is a technique where you shoot one frame at the measured exposure, then a second frame one f-stop under and a third frame one f-stop over. We could then push or pull an additional f-stop in the darkroom if need be. In those days there was no "live view" or "instant replay" so that is how we could insure we would have a usable print when we processed the film. I still rely heavily on that technique when i am out in the field where it would be difficult to return and try again, especially when shooting birds or wildlife where the shots cannot be repeated. When shooting macro shots of plants & flowers on a windy day I often set the mode to "Sports" which is shutter priority mode keeping the shutter speed as high as possible. This has a two fold effect. 1. By keeping the shutter speed very high it assures stop action when the subject is moving in the wind and 2. it keeps the aperture open, limiting depth of field, which generally puts the background out of focus giving a nice soft pastel background that does not detract from the subject. Back in the days of film bracketing the exposures was rather expensive when you considered the cost of film and processing, but in this age of digital when i go in the field I carry 5 or 6 SD cards and 5 sets of batteries so I am not concerned about wasting a shot or two if I can be sure that I will ultimately have the shot i want. In addition, I generally do not take just one shot, but rather I like to shoot a series of shots that show different aspects of the subject. By example, I am attaching a series I took of the evolution of a Dandelion. My brother said i was as crazy as an outhouse rat for taking pictures of dandelions but I like the outcome. DANDILION PLANT IN BLOOM DANDILION BLOSSOM DANDILION IMMATURE SEED POD DANDILION MATURE SEED POD DANDILION MATURE SEED POD DANDILION SEEDS...See MoreFree and low cost classes in photography
Comments (2)That is a really good deal. I have tried to take some digital photography courses and they are at least $30 for an hour or two with a class of 6 or 7. I would take a class in a minute for the manual settings, sure makes a difference if you have an occasion when you want a picture and only have the one chance to take it if you are in a hurry. Of course the auto settings have worked pretty good for me but I sure would like to learn more, hands on and in person works so much better than a book for me. Valerie...See MoreCamera Settings for Butterfly Photography
Comments (0)This forum article is by member bob_71. One of the finest pieces of marketing, ever, has been the coining of the phrase "Point-and-Shoot" camera. In three simple words it promises the ease of operation of an old Kodak Brownie and that you will be able to produce National Geographic quality photographs. Few of us ever produce pictures of such high quality...but we could! The new digital cameras have capabilities beyond our imagination! Unfortunately, the operator's manuals are written by the brilliant young engineers who have grown up with the technology and the language that surrounds it. They fail to understand that many buyers of cameras received their education somewhere around the middle of the last century...many (most?) of the terms in the manual did not even exist at that time. The language discourages these readers so the manual gets lightly scanned, or ignored. When this happens, the camera is used poorly and often with the wrong settings. This mini-tutorial is my attempt at simplifying the language while suggesting the "tweaks" that I use to customize my camera. My goal is to be able to walk outside, observe the weather conditions, make one setting adjustment to compensate for the existing weather and then to "point-and-shoot" all day with reasonable expectations of high quality photos. The camera manufacturer has to produce a camera that is set up to take average pictures in almost any area, but it is NOT set up to take OUTSTANDING pictures of anything. Whether the customer will be using it for architecture, landscapes, sports, portraits, or for butterflies, many settings will have to be adjusted for that purpose. When all the settings are correctly tweaked, the digital camera becomes capable of coping with the special requirements in a simple and straight-forward manner. There are two settings that are paramount in achieving quality, regardless of the subject matter. The first of these, and the most critical, is usually referred to as the IMAGE RECORDING QUALITY. In my opinion, it is a setting of the past that has outlived its time. When digital cameras first came out, storage capacity (same as number of shots on a roll of film) was quite low. For example, the memory space within your camera might allow only 25 high-quality pictures before running out. To boost that, they added software that would allow you to increase up to a hundred the number of shots that your camera could store. The trade-off was that in order to do so, they had to reduce the size of the file for each picture that, in turn, reduced the quality drastically. You ended up with 100 lousy pictures. The high quality that your camera (and you) had shot is gone forever...you can not get it back! Whether you shoot landscapes or butterflies...this one is a no-brainer: Select the option for the HIGHEST QUALITY SETTING available. Set it now and never, ever change it, regardless of what you are shooting. The second setting actually occurs within your editing software. It is a setting that is also designed to allow for smaller picture files (read: Lousy quality pictures) to reduce memory space usage on your hard drive. This option is based on the same as above...smaller files require less storage space...smaller files equate to reduced quality. Most of us utilize some form of post-camera software to edit our photos before we SAVE them. After you have completed the editing and wish to close and save this file to a folder, it will query you to select the quality level at which you would like it SAVED. No-brainer time again: Save at highest quality offered. I have all my photos, at the highest level of quality, stored on the same hard drive that I have used for the last four years and that houses everything from my computer. According to my pie-chart of available space, I still have room for over 40,000 photos! Summarizing these two critical options, (1) choose the highest quality for IMAGE RECORDING QUALITY and (2) choose the highest quality when SAVING from your editing software. If you select less than that, you can never get it back! The montage below shows the quality difference that occurs as a result of the above two options. These two photos were shot with a camera on a tripod and with all but two settings identical. The photo on the left was shot with IMAGE RECORDING QUALITY at it's lowest quality option and it was SAVED in editing to its lowest quality option. The photo on the right was shot with both options at the highest level. (Scroll down to see the montage mentioned above) Now for the settings that will customize your camera for shooting butterflies. We need to determine the characteristics of butterfly photography that are problematic. They are tiny creatures that rarely fill the frame of the camera...they are defensive in nature which causes them to "spook" as we approach...they CAN fly...and they are cold-blooded, meaning that most photos will be taken in full sunlight rather than in easier to handle lighting situations. In my opinion, the qualities that cause a photo to be less than good are poor focus (includes motion blur) and poor exposure. FOCUS: Most cameras have an option for operating in the AUTO FOCUS mode or the MANUAL FOCUS mode. I strongly urge you to opt for the AUTO FOCUS. It is faster, refocuses for each shot and, try as I might, I can not better its accuracy or consistency. When you select AUTO FOCUS, there are usually about three options from which to select. The first is a setting based on shooting still subjects. The second option is for shooting moving subjects and the third is a combination of the two. I get my best results when the "STILL SUBJECTS" option is selected. The butterflies are usually perched when photographed. With my Canon camera, this option is called ONE SHOT AF. I set it here right after I bought it when I did the initial camera settings and have left it there. EXPOSURE: The amount of light that reaches the sensor of your camera is based on the size of the opening that lets in the light (the aperture) and the amount of time that the light is allowed to come in (the shutter speed). When operating in FULL MANUAL, the operator must select and set both the aperture and the shutter speed. This requires lots of experience and/or a metering device if it is to be accurate. This is NOT my preferred operational mode! On some rare occasions, manual is the best but only rarely! FULL AUTO is not my preferred mode, either. There are two other modes that offer equally accurate exposure but allow for better control of other factors such as stopping movement and depth-of-field. These are called APERTURE PRIORITY and SHUTTER PRIORITY. They are based on the operator selecting either one of these controls and allowing the camera's software to select the other. Without getting into the technical aspects (they are tutorials of their own), the aperture size controls the depth-of-field (the portion of the photo that is in sharp focus) while the speed of the shutter can "stop" the blurring effects of motion. Thusly, for me, when I go outside to shoot, if the breezes are blowing I select SHUTTER PRIORITY, set the shutter speed at 1/400 second (which is usually enough to eliminate the movement of the flowers that the butterflies are on) and make no further changes unless the wind goes away. If the wind is not a concern, I select APERTURE PRIORITY and select an f-stop of f/5.6 or higher so I get an acceptable depth-of-field. One of the toughest things to overcome in butterfly photography is the required meter readings for proper exposure. The difficulty arises due to the camera's desire to measure the full frame area while the area occupied by the butterfly is only a small fraction of that area. The skittishness of butterflies has taught us to shoot our first pictures when we get to about six feet away. We can ease in further and sometimes we will be allowed to get quite close but we are usually faced with a small bug in a big garden. This requires that we "tweak" the metering settings to conform with reality. With most cameras the metering settings consist of three or more options serving as choices that control the parts of the image area that will be considered when setting exposures. The first option (variously named EVALUATIVE, MULTI-PATTERN, MULTI, etc.) is usually from nine to more than forty somewhat evenly-spaced points that are "read" and averaged to arrive at the exposure. This is essentially useless for any small subjects. The second option is called "CENTER WEIGHTED" and uses a circle around the center that comprises about 30% of the image area for the metering...better than the first option but still not the best. The final option is the best choice for butterflies...it is called SPOT. It is based on about 3%-4% of the area in a circle right around the middle of which our butterfly is a prominent part. This is how I keep my camera at all times regardless of what I am shooting. It is my belief that this setting is used to influence the auto focus function even though the operating manual does not specifically state this. One of the main settings for me is one called EXPOSURE VALUE or EV. The person(s) who wrote the software for your camera had to, at some point, make a decision as to what constituted the "correct" exposure. It will approximate the middle-of-the-road point that is not too dark and not too bright. It can vary slightly from camera maker to camera maker since it is a judgmental call. They have all set up an EV adjustment (usually as a slider) that is graduated in 1/3 f-stop increments from -2 full stops to +2 full stops. The camera comes out of the box set to shoot with the exposures that yield a photo that would come with shooting at zero adjustment. When you adjust to the left or right of zero, you are altering the aim point to either an overall darker image or an overall lighter image. Your camera will still do its superior job of metering and setting exposures...it's just that you have told it "I like what you are doing but I would like it a little better if your results were just a tad darker". My personal results fit my taste better with -2 increments (-2/3 f/stops). One of the reasons that I select a slightly darker image is that most of my shots are in full sun and the chance of overexposure is great with the vivid colors of the flowers that butterflies nectar on. The second reason is that editing software can correct for considerable underexposure but a picture that is overexposed is mainly lost forever. Burned out highlights are irretrievable. I occasionally shoot a photo that appears a little "off" when I review it on the camera monitor. When I do, I usually shoot two more photos of the same subject...one that has one f-stop increment more than the original and another with one f-stop increment less. This is called "bracketing" the exposure. When I edit them, I keep one and trash the other two. A small group of settings that I consider "personal taste modifiers" include contrast, saturation and brightness. I keep these all at +1...your taste may differ from mine. I do not alter the sharpness setting. I leave it at the manufacturers settings and make any adjustments in my editing software. ISO: These settings serve to modify the sensor's sensitivity to light. Increasing the ISO number allows your camera to arrive at the proper exposure in low-light situations. The trade-off is that you lose quality in proportion to the increase in the ISO number. The reduced quality manifests itself with softer focus, color faults and the introduction of tiny specks of color that increases progressively with the increase in ISO number. Most cameras yield pretty good results up to ISO400...above that can be less than good. I keep my camera at its lowest ISO setting of ISO 80. When you increase the ISO setting the camera must adjust the aperture or shutter speed. Shooting in full sunlight with high ISO settings can cause your camera to be unable to correct to a proper level of exposure. WHITE BALANCE: This refers to your camera's ability to correct from light sources that are less than pure white (the camera's own flash is considered pure white). Pure sunlight produces shades of yellow, red and other colors at different times of day and based on many other factors. Incandescent and fluorescent lights vary greatly from daylight sources. The internal software of most digital cameras when set on AUTO does a superb job of white balancing. A few years ago, the digital cameras had difficulty with vivid colors like dark red and purple but that is history. The recent cameras capture the toughest colors with ease. If spot-on color is called for, most digitals offer a CUSTOM setting that really works...it is cumbersome but will get the job done. In my experience, improper exposure is more often the cause of poor color, rather than off-white light sources or improper white balance settings. Recap of Settings: IMAGE RECORDING QUALITY: The highest level available. SAVE QUALITY: The highest level available FOCUS: AUTO with STILL OPTION OPERATING MODE: Aperture Priority if wind is not a problem, Shutter Priority if wind is a factor DO NOT SELECT MANUAL EXPOSURE VALUE: (-2) increments=(-2/3) f/stops METERING: Spot WHITE BALANCE: Auto ISO: Lowest number available CONTRAST: (+1) SATURATION: (+1) BRIGHTNESS: (+1) SHARPNESS: Make no change Motion blur appears as a blurry, or improperly focused photo. It is a function of movement that usually is generated by the photographer. The best solution that I have found is a good old-fashioned sturdy tripod. Many of today's cameras or lenses have image stabilization capabilities...if yours does, keep the switch ON! It can really help. I sincerely hope that your results give you as much pleasure as mine has given me. Bob Image by: bob_71Difference in Quality Settings...See Morebob_71
13 years agolast modified: 9 years agoTony G
13 years agolast modified: 9 years agobob_71
13 years agolast modified: 9 years agolarry_gene
13 years agolast modified: 9 years agominrose
13 years agolast modified: 9 years agoTony G
13 years agolast modified: 9 years agobob_71
13 years agolast modified: 9 years agolarry_gene
13 years agolast modified: 9 years agobob_71
13 years agolast modified: 9 years agolarry_gene
13 years agolast modified: 9 years agotdogmom
13 years agolast modified: 9 years agolarry_gene
13 years agolast modified: 9 years ago
KC Clark - Zone 2012-6a OH
9 years agoKC Clark - Zone 2012-6a OH
9 years ago
Related Stories
HOW TO PHOTOGRAPH YOUR HOUSEHow to Compose Your Shot for Stunning Home Photography
A photo pro shares secrets like camera height, lighting and lens type for creating images that do your home justice
Full Story
HOW TO PHOTOGRAPH YOUR HOUSEAttract Home Buyers Easily With Great Photography
Show your home's best face in real estate listing photos to have potential buyers knocking down your door
Full Story
REMODELING GUIDESDesign Photography: Let's Get Symmetrical
Photographers celebrate symmetry with interior compositions in perfect balance
Full Story
DECORATING GUIDESRooms Look Picture Perfect With Vintage Cameras
With their sculptural shapes and retro-cool look, antique cameras make for striking and unexpected displays
Full Story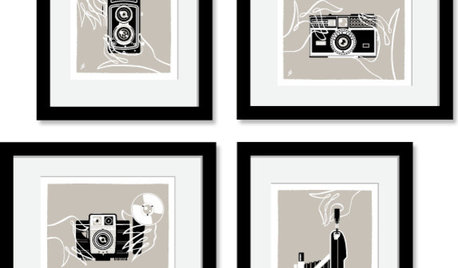
DECORATING GUIDESOn Trend: Vintage Camera Decor
Give your rooms new focus and a clear edge with prints, furniture and accessories that recall old-school camera glory
Full Story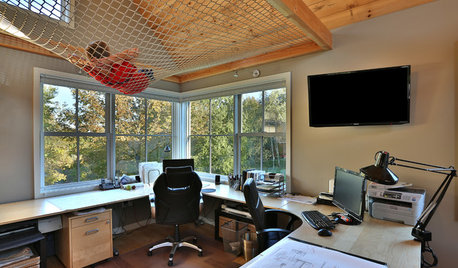
DESIGN PRACTICEHow to Set Up Your Design Studio at Home
Learn from an architect how to create a workspace that fuels your practice and feeds you inspiration
Full Story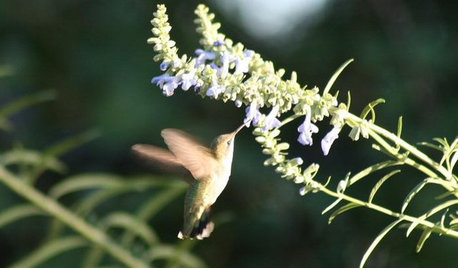
GARDENING FOR BUTTERFLIESA Quick-Start Guide to Bird-Watching for Fun and Learning
Set out some seed and grab your field guide. Bird-watching is an easy, entertaining and educational activity for the whole family
Full Story
HOW TO PHOTOGRAPH YOUR HOUSETake Better Photographs of Your House in a Snap
Let your home show its true colors with these tips for photographing with the right camera settings, lighting and more
Full Story
HOME TECHA Bird Photo Booth for Your Backyard
Catch a glimpse of nature's secret life or literally watch the grass grow. These cameras make it possible
Full StorySponsored
More Discussions
KC Clark - Zone 2012-6a OH