


Toothpick Rooting Technique: August
gardener365
6 years ago
Featured Answer
Sort by:Oldest
Comments (22)

arbordave (SE MI)
6 years ago
gardener365
6 years agoRelated Discussions
Techniques for fertilizing three different genera of orchids
Comments (11)1. For the average, non-commercial / non-expert grower, watering your orchids before you fertilize is an excellent idea, and while it's not a vital piece of care for your plants, it's something you should strive to do. And yes, water heavily and thoroughly immediately before feeding. Run plenty of water through the pot, so that several volumes of water have run out through the drainage holes. Give the mix and the roots plenty of time to get soaked and absorb the moisture. Then feed. The justification? Well, orchid roots are very sensitive to environmental conditions in general, and they are especially sensitive to salts and minerals (resulting from fertilizer) that tend to build up in your pots over time. As richardol stated, orchids just aren't heavy feeders in comparison to many other plants, and even though you are advised to feed at 1/4 to 1/2 strength of whatever the fertilizer directions say, your plant is still not going to be able to absorb all of the food. So, it will build up and could threaten your orchid. Watering heavily and thoroughly before fertilizing helps to flush out any salts remaining in the pot. And, it can help act as a bit of a buffer if you happen to mix up a batch of fertilizer that's a bit too strong, since whatever you add to the pot will now be further diluted. Plus, I have heard that pre-soaked roots are better at absorbing fertilizer. 2. Here's how I fertilize (most) of my orchids. I think this will work well for the three types you mentioned. Mix the fertilizer at 1/4 strength and use it for 3 out of 4 waterings. It's called feeding weakly weekly. Use the diluted fertilizer just as you would water...pour it in the pot, using enough that the water starts to pour out the bottom of the pot. Let it drain completely, then sit in a saucer. I wouldn't allow it to soak in, but so long as you don't leave the fertilizer (or water) sitting in the saucer for days on end, it probably won't be a problem. Anyway, like I said, feed in this manner for 3 weeks/waterings, then on the fourth occasion, use only water, no food to help flush out any excess fertilizer that may have accumulated over the last three weeks. 3. For the plants you have, and most orchids in general, getting the food to the roots is most important, so definitely make sure you are fertilizing the roots. Plants can and do absorb nutrients directly through their leaves, but it is not usually a very effective means of fertilizing them. However, most orchids are prone to rot and infections resulting from water standing on their leaves for prolonged periods. So, when you consider the benefits versus the potential risks of spraying the leaves with fertilizer, I'd say general consensus is to avoid the practice. Most likely it won't kill your plants, but it's just not worth the risk. (taking a deep breath, sorry for the long post, I tend to be wordy) So, for your plants specifically... The phal: Feed the phal year round, very weakly as they are definitely not big feeders and are especially sensitive to salts in the mix. Avoid getting water or fertilizer in the leaf crevices (and crown), and if you do, tip the plant over and let it all drip off. Phals are prone to crown rot. The vanda: Will most likely take a short winter break in growth, even in Florida, especially if you aren't growing it in a greenhouse or under lights. So, if you notice that it's not in active growth, don't fertilize it, because it won't be feeding at that time anyway. With the vanda, you'll probably want to mix up the fertilizer in a bowl or small bucket, dip the plant down in to the liquid, let it set in there for atleast 10-15 minutes, pull it out and allow it to drip dry. You could also just hold it over a bucket and pour fertilizer over the roots, but vandas are a little tricky due to their propensity to develop aerial roots all along the stem, not just at the base. The dend: I don't know anything about your dendrobium, but again, apply fertilizer to the roots, don't worry about applying it to the leaves. If there are no new growths forming/maturing, then there's no need to feed. Basically limit your fertilizing so that you're only feeding when the plant is actively growing....See MoreToothpick Propagation
Comments (4)Interesting method. I use a toothpick when I'm air layering hard wood cuttings to keep the cut open. I don't cut the brug stems when I air layer them. I just score the circumfrence of the stem about 1/2" wide then cover it. Karyn...See MoreIt's August and time for the 'toothpick' technique
Comments (47)I tell ya if you really want to have success rooting (any) cuttings - you should watch this video, Carol/anyone. You can skip ahead to 1:30 seconds. Pay attention to what this guy does by scraping the bark off of two sides. From there I go off in a different direction whereas he's wrapping with parafilm. I happen (instead) use a tent which I bought a huge & clear rubbermaid and drilled about 9 or a dozen holes around an inch in diameter on the bottom which I prop up one side; Once or more daily as necessary I mist the cuttings and the tupperware with fine water droplets only. My cuttings are in many a different pots but I like 1/2 gallon air pruning pots I found on eBay some time ago but the measurements were in metric. I also will use Anderson Tree Band Pots that are 5" tall. Anyways, under I have bottom heat....it's a heat mat sandwiched between (2) pieces of reflective insulation. I've determined that level of heat is excellent for rooting. I use the same heat mats everybody else uses. The ones with big green writing on them that are as large as 48" x 20". I use 1 parts 'Dip n' Grow' to 5 parts water for hardwood cuttings at 5-10 seconds dip or 1 to 10 parts 'Dip n' Grow' to water for softwood. Here's that video: https://www.youtube.com/watch?v=cwPvmG9sK_Y&t=250s...See MoreRoot-Knot Nematodes in Z8b FL? Also own-root Austin roses fertilizing?
Comments (2)You don't have to test for nematodes. You have them. We all have them. They will eventually kill your roses if they aren't grafted, and even roses grafted onto the best rootstocks will die eventually. This is a technique for planting that will hold them off for awhile, but not forever. It really is best to plant Fortuniana grafted roses in FL, though, and even they don't live forever. Your own-root roses have about 5 years before they will die. I hate to be harsh, but that's my experience and that of many northerners who move down here and plant their favorite northern roses on their own roots. Dig a hole 3x the diameter of the pot you're transplanting from, or about 20 inches for bare roots. Dig it 3 inches deeper than you want the plant to sit. Fill the bottom three inches with straight organic peat, put your rose in and add peat until you get it to the right height, then fill the entire rest of the hole with organic peat. (Organic peat is not the same as peat moss). Nematodes hate organic matter, so this will keep them away from the roots, but not forever. It will stave them off for a few years, though, until the organic peat breaks down. I don't know any more about growing roses, just this. I'm sure someone will come along and help you who knows more. I do know some OGRs (Old Garden Roses) will grow on their own roots here....See Morearbordave (SE MI)
6 years agogardener365
6 years ago
tsugajunkie z5 SE WI ♱
6 years ago
rickl144
6 years agogardener365
6 years ago
Tony35 (SE WI)
6 years agoterrene
6 years agohairmetal4ever
6 years agogardener365
6 years ago
Vladimir (Zone 5b Massachusetts)
6 years agogardener365
6 years agoVladimir (Zone 5b Massachusetts)
6 years ago
Timothy Wood
6 years agomary_rockland
6 years agogardener365
6 years agogardener365
6 years agolast modified: 6 years agorickl144
6 years agomary_rockland
6 years agoUser
6 years ago


Related Stories

ARCHITECTUREDesign Workshop: Kinetic Architecture
Industrial techniques achieve the sublime in these 5 examples of mechanical walls that move
Full Story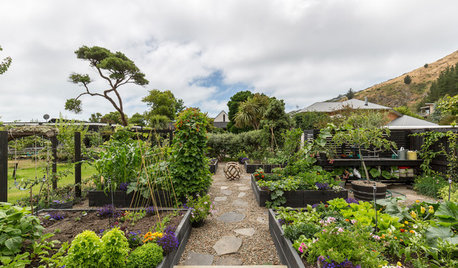
EDIBLE GARDENSNatural Ways to Get Rid of Weeds in Your Garden
Use these techniques to help prevent the spread of weeds and to learn about your soil
Full Story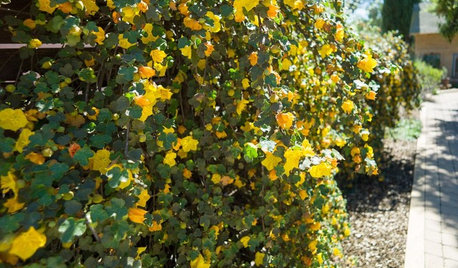
GARDENING GUIDESTidy Up Sprawling Native Shrubs With These Pruning Tips
Sound horticultural pruning methods work for native and nonnative plants alike
Full Story
HOUZZ TOURSMy Houzz: Arts and Crafts Inspires a Midcentury Home
Antiques and modern touches combine seamlessly in a personalized remodel for a Dallas couple
Full Story
EDIBLE GARDENSHow to Grow 10 Favorite Fruit Trees at Home
Plant a mini orchard in fall, winter or early spring to enjoy fresh-off-the-tree fruit the following year
Full Story
EDIBLE GARDENSSummer Crops: How to Grow Tomatoes
Plant tomato seedlings in spring for one of the best tastes of summer, fresh from your backyard
Full Story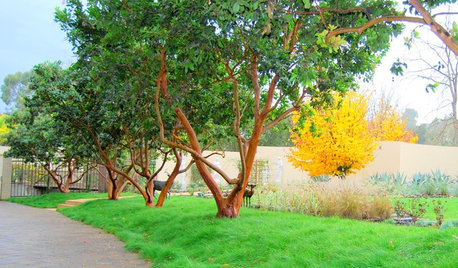
GARDENING GUIDESGarden Myths to Debunk as You Dig This Fall and Rest Over Winter
Termites hate wood mulch, don’t amend soil for trees, avoid gravel in planters — and more nuggets of garden wisdom
Full Story
SELLING YOUR HOUSEA Moving Diary: Lessons From Selling My Home
After 79 days of home cleaning, staging and — at last — selling, a mom comes away with a top must-do for her next abode
Full Story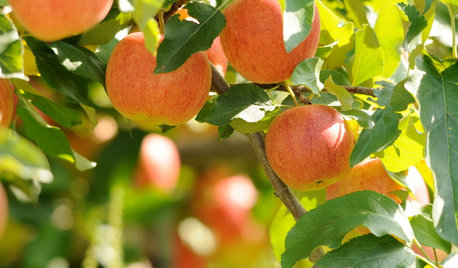
TREESHow to Plant a Fruit Tree
Great Home Project: Choose the best tree for your region, plant it to thrive and enjoy sweet rewards year after year
Full Story
LANDSCAPE DESIGNNatural Swimming Pools: More Beauty, No Chemicals
Keep your skin and the environment healthy with a pool that cleans itself, naturally
Full Story
Vladimir (Zone 5b Massachusetts)