


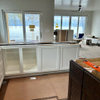
Please critique my kitchen design
misschocolatecake
6 years ago

Featured Answer
Sort by:Oldest
Comments (15)

misschocolatecake
6 years agoRelated Discussions
Kitchen Design Critique, Please!
Comments (23)Would you be willing to at least modify the DR doorway? Make it a bit wider and shift it to the left? In your layout, it looks like it's been modified... Here are two layout ideas. Both retain the island but remove the "barrier" it causes. You still have rather narrow aisles, but if the DR doorway is never used, it may not be an issue. Both of these layouts have a 38" aisle b/w the sink and island and a 36" aisle b/w the island and "bottom" wall. The island is 27" deep...24" deep cabinets + 1.5" overhang on all sides (1.5" + 24" + 1.5" = 27"). In both, I moved the refrigerator to the left wall. This eliminated the "barrier" and placed the refrigerator so it's easily accessible from the sink, the cooktop, the island, and "outsiders" looking for a snack. However, to eliminate the need for significant filler b/w it and the wall, I shortened the wall so it's no deeper than the refrigerator carcass/box. This will allow you to open the doors fully. If the wall remains 50" deep, you will need approx 12" b/w it and the wall. Yes, you could take the 12" cabinet from the right of the cooktop and move it the other side of the refrigerator, but that would significantly reduce your Prep Zone and Cooking Zone shared workspace. I moved the ovens to the bottom wall along with two pantries and 24" of landing space. In this location, the island makes a good Baking Center (working on the oven side of the island). The 12" pantry is "first" for two reasons...(1) to give you pantry space for your most commonly used items close to the Prep & Cooking Zones w/o the island being a barrier and (2) to have a bit of "safety buffer" b/w the ovens and the doorway when "turning the corner" (which shouldn't be often since the DR doorway is not used). The 12" cabinet to the right of the cooktop is an ideal place for cutting boards...it's in the primary Prep Zone (b/w the sink and cooktop) as well as very close to the island and the secondary Prep Zone. For trays, cooling racks, etc., I suggest storage over the ovens. We have ours there and it's perfect! (I'll post a pic of it in another post.) The trash & recycle pullout (2 bins) is in the island on the end closest to the cooktop. This puts it in close proximity to the Cooking Zone and cooktop as well as in the two Prep Zones and Cleanup Zone. To the right of the DW, I put a Dish Hutch...with the upper cabinet to the counter to maximize dish storage. It puts the dishes within easy reach of the DW as well as the "breakfast" area and, to some degree, the FR. The only plumbing that may have to be moved is for the refrigerator if you have an icemaker or water dispenser. This shouldn't be too much of an issue since no waste pipe/drain and drain vent are required. I also included a zone map for Layout #1. The same basic map applies to Layout #2 as well, so I did not do one for that second layout. Here they are. Note that I made some changes b/w them. Most of the......See MoreCritique my design, please!
Comments (8)My U-shaped kitchen is 8 X 12.5 feet and also opens to the main hallway. We have a 36 in. CD fridge. My peninsula has a 27 in. sink base and a 24 x 18 in. sink, a 24 in. DW, and a separate 12 in. trash cabinet. I put the sink in the corner so I'd have a large expanse of prep space. It's been great! Does your peninsula butt up against your dining room? If so, you do not need seating at it. I had a raised bar peninsula before the remodel. It made no sense to have bar stools literally in the DR. Keep the fridge uppers but make them deeper. You can store small appliances, metal baking pans, and large odds and ends in there. A 6 pack of paper towels for example. It's valuable space! Try to extend your upper cabinets to the left of your range close to the end of the peninsula. If you stop short of the edge, you'll have too much bare wall over the peninsula. It will create problems when you go to tile since you'll want to start your tile under the first cabinet. Here's what we did....See MorePlease Critique My Remodel Design
Comments (30)Here's an aerial view showing family room, kitchen, dining and living room. Note the exterior door and the living room sofa are missing - guess the 3D rendering forgets them somehow probably thinks they are in the basement. I like the flow of this design, and although the kitchen is a bit cramped compared to the other designs I prefer it in the center of things as it's the best use of that corridor space that connects the two rectangular house sections. Oh and the microwave is supposed to be a built in above the range, but the program just sits it on the stove!...See MoreKitchen Designer plan critique please
Comments (0)Our lower base cabinet plan is complete and installed and for that I extend my thanks to several members who assisted in narrowing down options for the floorplan. This is for a cottage that was a complete gut in the lower walkout where the kitchen and main living areas are. I hosted a family event there this fall and had to get some semblance of a kitchen installed so we opted for the base cabinets and left the upper plans for later. Now it's later and I want to have a complete kitchen soon! The base cabinets are mostly installed with the blind corners and peninsula still needing final attachments. Love my fancy drawers pulls and sexy plywood counter lol? Those familiar with Ikea will recognize the base cabinets but for the uppers I am using a local manufacturer to give me more flexability with size and to add some individual style. This is the first concept drawing I received from the KD, and for the most part I really like it. There is one wall left completly bare which maintains a more open feel to the space, but is there an easy way to add cabinets or shelves without cramping the other walls? Problems with a full u-shaped kitchen I guess. There is electrical roughed in for under cabinet lights but I don't think it's a problem if they aren't used.. The pictures are how the kitchen currently looks. There will be an 18" DW between the sink and fridge, but right now without the DW, the fridge is pushed up next to the sink cabinet. Thoughts, feelings, comments on the KD's proposal?...See More
bpath
6 years ago
salex
6 years ago
Kathryn P
6 years agomisschocolatecake
6 years agopowermuffin
6 years ago
Cheryl Hewitt
6 years agodesignsaavy
6 years agolast modified: 6 years ago
alex9179
6 years agomisschocolatecake
6 years agoBuehl
6 years agoBuehl
6 years agolast modified: 6 years ago
Related Stories
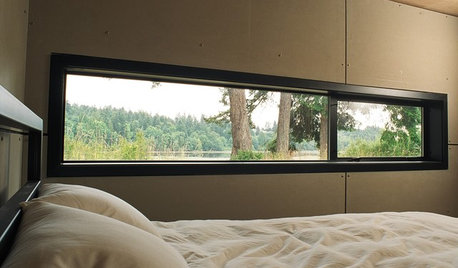
ARCHITECTUREDesign Workshop: Just a Sliver (of Window), Please
Set the right mood, focus a view or highlight architecture with long, narrow windows sited just so on a wall
Full Story
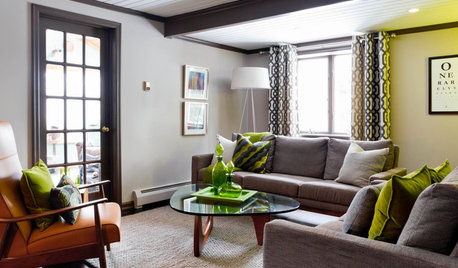
LIVING ROOMSCurtains, Please: See Our Contest Winner's Finished Dream Living Room
Check out the gorgeously designed and furnished new space now that the paint is dry and all the pieces are in place
Full Story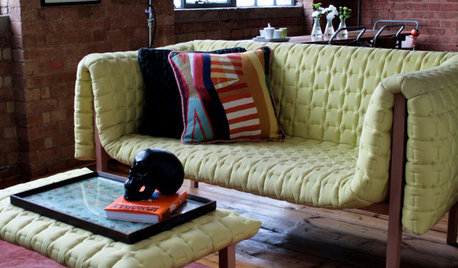
DECORATING GUIDESPlease Touch: Texture Makes Rooms Spring to Life
Great design stimulates all the senses, including touch. Check out these great uses of texture, then let your fingers do the walking
Full Story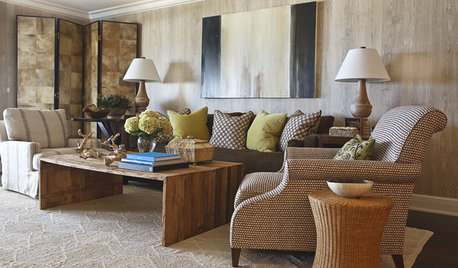
HOUZZ TOURSHouzz Tour: A Neutral Palette Pleases By the Sea
Designer Phoebe Howard creates earth-toned elegance for a family's Florida beach getaway
Full Story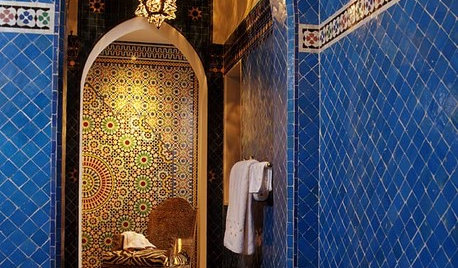
TILEMoor Tile, Please!
Add an exotic touch with Moroccan tiles in everything from intricate patterns and rich colors to subtle, luminous neutrals
Full Story
TRADITIONAL ARCHITECTURESaltbox Houses Pleasingly Pepper Landscapes
Refreshingly basic silhouettes and materials make saltboxes a simple architectural pleasure
Full Story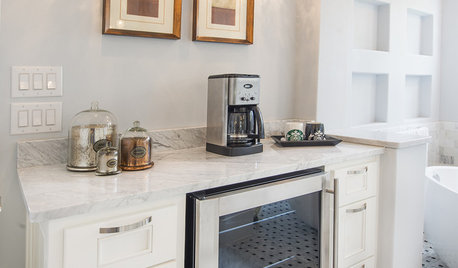
BATHROOM DESIGNUpload of the Day: A Mini Fridge in the Master Bathroom? Yes, Please!
Talk about convenience. Better yet, get it yourself after being inspired by this Texas bath
Full Story
HOME OFFICESQuiet, Please! How to Cut Noise Pollution at Home
Leaf blowers, trucks or noisy neighbors driving you berserk? These sound-reduction strategies can help you hush things up
Full Story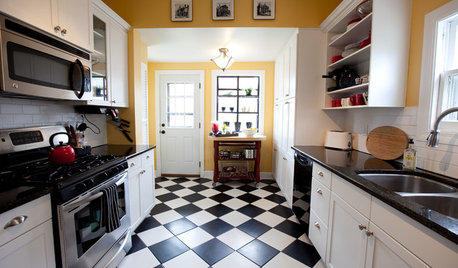
FLOORSChecks, Please! 13 Choices for Checkered Floors
Checkerboard Patterns Go From Casual to Ritzy, From Marble to Grass
Full Story
mtnfever (9b AZ/HZ 11)