

Gluten-free talk
9 years ago

Featured Answer
Sort by:Oldest
Comments (17)
 9 years ago
 9 years agolast modified: 9 years ago
Related Discussions
Gluten Free, Soy Free, Protein-ful Vegan Loaf?
Comments (23)I got the original recipe here: http://vegan-magic.blogspot.com/2012/06/bean-and-lentil-loaf-low-fat-gluten.html where credit is given to Anne Sheasby's book "High fibre cooking". Here is the version I did tonight, written as for a non-cook as much as possible: Food Processor, scale, large mixing bowl, strainer or slotted spoon, two pots, mixing bowl, measuring cups and spoons, wooden spoon or other cooking spoon, 9" loaf pan (mine is shiny aluminum), prep bowls, cutting board and knife, pastry brush (preferably silicone) Dry Garbanzo beans, about 200 g cooked weight Dry beans (black eyed peas tonight, white or black beans another time), about 200 g cooked weight 400 g cooked weight dried green lentils 1 onion, about the size of a fist, chopped 2 stalks of celery, chopped 1 large or 4 small cloves of garlic, squished and chopped or pressed Oil for sauteing (I use Extra Light Olive Oil) Carrots, about 8 peeled baby or one large 1/2 c. walnut pieces 1/2 c. almond meal 2 TBSP tapioca starch 2 TBSP ground flax seeds 1/2 cup crumbs (better idea than rice) 3-4-ish TBSP Simply Heinz tomato ketchup (if you're picky--any would do), plus more for brushing on later Be generous on the measures with the spices. Not heaping, but a little rondure. :) 1 tsp ground cumin 1 tsp ground coriander 1/2 tsp chili powder 1/2 tsp chipotle powder 1 tsp smoked Spanish paprika 1/2 tsp black pepper, not too fine 1/2 tsp Morton's table salt (I say go for the iodine when cooking because who wants goiter?) 1 very very generous tsp dried basil 1 tsp dried thyme Day before: Rinse and sort beans, well. Put beans in a heavy pot, cover with water, bring briefly to a boil and let cool, then put in fridge overnight. Day of:Pour off some of the bean water until it's only about a third of the way up. Bring to a moving simmer and cook the beans through to tender. Should take about the time it takes for the water to boil off/be absorbed. About 20 minutes. Add back more bean water if needed. Rinse and sort lentils, well. Cook about a cup of lentils to 3-4 cups of water. Bring to a boil and simmer for about 20 minutes until they puff up. Saute onions and celery. When the onions start going transparent, add the garlic. Continue to cook until soft but not carmelized (brown). Put the walnut pieces in the food processor and pulse until small. Add the almond meal and pulse a few more times to mix. Put nut mixture in mixing bowl. Put carrots in food processor and pulse until small but not minced and loosing their water. Add to mixing bowl. Add the crumbs to the mixing bowl. Measure and combine in a prep bowl: seasonings, spices, herbs, flaxseed and tapioca (i.e., the small amounts of dry stuff). Mix well with a fork. Set oven to 350 degrees F. Drain both the beans and lentils. Measure out 400 grams of the lentils and 400 grams of the beans. Put equal portions in the food processor with a portion of the sauteed mixture equal to the proportion of the beans/lentils. That is, if you're putting in a third of the beans and a third of the lentils, use a third of the sauteed vegetables. Turn on the FP and let it run until a paste develops. Scrape down the sides once or twice. It's done when looking from the top (lid off) it seems well blended and doesn't have big pieces of anything showing. About the texture of stiff hummus. Empty into mixing bowl and repeat until done. Mix the contents of the bowl with your wooden spoon until everything is well distributed. Add the ketchup, and mix. Pour the spice mixture all around the bowl so that it's well spread out, and mix bringing the outside edges in, until all the spice mix is well mixed in and distributed. If you think it needs more color, add another squirt of ketchup. Prepare the loaf pan by generously oiling it (or spray oil). Not enough oil for puddles, but so there's lots on the sides and bottom. Don't do this ahead or the oil will all run down. The oil is for making the crust as much as keeping the loaf from sticking. Put the bean mixture in the pan and smooth the top. Try to get the sides not to stick up so they won't burn. Place in the middle of a 350 degree oven on convection/bake if you have it, or else convection or bake. Set the timer for 45 minutes. If the top is at all dry looking, use your pastry brush to cover it with a thin layer of ketchup. Bake a further 10-15 minutes. When it's ready the edges will just be getting dark and will be pulling away from the sides of the pan. Remove from oven and put on a rack. Let it cool and rest for at least 20 minutes. When the pan's edges are cool enough to touch, place your plate over the pan, grab the edges of both and invert. Garnish as you please. A scalloped or serrated knife will probably cut the cleanest, or choose a thin blade. Just don't press down so hard it squishes. Since I wasn't having company, I went for the practical and unmolded my loaf onto the top of a long Ziploc container. That made it easy to just put the container over the loaf for storage in the fridge. Edit: Left off the lentils from the ingredients. This post was edited by plllog on Tue, May 6, 14 at 1:10...See MoreGluten free, nut free cake
Comments (10)I have made this white cake for years.....but not FOR years if you get what I mean....what I mean was that it was an old favorite when I baked birthday cakes more often. ICE CREAM CAKE 2 cups sugar 3/4 cup butter 2 cups sifted flour 3 tsp. baking powder 1 cup sifted cornstarch 1 cup milk 1 tsp. almond or vanilla extract 5 stiffly beaten egg whites Cream sugar and butter together. Sift the flour, baking powder and cornstarch together. Alternate adding these to creamed mixture along with milk. Beat until very smooth. Add vanilla and then fold in egg whites that have been beaten until stiff. Bake in 2 greased and floured 8" round cake pans for 25 to 30 minutes in a 350 degree oven. Frost with Boiled White Icing. Or....since he specifically asked for "vanilla cake, I might fill with a vanilla pastry cream and then top with that frosting where you mix egg whites, sugar and syrup in a double boiler and cook beating all the while until it's thick and holds it's shape Here's what I have for a flourless chocolate cake.....came from this forum many years ago... It is kind of like a cake textured hot fudge sauce served in slices. VERY rich - so cut in thin slices. Killer Chocolate Torte 2 cups unsalted butter (4 sticks) cut into 1/2 in. pieces 1 Cup plus 2 tablespoons sugar 1 Cup plus 2 tablespoons espresso powder 16 ounces bittersweet chocolate, chopped (NOT unsweetened or semisweet) 6 large eggs at room temperature 6 large egg yolks at room temperature powdered sugar for garnish whipped cream (optional) Position rack in the middle of the oven and preheat to 325 degrees. Generously butter an 8-inch springform pan with 2 3/4 inch sides. cut parchment or wax paper to fit sides, and, and a circular piece to fit in the bottom of the greased pan. Smooth paper against inner surfaces. Melt 2 cups butter with the sugar and espresso powder in a heavy saucepan over medium low heat, stirring until the sugar dissolves. Add chocolate and stir until mixture is smooth and chocolate is melted. Remove from heat and cool slightly. Whisk the eggs and additional yolks in a large bowl until frothy. CAREFULLY fold into the chocolate mixture. Pour batter into prepared pan and place on a heavy baking sheet. Bake in the preheated 325 degree oven until the edges puff and crack slightly but the center is not quite set. Transfer to a rack and let cool. Cover with foil and refrigerate overnight. to remove from pan, dip a sharp thin knife in hot water and run it around the sides of the pan to loosen the torte. Carefully release and remove the pan sides and the parchment. It will have cracks in it, but this is normal. Sprinkle lightly with powdered sugar (if desired) and cut into very thin slices with a sharp knife dipped into hot water, taking care to wipe the knife after each cut. Serve with whipped cream if desired. Many servings....See MoreLOOKING for: Wheat-free, gluten-free bread recipes
Comments (3)The following is from Mary Frances PickettÂs website http://www.glutenfreecookingschool.com She has Q&A section about baking gluten free bread on her blog at that you might find helpful (e.g., get more rise by beating dough mixture for a few minutes with the paddle before adding it to the bread machine); read more at: http://www.glutenfreecookingschool.com/archives/gluten-free-bread-tips Really Good Sandwich Bread 1 Tbsp. active dry yeast 1 Tbsp. sugar 1 ½ c. water (105 degrees or a little less than hot) 2 ½ cups "Gluten Free All Purpose Flour Mix Recipe" (see below) 2 tsp. xanthan gum 1tsp. salt 2 eggs (or 6 Tbsp. water and 2 Tbsp. ground flax seed) 1 ½ Tbsp. oil 1 tsp. cider vinegar 1. Start by combining the yeast and sugar in a small bowl (I use the smallest in my set of three nested mixing bowls). Add the water while gently stirring the yeast and sugar. Let this mixture sit while you mix the rest of the ingredients - bubbles and foam should form if the yeast is happy. 2. Combine the flour mix, xanthan gum and salt in the largest mixing bowl and stir well. 3. In a third bowl, whisk the eggs, oil and vinegar until the eggs are a bit frothy. 4. By this point the yeast mixture should be foamy, so you can pour the two liquid mixtures into the flour mixture. Stir until all ingredients are well mixed and then dump into your bread machine. Cook on the 80 minute setting  the stirring paddle is not necessary. +++++++++++++++++++++++++++++ Gluten Free All Purpose Flour Mix (Note: this mix can be used for a variety of baked goods and things like pancakes as well) 3 parts brown rice flour (I use BobÂs Red Mill) 3 parts corn starch 2 parts soy flour 1 part masa harina...See MoreGluten-free Dairy-free Chocolate Wafer...
Comments (1)Lets see...I found three recipes. A ginger cookie, an oatmeal-ish, and a spicy chocolate chunk cherry one. Using all three ideas I should come up with something. I don't think I have any 'nut people'. The ginger has the right look. Oats I would have to grind in the spice grinder. I'll post when I come up with something. Might just be adjustable for any needs and substitutions. The ginger is the most promising as 7min for soft and 10 minutes cooking for a crisp....See More- 9 years agolast modified: 9 years ago
- 9 years ago
- 9 years agolast modified: 9 years ago
- 9 years agolast modified: 9 years ago
- 9 years ago
- 9 years ago
- 9 years ago
- 9 years ago
- 9 years ago
 9 years ago
- 9 years ago
- 9 years ago
 9 years ago
- 9 years ago


Related Stories

LATEST NEWS FOR PROFESSIONALSTalking About the Budget Doesn’t Have to Be Awkward
These 4 tips can help when you’re discussing project costs with clients
Full Story
BATHROOM DESIGNExpert Talk: Freestanding Bathtubs Make a Splash
Professional designers explain why they chose freestanding tubs and how the style can enhance the design of any bathroom
Full Story
LIFEIf You Could Talk to Your House, What Would You Say?
‘Pull yourself together’ or ‘thank you for transforming my life’? Notes to homes around the country hit us where we live
Full Story
PRODUCT PICKSGuest Picks: Let’s Talk Tubs
Find just the right bathtub no matter how you like to soak
Full Story
ARTExpert Talk: Sculpture Helps Rooms Break the Mold
Pro designers explain how sculpture can bring interiors to a higher level of design
Full Story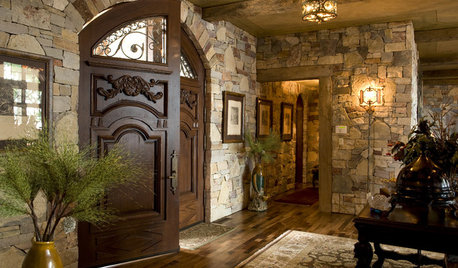
ENTRYWAYSExpert Talk: Front Doors Hold Key to Great Style
You can't take back a first impression. Professionals explain why they chose these striking front doors for their clients' homes
Full Story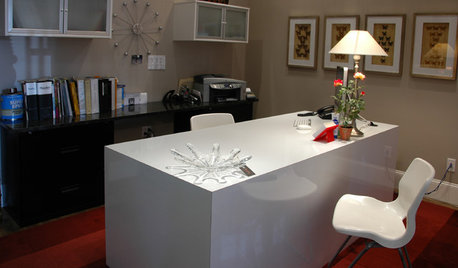
HOME OFFICESExpert Talk: 11 Desk Designs That Really Work It
Boring or inadequate desks don't cut it for productivity in a home office. File these desk designs and expert insight under "To Do"
Full Story
ECLECTIC STYLEDesign Talk: Eclectic vs. Collected
12 Ways To Master the Mix-and-Match Style
Full Story
REMODELING GUIDESHave a Design Dilemma? Talk Amongst Yourselves
Solve challenges by getting feedback from Houzz’s community of design lovers and professionals. Here’s how
Full Story
DECORATING GUIDESExpert Talk: Lean or Hang Artwork?
Professional designers explain why a tilt is sometimes better than a nail for artwork around the home
Full Story


party_music50Original Author