


Experiment comparing indoor/outdoor citrus during winter in Zone 7b
calamondindave
7 years ago
Featured Answer
Sort by:Oldest
Comments (10)

poncirusguy6b452xx
7 years agoRelated Discussions
Hardy citrus in zone 6?
Comments (117)I live in Utah zone 6b - 7a fluctuations. Last winter I grew a 6 inch tall tiny 'Prague' chimera citrus outdoors in-ground in a micro climate next to the south wall of my house. Temperatures dropped as low as 15 F. This tree was heavily mulched with wood chips and caged in poultry wire with a plastic tarp wrapped around it. From December 20 to Jan 15 I surrounded the cage with old milk jugs that were repeatedly warmed in the micro-wave around midnight any-time temperatures dropped below 20F. Not only did the 'Prague' tree survive the winter without defoliation but the citrus has tripled in size this year of 2022. Additionally I grew a 2 foot tall 'Nippon' orange-quat with the same procedure and the Nippon pushed out beautiful new growth last spring and is fruiting for me this year although it suffered some defoliation and 1/3 of the old leaves look damaged. I was able to harvest some fruit from 'Nippon' last December and successfully germinated a dozen seeds. Additionally both of these trees have survived summer temperatures up to 107F. The Nippon suffered some scorch in the most exposed leaves. I intend to continue growing 'Prague' and 'Nippon' citrus tree in the ground and espalier them against my home each winter as they mature. Due to my recent success I intend to also try a very cold hardy tangerine hybrid the same way. All of these citrus are grafted to Poncirus 'Flying Dragon' root stock. Good Luck Howard! Most of the folks bragging about growing a citrus tree in a cold zone are from zone 8 so I think growing citrus in the ground outdoors in zone 6or 7 takes effort and is something to be proud of. Keep trying! You will figure something out....See MoreCitrus indoors during winter time
Comments (3)Not in Georgia, but here (zone 7A, NJ), I move them into a sunny, south facing garage. I just aim to keep temps from falling below freezing, but temps must average 40-60 over Winter. I used to move mine into the house over winter--they always ended up with scale. So, in despair one Autumn, I just decided to leave them in the garage over the winter. I just moved them outside yesterday as March was cold here. If you love Citrus, but can only overwinter in the house, I highly recommend KUMQUATS. They are smallish trees (an advantage in the house...especially as many true Citrus are quite prickly), and cope much better with the house over the winter being much less prone to bugs! Good luck....See More"How to Winter Sow Seeds Outdoors"
Comments (0)"How to Winter Sow Seeds Outdoors" It really is very easy to do. First, let me give you a little background as to why I sowed the seeds during the Winter. I live in a very small house, a cottage actually and I simply do not have room for a light set up, also any window space I have must be fought from the cat and "Prinny" likes to look out on the street and watch the world go by, so I have to give her a windowsill. She's a good cat and deserves her place in the sun. I got hooked on seed trading, and as you all know seed trading is like Pokeman......you gotta have 'em all. I had tons of seeds, I had them all. Though I am not a novice at gardening I am a novice at growing seeds, this was my second season doing so. Because of my lack of experience with growing seeds, and not having a light set up, I always traded for "easy to grow" seeds: I had to start them in the windowsill or out on the patio in flats during Spring and Summer which I did the previous year with good success too. I was thinking a lot last Winter about how I was going to start all these seeds, I needed an easy way out. I knew that many seeds needed to be pre-chilled, and I knew that many plants reseed and germinate outdoors without our intervention. I thought about this for a few days and put 2+2 together. I would sow them into flats, and take them outside for the Winter, if all went well then they would germinate in Spring. I am a true believer in "recycle and reuse". I had been saving my take-out containers from the Chinese restaurant (not those typical white boxes that have a metal handle and white rice inside), I was saving the foil pans that have a separate clear plastic lid, they're usually round or rectangular. These containers were just perfect.....plus I didn't have to go to a store and open up my wallet (hmm, look at all the moths fly out), if I can get away without having to lay down a buck I will. I did need soil though and so I went to Walmart and got their brand which was the cheapest I could find. Seed selection: Take a look at a seed catalogue, most will have some sort of notation about a seed's germination requirements, or you'll pick up a few clue-in phrases. Look for these terms: Needs Pre-chilling (freeze seeds, refrigerate seeds, stratify for x amount of day or weeks), Needs Stratification, Will Colonize, Self Sows, Sow outdoors in early Autumn, Sow outdoors in early Spring while nights are still cool, Sow outdoors in early Spring while frosts may still occur, Hardy Seeds, Seedlings can withstand frost, Can be direct sown early, Wildflower, Weed (such as butterfly weed, joe pye weed, jewel weed) Common Names indicating a natural environment: Plains Prairie Desert Mountain Swamp Field etc. Look for names that might indicate an origin in a temperate climate: Siberian Chinensis Polar Alpine Orientale Canadensis Russ (indicating Russian origin) etc. Think about your own garden, and your neighbors' gardens too. Do you find plants that have volunteered each spring and shown up as seedlings that you didn't sow? These are very good choices. (let's say that your orange marigolds have returned in Spring as volunteer seedlings.......you can then be pretty well assured that gold, or lemon, or African or French varieties will also reseed for you too, when it comes down to it a marigold is a marigold is a marigold). I like Park's Seed catalogue, it has a great germination table right in the middle of the catalogue. They have a numbered guide indicating the best germination requirements for seeds. I took a yellow highlighter and went down that numbered list and highlighted all the numbers that would be appropriate for Winter Sowing, then I carefully went through their list of seeds and highlighted the varieties that corresponded to the correct numbers. This is how I chose which varieties I would Winter Sow. A lot of catalogues, not just Parks, will have a germination table, or some information about germination, look at them, study them, and learn. To make a flat you take the foil container (of course it's clean, washed in hot soapy water) and a paring knife. Stab a few slits in the bottom of the pan, this is for drainage. Now fill the pan with soil to about a half inch from the top. Give it a real good drink and let it drain. I do this in my kitchen. (I have a sprayer on a hose at the sink and I use this for the watering, works well and doesn't gouge out holes in the soil). After the pan has drained sow your seeds and pat them down. Cover them with more soil to the correct depth if necessary. I like growing plants with tiny, tiny seeds, they're really just the very most easiest to sow. Sprinkle them on top of the soil, pat them down, and that's that. Now you need to put the lid on BUT FIRST.........and this is the very most important step.......take the knife and poke several slits in the clear plastic lid. This is for air transpiration. Think about it, you're making a little mini greenhouse. If you don't vent the air that is heated by the sun you'll cook your flat and the seeds won't germinate. You've baked them to death. Okay, put the lid on secure by folding down the foil rim. Now the seeds are sown. Uh oh.......back it up, I forgot a step that you may wish to use: labeling. I didn't label mine as I like surprises, however this concept may pop the heads of gardeners who enjoy having everything "just so". Get some freezer tape, or any tape that you know will work well after being frozen. Pull off a piece and stick it to the bottom of the flat. Write the variety name on it with a laundry marker (or a sharpie). You can do this before or after sowing, if you do it afterwards make sure you wipe the bottom of the flat well as freezer tape doesn't really adhere as good as you'd like to a damp surface. Label the tape before sticking it the bottom of the flat. The label is on the bottom of the flat because the sun can't bleach it down there. I haven't yet found a marker that won't bleach out in my strong Long Island sun. All right, the flat is now sown and covered (with little slits in the top, yes? don't forget!!). Now take it outside to somewhere it will be safe for the winter. I put them on a picnic table top away from my curious puppy. I learned my lesson, I lost a flat of daylilies (the first I sowed this way) because I put them on the ground under a bush and the puppy found them and thought the flat was a toy, and she promptly killed it by shaking it to death. After that all the flats went up on the table out of her reach. Sad loss, but an excellent lesson. Now you just wait it out. When the weather warms the flats will freeze and thaw repeatedly as winter gives way to spring. This action of freezing and thawing out helps loosen the seed coat. You'll often see the term "nick or file seeds prior to sowing" in germination databases: this is to duplicate Mother Nature's work (now you won't have to do that anymore). Amazingly, just when winter is about to break, and you're still getting nightly freezes, the first of your flats will begin to germinate. When I saw this I thought that the seedlings were goners, but they thrived. The seeds know when it's safe to come up, it's part of their genetics. Now is the time to check the moisture in the flats, on an above freezing day open them up and if they look like they need a drink give them one. The excess water will drain away. Don't forget to replace the lids tightly. As your seedlings grow start widening the slits in the covers, once a week or so make the slits a little bit bigger, eventually you'll have more open areas than covered and you'll be able to transplant the seedlings into the garden because they are completely hardened off. I have put in seedlings that barely had their first set of true leaves and they thrived in the ground. After transplant care is typically the same as for indoor sown seedlings. They need a drink and just a little bit of food: 10% strength after their first week in the ground, then increase slowly as the season progresses. After about eight weeks and a few feedings your seedlings will be able to take a full strength feeding. Alternate seed flats: I have used plastic milk jugs and 2 liter soda bottles too, just cut around the middle almost all the way through. Make the drainage slits. Fill with dirt, water, drain, sow, cover with more dirt (the same procedure as above). Tape the cut edges together and simply remove the cap for air transpiration. Cardboard orange juice or milk containers can be used with a baggie. Cut them in half, horizontally or vertically, make the drainage slits and sow your seeds by the same method above. Slip the flat into a baggie, tie it closed with a twist tie or a knot and use the knife to make a few slits for air transpiration, put a few slits in the bottom of the baggie for drainage. Coolwhip tubs: Make the drainage slits, sow your seeds as above. Take a scissors and cut out the center of the lid, leaving about an inch around the inside of the rim. Put a piece of saran wrap over the tub, put on the lid. This holds the saran wrap "window" snugly. Take the knife and make some slits in the saran wrap for air transpiration. +++++++++++++++++++++++++++++++++++++++++++++++ So that's how to do it, if I remember something that I have forgotten I'll post an addendum, but I think I have it all covered. The major principles of outdoor Winter Sowing are selecting the appropriate seeds for your plant zone, and providing adequate drainage and adequate air transpiration. Do all these and you'll have a success. Did all my flats germinate? NO! I had about eighty or so of these made and I had eight not germinate. Was it the seeds? Was it the method? Was it me? I don't know. But I did have around seventy flats that did germinate. Outside! I forgot to mention that I also used four kiddie pools. These were used the summer before as container gardens (lots of soil, lots of big slits for drainage). I simply direct sowed these and left them uncovered. They got snowed on, the snow melted, it rained while the base of the kiddie pools were still frozen and the rain didn't drain. They all were frozen with ice at least an inch thick.......aarrgghh, panic Panic PANIC....I couldn't do anything about it. When the warmer weather finally came the pools thawed and drained and the seeds came up! YEAH! That's it. As you see it's not hard to do at all and I sowed these flats at my leisure throughout the Winter. Everyone talks about going bonkers in January and February because they can't get out and do any meaningful gardening, and there are only only a few varieties of seeds which can be successfully sown this early indoors....frustration and gardening fever sets in. While all the other gardeners were chomping at the bit I was being self indulgent and playing with dirt and mud and seeds at my own lazy bones pace. I took a leap of faith doing this, I kept the faith, and I was rewarded. I believe in this method, it works, it really truly works. Too much emphasis has been made on indoor sowing under lights. It takes up time, it takes up space, white flies take to the air, damp off kills your effort, your seedlings, your spirit. Did I forget to mention that there was NO EVIL DAMP-OFF? The freezing action killed whatever nasties that are in the soil that cause young innocent seedlings to perish so tragically and so sadly. And it is sad, you take a lot of time and care in your efforts, the seedlings are sometimes almost like our "plant" children. It really is depressing when a flat of seedlings doesn't make it. I encourage everyone to try this Winter Sowing method, if you want to hold back some seeds the first time you try it that's great. Save some seeds to sow indoors of a variety you have placed in a Winter Sown flat, compare the differences in the seedlings, and then the compare plants when they mature. Learn from what you observe. Make your life and garden easy, let it flourish with flowers, grasses, vines, bushes, and trees you thought you couldn't even consider trying before now. Good luck to you all! Trudi Davidoff...See MoreHow to Winter Sow Seeds Outdoors
Comments (0)Image by: gardenweed_z6a Milk jug containers How to Winter Sow Seeds Outdoors It really is very easy to do. First, let me give you a little background as to why I sowed the seeds during the Winter. I live in a very small house, a cottage actually and I simply do not have room for a light set up, also any window space I have must be fought from the cat and "Prinny" likes to look out on the street and watch the world go by, so I have to give her a windowsill. She's a good cat and deserves her place in the sun. I got hooked on seed trading, and as you all know seed trading is like Pokeman......you gotta have 'em all. I had tons of seeds, I had them all. Though I am not a novice at gardening I am a novice at growing seeds, this was my second season doing so. Because of my lack of experience with growing seeds, and not having a light set up, I always traded for "easy to grow" seeds: I had to start them in the windowsill or out on the patio in flats during Spring and Summer which I did the previous year with good success too. I was thinking a lot last Winter about how I was going to start all these seeds, I needed an easy way out. I knew that many seeds needed to be pre-chilled, and I knew that many plants reseed and germinate outdoors without our intervention. I thought about this for a few days and put 2+2 together. I would sow them into flats, and take them outside for the Winter, if all went well then they would germinate in Spring. I am a true believer in "recycle and reuse". I had been saving my take-out containers from the Chinese restaurant (not those typical white boxes that have a metal handle and white rice inside), I was saving the foil pans that have a separate clear plastic lid, they're usually round or rectangular. These containers were just perfect.....plus I didn't have to go to a store and open up my wallet (hmm, look at all the moths fly out), if I can get away without having to lay down a buck I will. I did need soil though and so I went to Walmart and got their brand which was the cheapest I could find. Seed selection: Take a look at a seed catalogue, most will have some sort of notation about a seed's germination requirements, or you'll pick up a few clue-in phrases. Look for these terms: Needs Pre-chilling (freeze seeds, refrigerate seeds, stratify for x amount of day or weeks) Needs Stratification Will Colonize Self Sows Sow outdoors in early Autumn Sow outdoors in early Spring while nights are still cool Sow outdoors in early Spring while frosts may still occur Hardy Seeds Seedlings can withstand frost Can be direct sown early Wildflower Weed (such as butterfly weed, joe pye weed, jewel weed) Look for Common Names indicating a natural environment: Plains Prairie Desert Mountain Swamp Field River Look for names that might indicate an origin in a temperate climate: Siberian Chinensis Polar Alpine Orientale Canadensis Andean Russ (indicating Russian origin) Think about your own garden, and your neighbors' gardens too. Do you find plants that have volunteered each spring and shown up as seedlings that you didn't sow? These are very good choices. (let's say that your orange marigolds have returned in Spring as volunteer seedlings.......you can then be pretty well assured that gold, or lemon, or African or French varieties will reseed for you too, when it comes down to it a marigold is a marigold is a marigold). I like Park's Seed catalogue, it has a great germination table right in the middle of the catalogue. They have a numbered guide indicating the best germination requirements for seeds. I took a yellow highlighter and went down that numbered list and highlighted all the numbers that would be appropriate for Winter Sowing, then I carefully went through their list of seeds and highlighted the varieties that corresponded to the correct numbers. This is how I chose which varieties I would Winter Sow. A lot of catalogues, not just Parks, will have a germination table, or some information about germination, look at them, study them, and learn. To make a flat you take the foil container (of course it's clean, washed in hot soapy water) and a paring knife. Stab a few slits in the bottom of the pan, this is for drainage. Now fill the pan with soil to about a half inch from the top. Give it a real good drink and let it drain. I do this in my kitchen. (I have a sprayer on a hose at the sink and I use this for the watering, works well and doesn't gouge out holes in the soil). After the pan has drained sow your seeds and pat them down. Cover them with more soil to the correct depth if necessary. I like growing plants with tiny, tiny seeds, they're really just the very most easiest to sow. Sprinkle them on top of the soil, pat them down, and that's that. Now you need to put the lid on BUT FIRST.........and this is the very most important step.......take the knife and poke several slits in the clear plastic lid. This is for air transpiration. Think about it, you're making a little mini greenhouse. If you don't vent the air that is heated by the sun you'll cook your flat and the seeds won't germinate. You've baked them to death. Okay, put the lid on secure by folding down the foil rim. Now the seeds are sown. Uh oh.......back it up, I forgot a step that you may wish to use: labeling. I didn't label mine as I like surprises, however this concept may pop the heads of gardeners who enjoy having everything "just so". Get some freezer tape, or any tape that you know will work well after being frozen. Pull off a piece and stick it to the bottom of the flat. Write the variety name on it with a laundry marker (or a sharpie). You can do this before or after sowing, if you do it afterwards make sure you wipe the bottom of the flat well as freezer tape doesn't really adhere as good as you'd like to a damp surface. Label the tape before sticking it the bottom of the flat. The label is on the bottom of the flat because the sun can't bleach it down there. I haven't yet found a marker that won't bleach out in my strong Long Island sun. All right, the flat is now sown and covered (with little slits in the top, yes? don't forget!!). Now take it outside to somewhere it will be safe for the winter. I put them on a picnic table top away from my curious puppy. I learned my lesson, I lost a flat of daylilies (the first I sowed this way) because I put them on the ground under a bush and the puppy found them and thought the flat was a toy, and she promptly killed it by shaking it to death. After that all the flats went up on the table out of her reach. Sad loss, but an excellent lesson. Now you just wait it out. When the weather warms the flats will freeze and thaw repeatedly as winter gives way to spring. This action of freezing and thawing out helps loosen the seed coat. You'll often see the term "nick or file seeds prior to sowing" in germination databases: this is to duplicate Mother Nature's work (now you won't have to do that anymore). Amazingly, just when winter is about to break, and you're still getting nightly freezes, the first of your flats will begin to germinate. When I saw this I thought that the seedlings were goners, but they thrived. The seeds know when it's safe to come up, it's part of their genetics. Now is the time to check the moisture in the flats, on an above freezing day open them up and if they look like they need a drink give them one. The excess water will drain away. Don't forget to replace the lids tightly. As your seedlings grow start widening the slits in the covers, once a week or so make the slits a little bit bigger, eventually you'll have more open areas than covered and you'll be able to transplant the seedlings into the garden because they are completely hardened off. I have put in seedlings that barely had their first set of true leaves and they thrived in the ground. After transplant care is typically the same as for indoor sown seedlings. They need a drink and just a little bit of food: 10% strength after their first week in the ground, then increase slowly as the season progresses. After about eight weeks and a few feedings your seedlings will be able to take a full strength feeding. Alternative seed flats: I have used plastic milk jugs and 2 liter soda bottles too, just cut around the middle almost all the way through. Make the drainage slits. Fill with dirt, water, drain, sow, cover with more dirt (the same procedure as above). Tape the cut edges together and simply remove the cap for air transpiration. Cardboard orange juice or milk containers can be used with a baggie. Cut them in half, horizontally or vertically, make the drainage slits and sow your seeds by the same method above. Slip the flat into a baggie, tie it closed with a twist tie or a knot and use the knife to make a few slits for air transpiration, put a few slits in the bottom of the baggie for drainage. Coolwhip tubs: Make the drainage slits, sow your seeds as above. Take a scissors and cut out the center of the lid, leaving about an inch around the inside of the rim. Put a piece of saran wrap over the tub, put on the lid. This holds the saran wrap "window" snugly. Take the knife and make some slits in the saran wrap for air transpiration. +++++++++++++++++++++++++++++++++++++++++++++++ So that's how to do it, if I remember something that I have forgotten I'll post an addendum, but I think I have it all covered. The major principles of outdoor Winter Sowing are selecting the appropriate seeds for your plant zone, and providing adequate drainage and adequate air transpiration. Do all these and you'll have a success. Did all my flats germinate? NO! I had about eighty or so of these made and I had eight not germinate. Was it the seeds? Was it the method? Was it me? I don't know. But I did have around seventy flats that did germinate. Outside! I forgot to mention that I also used four kiddie pools. These were used the summer before as container gardens (lots of soil, lots of big slits for drainage). I simply direct sowed these and left them uncovered. They got snowed on, the snow melted, it rained while the base of the kiddie pools were still frozen and the rain didn't drain. They all were frozen with ice at least an inch thick.......aarrgghh, panic Panic PANIC....I couldn't do anything about it. When the warmer weather finally came the pools thawed and drained and the seeds came up! YEAH! That's it. As you see it's not hard to do at all and I sowed these flats at my leisure throughout the Winter. Everyone talks about going bonkers in January and February because they can't get out and do any meaningful gardening, and there are only only a few varieties of seeds which can be successfully sown this early indoors....frustration and gardening fever sets in. While all the other gardeners were chomping at the bit I was being self indulgent and playing with dirt and mud and seeds at my own lazy bones pace. I took a leap of faith doing this, I kept the faith, and I was rewarded. I believe in this method, it works, it really truly works. Too much emphasis has been made on indoor sowing under lights. It takes up time, it takes up space, white flies take to the air, damp off kills your effort, your seedlings, your spirit. Did I forget to mention that there was NO EVIL DAMP-OFF? The freezing action killed whatever nasties that are in the soil that cause young innocent seedlings to perish so tragically and so sadly. And it is sad, you take a lot of time and care in your efforts, the seedlings are sometimes almost like our "plant" children. It really is depressing when a flat of seedlings doesn't make it. I encourage everyone to try this Winter Sowing method, if you want to hold back some seeds the first time you try it that's great. Save some seeds to sow indoors of a variety you have placed in a Winter Sown flat, compare the differences in the seedlings, and then compare plants when they mature. Learn from what you observe. Make your life and garden easy, let it flourish with flowers, grasses, vines, bushes, trees, and vegetables, you thought you couldn't even consider trying before now. Good luck to you all! Trudi Davidoff (copyright 2000)...See More
hobbyartisan (Saskatoon, SK Canada, 2b)
7 years ago
calamondindave
7 years agoponcirusguy6b452xx
7 years agolast modified: 7 years agocalamondindave
7 years agoponcirusguy6b452xx
7 years agolast modified: 7 years agocalamondindave
7 years agolast modified: 7 years agoponcirusguy6b452xx
7 years agolast modified: 7 years ago
Nancy(Alabama 8A)
7 years ago
Related Stories
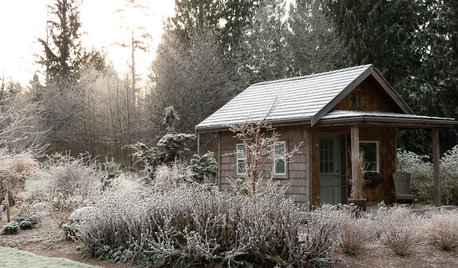
WINTER GARDENINGMake the Most of Your Garden During the Quiet Season
Discover 9 ways to make your winter garden more beautiful, functional and inviting to wildlife
Full Story
HOUSEPLANTSHow to Force Amaryllis Bulbs Indoors
Enjoy vibrant red blossoms even as gardens turn snowy white, by teaching this hardy repeat performer to ignore the calendar
Full Story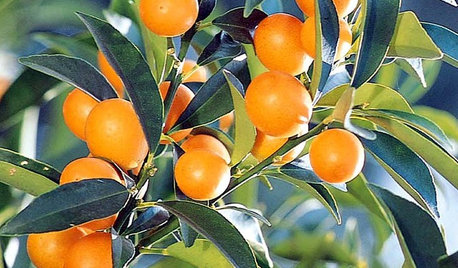
GARDENING GUIDESGreat Design Plant: Kumquats for a Juiced-Up Winter
Grow it for the edible fruit or its good looks alone. This citrus cousin will brighten any gray winter day
Full Story
LIFEThe Good House: An Experience to Remember
A home that enriches us is more than something we own. It invites meaningful experiences and connections
Full Story
LIFE10 Ways to Work Through Grief Triggers During the Holidays
A year after losing her sister, she was facing another holiday. Here’s how one woman learned to find joy again
Full Story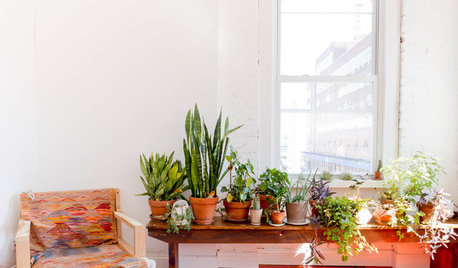
HOUSEPLANTSIndoor Winter Gardens for Cheerier Days
Bring plants inside for drab-days mood boosting — not to mention cleaner indoor air and protection for your greenery
Full Story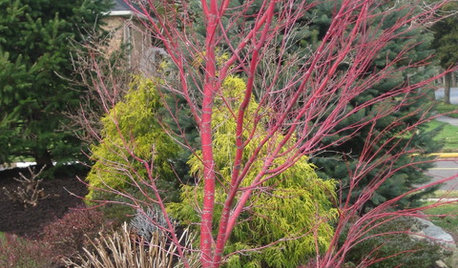
TREESGreat Design Plant: Coral Bark Japanese Maple, a Winter Standout
Go for garden gusto during the chilly season with the fiery red stems of this unusual Japanese maple
Full Story
HOUSEPLANTS8 Essentials for Healthy Indoor Plants
Houseplants add so much to our homes — and can thrive when grown in the right conditions. Keep these tips in mind
Full Story
LAUNDRY ROOMSHouzz Call: How Do You Air-Dry Your Clothes in Winter?
Baby, it’s cold outside! Do you have a trick to line-dry clothing indoors? Please tell us about it
Full Story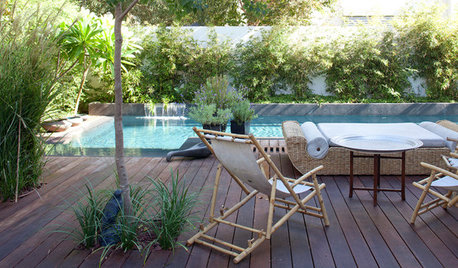
GARDENING AND LANDSCAPING10 Great Outdoor Chill Zones
Whether you have a huge poolside deck or a sliver of a patio, these ideas will kick stress to the curb all summer long
Full Story
Laura LaRosa (7b)