


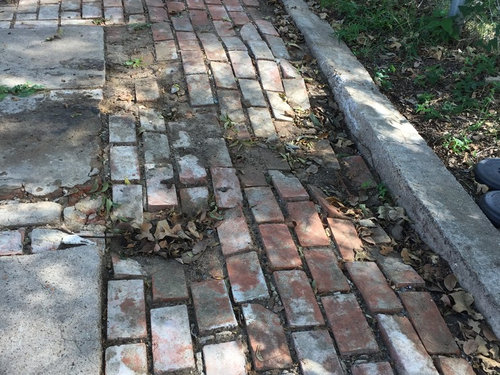
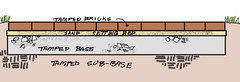
Restore an old failing patio
ron_b_cross
7 years ago


Featured Answer
Sort by:Oldest
Comments (28)
Related Discussions
Reconditioning, restoring, remodeling....where to begin?
Comments (3)holligator, here is a link to Tile Supply in FL. You can browse around their site and see some of the options on tile and coping. A lot of builders do renovations these days. Try searching for swimming pool renovation companies in your area. If still not coming up with anything, just call builders to see if they do it or recommend someone that does. At some point, you are going to have to get some of them out to look at it and give you some estimates. If you haven't done a renovation before, make sure you are sitting down when you get the numbers. Most renovation virgins are shocked at what it costs. Common response-Geez, that's more than I paid for the pool. Of course, things change and prices go up. It is generally a better idea to do a renovation on everything at once. It may not be in the budget, but you may end up paying to do things twice. For example, draining and refilling the pool each time. The renovation guys can make these recommendations and give you some options. Here is a link that might be useful: Tile Supply Inc....See MoreScrews failing on ACQ decking and now with Trex!
Comments (6)I bought the ACQ and the "TufCote" screws from one of the largest and most reputable lumber mills in town. I asked THEM which screws to use with my wood decking -- then the second time with the Trex as well. I wanted to do it right. They had thought the cause of the ACQ decking cupping and snapping screws was a due laying down very wet decking during a very hot period with full southern exposure. They felt the combination just baked the wood and offered me a slight discount on the Trex. I even had a rep from Simpson some out to look at my deck and they offered me more coated trimheads! So now I have a resurfaced Trex decking with screws ready to fail again? How bad do you think it would mess up the decking to unscrew the coated trim heads and replace them with a stainless steel at this point? Not sure if it would chew up the Trex. Do you think I need to replace every screw or maybe just 1 per joist? I may be about to unscrew them, replace with SS and pound the material in place... ah, what a nightmare! At least I didn't use TrapEase scews which you can't back out. Looks like I need to have a meeting with the lumber mill....See MoreRestoration Hardware Antibes Patio Sofa
Comments (11)The sofa we did over was an old Scandinavian Design (remember them?) three-cushion gray and white striped thing. We ditched the rather cheap cushions, fattened up the arms a little, gave it a tailored waterfall skirt, added the aforementioned single seat cushion, and then used five square down pillows with thick short fringe for the back cushions. So it was a pretty big job, but I got something that would have cost about $4,000 for about $1,200. That was 15 years ago, and it needs to be done again. The fringed back pillow thing is so 80's! One note, if you decide to do it. Make sure that the seat cushion has some form of subtle strap included in the design to secure the cushion to the frame. Otherwise, it will slide around when you sit on it, which will drive you right round the bend. What comes to my mind is a couple of simple self-fabric belts with velcro closures incorporated into the back edge. The front corner detail will help hold it (and make sure that detail is in the design as well), but I think when you put fabric on metal, slippage is a given. But to your question...I cut several pictures out of design magazines (known in the trade as "shelter books," a term I've always found hilarious, tho I don't know why...) of sofas that looked exactly like what I wanted, and talked them over with my upholsterer. We agreed on the kind of construction and the dimensions and the price. I was specific about the shape of the corners, the size of the welting, and everything else about the piece. I made copies of the pictures and my sketches and notes to leave with him, so there would be no question. I even gave him a picture of something similar but not what I wanted, so he would see what I wanted him to avoid. This is a good time to say again something I say all the time (so I must believe it!). First, to communicate a visual idea, use a visual medium. Second, do not leave any detail out of the discussion, and go over it and have it repeated back to you until you are sure that the vision in your head (and in your notebook) is the same in your tradesperson's head (and notebook). How I do run on......See MoreOld PTAC units - restore or replace?
Comments (1)replace....See More
ron_b_cross
7 years agolast modified: 7 years agoron_b_cross
7 years agoron_b_cross
7 years agoron_b_cross
7 years ago
daylily
7 years ago PRO
PROYardvaark
7 years agolast modified: 7 years agoron_b_cross
7 years ago
gardengal48 (PNW Z8/9)
7 years agoron_b_cross
7 years agoron_b_cross
7 years ago- PRO
Yardvaark
7 years ago 
mad_gallica (z5 Eastern NY)
7 years agoron_b_cross
7 years ago- PRO
Yardvaark
7 years ago ron_b_cross
7 years agokentc
7 years agoron_b_cross
7 years agoron_b_cross
7 years ago- PRO
Yardvaark
7 years ago ron_b_cross
7 years ago


Related Stories

HOUZZ TOURSMy Houzz: Spanish Colonial Restoration in Hollywood
Honoring its Spanish heritage, a 1928 home in California becomes a romantic sanctuary and inviting space for entertaining
Full Story
REMODELING GUIDESReplace vs. Restore: The Great Window Debate
Deciding what to do with windows in disrepair isn't easy. This insight on the pros and cons of window replacement or restoration can help
Full Story
CRAFTSMAN DESIGNMy Houzz: Small-Space Living in a Restored Bungalow
See how this homeowner celebrates his personal style, his flea market finds and the heritage of his 1919 Long Beach home
Full Story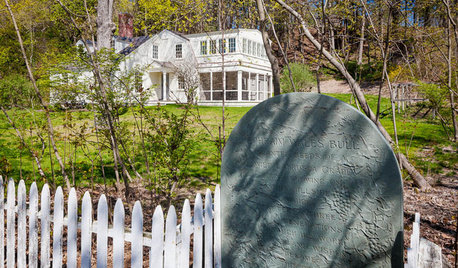
TRADITIONAL HOMESHouzz Tour: Historic Concord Grapevine Cottage’s Charms Restored
This famous property had fallen on hard times, but passionate homeowners lovingly brought it back
Full Story
HOUZZ TOURSHouzz Tour: A Boston Brownstone Is Restored to Glory and Then Some
Victorian-era architectural details create a strong base for an eclectic mix of furniture, accessories and modern art
Full Story
HOUZZ TOURSMy Houzz: Artful Restoration for a Brooklyn Brownstone
Historic detail balances with modern finishes and furnishings in this thoughtfully renovated, art-filled home
Full Story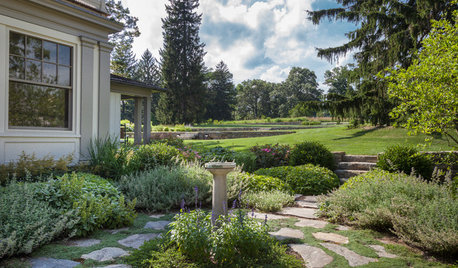
TRADITIONAL HOMESHouzz Tour: Connecticut Farm Restored for Generations to Come
A man renovates his extended family’s stately farmhouse and land. Sustainable practices are used in gardens, wetlands and recreation areas
Full Story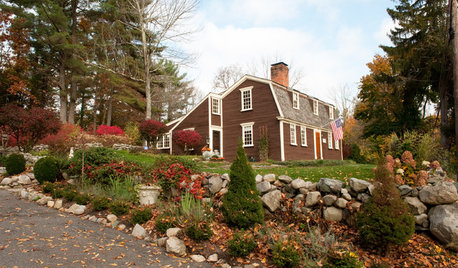
TRADITIONAL HOMESMy Houzz: Loving Efforts Restore a 1787 Farmhouse
Careful attention to original details preserves and revives a vacant New England home with a considerable history
Full Story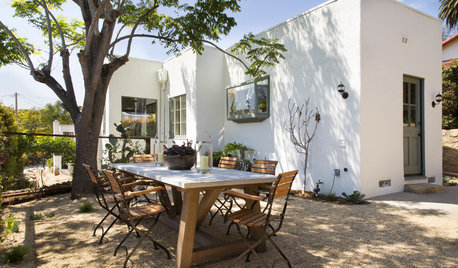
MEDITERRANEAN STYLEHouzz Tour: Beauty Restored to a 1930s Spanish Colonial Revival Home
Original details have been painstakingly preserved or reproduced in this Santa Barbara home
Full Story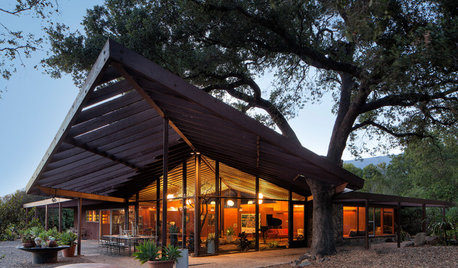
FEATURESHouzz Tour: A Daughter Restores Her Stunning Childhood Home
Her midcentury modern home in Ojai, California, was created in 1959 by a Case Study House designer
Full Story


gardengal48 (PNW Z8/9)