

Crock Pot Comparable Oven Temp
10 years ago
Featured Answer
Sort by:Oldest
Comments (12)
- 10 years ago
Related Discussions
In the market for a new slow cooker (Crock Pot)
Comments (32)Pfmastin, below is the link to Amazon's page for Nesco's. Which one did you buy? I have a question. My old crockpot has the "circular" elements in it and it never browned chicken. How does the roaster brown meat when the condensation drips down on it from the lid? Although most of the reviews are good, many say it's too hot on the outside & you can burn yourself. How does that help keep the kitchen cooler? I'd love to bake a chicken in there and have it crisp up! And is the 6 qt. big enough for a large chicken?...See MoreCrock pot vs. electric roaster
Comments (9)I own a Rival Crock pot, a Chef's pot (virtually the same thing only a little larger and is a multipurpose crock pot, deep fryer, etc) and a 4 & 6 qt size Nesco roaster. Hands down winner is the Nesco roaster. They work in a similar fashion. You just have much more control with the roaster. I'm going to talk about Nesco since that's what I have and I know its features. The other roasters do not necessarily have the same features. Cost of a crock pot or roaster are about the same. I just bought two of the 6 qt Nescos at Target for $24.99 each (they were on clearance and I couldn't turn them down for gifts). The crock pots have Off/Low/High for settings. I never found them to really be right. Low wasn't hot enough and High boiled everything so it was a constant switching back and forth. Granted, others do not have this problem. The Chef's pot has a variable temp controller, and a crock. I just hate cleaning the crocks. They're NOT easy cleaning. The Nesco with the enamel pot is fine for a while, but gets harder to clean. But with the non stick which comes in them now, it's easy cleaning. Plus you have temperature control from off to 450° or so. I've baked bread (frozen white bread and banana bread in the Nescos. I can put a 7# turkey breast in the 6 qt version. Beef roast is great. I'll cook up a package of boneless chicken breast and have for other things. I'll use it for baking potatoes. Basically if you can put it in the oven and cook it and can fit it into the Nesco, it works fine. The best lasagna I've ever made was in the Nesco and not cooking the noodles. In summary, yes, you'll do everything with a Nesco that you can do with a crock pot and more. I don't use my crock pots anymore. No need to and it's less hassle to clean and don't fight the heavy crock. Lift out cookwell fits in the frig better too. I'm also hearing people who have similar units say they're not as good as the Nesco brand. No, I don't work for them, just very satisfied with it. The people I know and have either bought them or received them as gifts *all* love them and won't go back to crock pots. Crock pots served their purpose but are now obsolete. I equate it to a can opener and an old can to a pop top lid. The Nesco is more modern way of doing the old way. Yes you can still use a can opener and crock pot, but why when you can use pop top lids and a Nesco? OK, not the greatest analogy, but you get the idea. Ken...See MoreCan my warming drawer replace a Crock Pot?
Comments (30)Interesting question that got me thinking. So I did some research. My conclusion: there is no simple answer and a lot of interesting information to ponder. Here's what I've come up with so far from plowing through the research I've found. USDA conclusions about how low and how slow are not limited to sous vide, but will not apply for every cooking method, either. Basically, the ideas are valid for anything you can safely cook low and slow. "Safely" depends on a lot of factors including the particular food(s) you are cooking and how well you can avoid the possibility of cross-contamination. You certainly don't want to try this for, say, for cooking unrefrigerated home tomato preserves (what we call "home canning" over here) or anything else that might carry botulism spores. Beyond that, there seems to be be controversy over how low and how slow for any given foodstuff. Here's an example to consider if you like roast beef. Back in the 1950s, cooking gurus Adele Davis (on our side of the Atlantic) and Elizabeth David (on yours) had recipes for roast beef that (IIRC) involved 5 or more hours in a 200°F/95°C oven, followed by a brief sear of the exterior. (Maybe vice versa.) Over here, Cook's Illustrated magazine revived that low temp roasting idea in the mid-90s and even suggested going down to the 170°F temperature which was the lowest that most modern ovens could maintain (at least in North America.) Those recipes left some food safety experts and critics aghast and vociferous --- the concern being about fear of interior bacterial growth during the long time it took for the interiors of thick roasts to reach "food-safe" temperatures. Other experts felt that the problem bacteria were on the food exterior surfaces and the oven temperatures were suffient to get the surfaces hot enough and quickly enough to kill the bad bugs (or at least reduce them levels that were not a health concern. More recently, celebrity British chef and author, Heston Blumenthal, one-upped (downed?) that controversy with a recipe that called for a five hours in a 131°F/50°C oven followed by a sear of the exterior with a blowtorch. Certainly sounds like you could do these recipes in a suitable warming drawer. (Suitable meaning that the drawer maintains a relatively even temperature.) FWIW, Cooks Illustrated now recommends different techniques for slow roasting beef and and does not recommend them for poultry. The current recommendations are these. For less expensive cuts with lots of connective tissue, 250°F/120°C for five hours. For leaner and more expensive cuts (such as what North Americans call "prime rib"), 20 minutes in an oven preheated to 500°F/260°C, then shut the oven off and leave the roast to sit there (door closed) for 2½ hours or so. I've tried both recipes and both produced very good results. So far, I have not yet run across anything scientific discussing before and after "bug counts" for Blumenthal's 130°F method. (The info may be out there, I just have not found it yet.) Sounds like a science fair project. Hmmm. While I no longer have a stove with a warming drawer, my current stove's oven will hold a steady 130°/55°C temperature. I do have a blowtorch. A friend of mine is a biology professor with a lab than can measure surface bacteria levels. But, heck, maybe I should just try the recipe and see if I get sick? ;>P In the meantime, I ran across an interesting and thoughtful article from Scientific American magazine that might be of further interest. It's sort of halfway between the USDA study and Kenji Alt's simplified digest. http://www.scientificamerican.com/article/complex-origins-food-safety-rules/...See More6 quart Nesco vs. crock pot
Comments (8)You probably already know my answer, there's nothing I prefer in a slow cooker, whether Crock-Pot® brand or otherwise. I threw both my Crock-Pots out. Never gave the temp I wanted and in decades of use I can honestly say I have never said or thought gee I wish I had a Crock-Pot® again. Not once. All I do on the Nesco is adjust the dial. No cuss, just adjust. I've said my piece on slow cookers before so won't repeat that except, to say to each their own. My dad, for instance, absolutely refused to get or let me get him an automatic washer. Nope, no way, no how. Only a wringer washer for him. ("Dem automatic washers walk across the floor you know! That's what they say! Wouldn't take one if dey gave it to me!") :) annie1992 has a point, maybe, but I really didn't see that happen when I had slow cookers. I will say, and thought at the time that in theory, the crock should not burn edges as much, right? But I experienced the same burn in unattended cooking in a side by side situation, unless I had it only on low which kept the food unedibly cool. Both units apply heat, and too much heat will burn. The slow cooker applies heat continuously though while the electric roaster cycles on and off. I would think that if anything the opposite would be true but I don't use my roaster for beans (no pun intended) so I'll yield to Annie's greater knowledge on them. And I don't have a slow cooker to test my theory and wouldn't have one anyway so I guess it'll go on as one of life's great mysteries for me! I would say this, Try it and see if you like it. My guess is you will like it far better for at least most applications if not all. There's been quite a few people who were skeptical but found out what a versatile appliance a roaster is once they had one....See More- 10 years ago
- 10 years ago
- 10 years ago
 10 years ago


Related Stories
KITCHEN DESIGNA Cook’s 6 Tips for Buying Kitchen Appliances
An avid home chef answers tricky questions about choosing the right oven, stovetop, vent hood and more
Full Story
KITCHEN DESIGNCreate Your Own Checklist for a Well-Stocked Kitchen
Personalize the kitchen with your own must-haves from our list of top cooking tools, small appliances, pots, pans and more
Full Story
KITCHEN APPLIANCESFind the Right Cooktop for Your Kitchen
For a kitchen setup with sizzle, deciding between gas and electric is only the first hurdle. This guide can help
Full Story
HEALTHY HOME12 Ways to Set Up Your Kitchen for Healthy Eating
Making smart food choices is easier when your kitchen is part of your support team
Full Story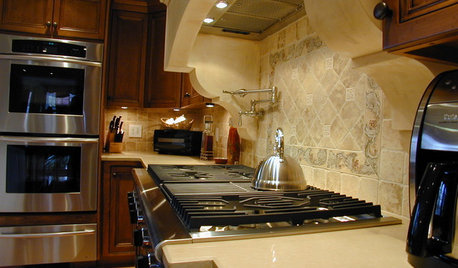
KITCHEN DESIGN8 Kitchen Design Tips for Foodies
If you own at least one pricey knife and have a slew of kitchen tools, you’ll want to read this
Full Story
PRODUCT PICKSGuest Picks: The Well-Stocked Starter Kitchen
We’ve got all the kitchen basics and tableware you need (or that recent grad needs) to make cooking a joy
Full Story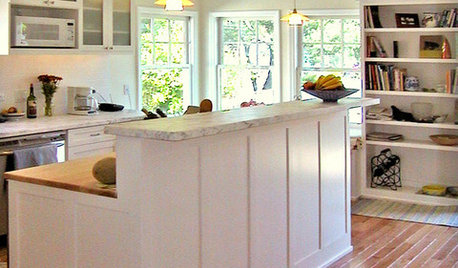
KITCHEN DESIGN8 Kitchen Organizing Ideas for Messy Cooks
Not the clean-as-you-go type? Not to worry. These strategies will help keep your kitchen looking tidy no matter what your cooking style is
Full Story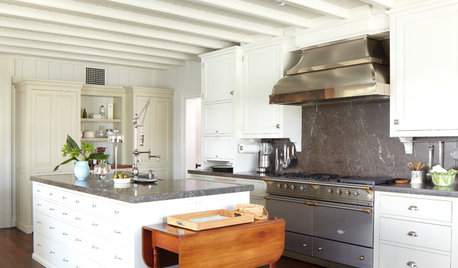
KITCHEN DESIGNHow to Find the Right Range for Your Kitchen
Range style is mostly a matter of personal taste. This full course of possibilities can help you find the right appliance to match yours
Full Story
KITCHEN APPLIANCESConsidering a New Kitchen Gadget? Read This First
Save money, time and space by learning to separate the helpers from the hassles
Full Story
KITCHEN APPLIANCES9 Places to Put the Microwave in Your Kitchen
See the pros and cons of locating your microwave above, below and beyond the counter
Full Story


grainlady_ks