


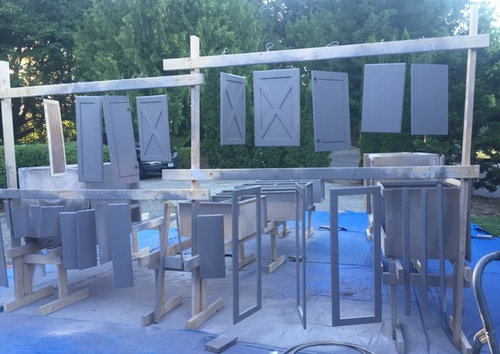
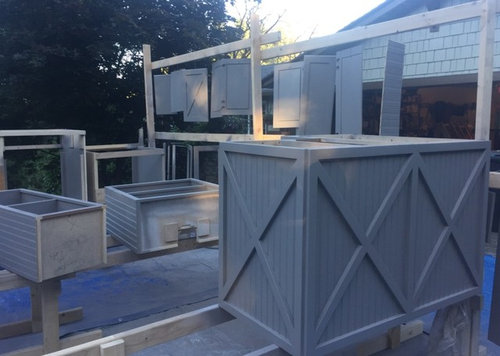
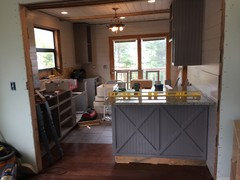
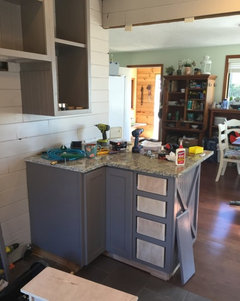
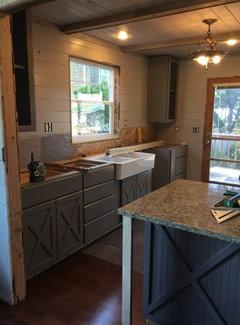
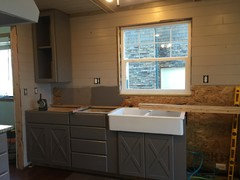
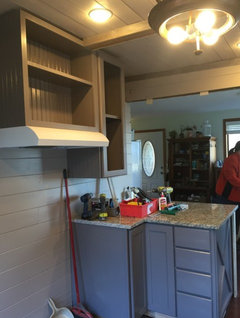
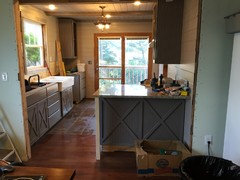
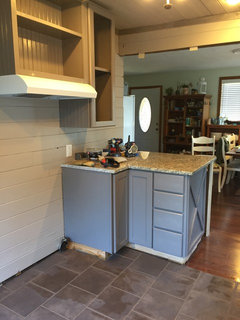
Spray painting our new kitchen cabinets, starting install today
Troy Farwell
7 years ago
Featured Answer
Sort by:Oldest
Comments (19)

Troy Farwell
7 years agoRelated Discussions
Painting OLD cabinets and adding new to match
Comments (27)Oh, and in case it wasn't clear from my earlier post, I don't think you should discount soapstone at all--I would use it again in the right setting. I just wouldn't use *our* particular soapstone. We didn't get samples and test, and we should have (it was at the top of our budget so we just went with the cheapest stone they had--mistake!) I remember someone here, Marcolo I think, getting samples a few months after ours went in and commenting that our stone looked like Ray Liotta after the testing. ;) But I do still love it for the reasons we chose it, so I would look for a harder soapstone that had those great qualities with fewer of the downsides. All soapstone will show some wear, but usually it's more like a patina, and many can be oiled or sanded to hide this if you want. I don't think most people have the issue with the edges gouging and breaking down like we do. A few random thoughts, too--our sink cabinet was much the same as yours. In our before pics you can see one door completely missing--it wouldn't close so we finally just took it off! Our sink run had been built in a later remodel (using, we think, parts of the original cabinets) because the original sinks of that era were freestanding behemoths (beautiful, but rarely kept in remodels in the 30s-50s sadly) so it was common for those cabinets to be remodeled even if others were kept. Ours were very poor condition (only mediocre quality to start, and many years old with water leaks and such to boot) and could not be salvaged. They were also three-sided built-in-place (very common in that era) which limited how easily we could reuse or adapt them. And I love love love tile counters, but we got it priced out and it was well above the cost of any stone options to have it done well (critical for it to be level--while we were fine doing our backsplash ourselves, we were not confident in our ability to get a perfectly level surface on the counter) using epoxy grout (which local places said was the solution to icky grout, something we wanted to avoid--dunno what the thinking on this is these days, as this was three years ago). If you have strong DIY tile skills, maybe an option, but otherwise, it's probably not worth the cost. And last (sorry for the length!) two thoughts on drawers: yes, they can add runners if you want (may need to replace the boxes though depending on drawers), but beeswax did wonders for ours! Try that first for sure. We did find that it was less costly to remodel the areas where we did not open walls beyond electrical, so I think if you can divide the kitchen by walls, it would be feasible to keep the Hoosier and drawers but gut the other areas. However, we also had and were keeping plaster walls--drywall is a lot cheaper so then it might make more sense to go down to the studs and just put up new wall. It may also affect code requirements, too. Where we did not open walls, our existing wiring was grandfathered in (except for counters, since cabinets/counters were new). That did save us some money too....See MoreCabinet install started today!
Comments (14)I love seeing those lovely shims. There's only one way to know where to place them and that's with a level. I'll bet those cabinets are dead on. In the first picture above, note the shim behind the upper right cabinet. It is there because the wall strays out of plumb. Yes, it will create a tapering gap between the back of the cabinet and the wall, but if he fastened the cabinet to the crooked wall, the cabinet would be "racked" out of square and the right door would not shut. I'd rather have a little caulk/moulding at my cabinet/wall than a cabinet door that won't close. The appliance and countertop subs will smile when they arrive. This guy knows what the hell he is doing. This post was edited by Trebruchet on Sun, Mar 30, 14 at 12:20...See MoreTall pantry cabinet door got dinged from installers today :(
Comments (53)Stupid I know but I just breathed a huge sigh of relief! My guys came to work today said their hello's and got right after it. Called me in the kitchen to show me how they had fixed the drywall that was bowed behind sink and is now flush and level with cabinets installed. Great! Close to templating! Woo hoo! The head guy says what's the blue tape on the doors? I said "I see there is another ding in the cabinet here now from the work on Friday. These dings are really bothering me and I don't want any dings in my new cabinets. I said had it been down low or inconspicuous maybe it would be ok but I need these doors replaced." He said OK. I kept going with my spiel saying "I'm happy to help do what I can to protect the others going forward" Wait what did he just say?! He said OK! That was easy! He then says no problem. I want you to be happy. :) I smile he smiles even tho he probably wants to kill me ;) Geez, I'm really going to be a nervous wreck when counter tops go in. Just thought I'd share for anyone else going thru the same issue. Hope this helps....See MoreNeed advice on painting kitchen cabinets
Comments (2)You’re going to have to 100% start over. Concrete was a very bad idea. You’ll be ripping out that stained and cracked mess very soon. Might as well do that now. Even laminate performs better than concrete. Here is how I would expect a pro to spray paint kitchen cabinets. An amateur job should follow the same path. A brush painted job would differ slightly in that you wouldn't hang the doors to paint. You'd place them on a work table or easel instead. It's time intensive work, and should take 7-14 days for a Pro to accomplish completely and cost between 8--10K depending on kitchen size and amount of detail in cabinets. Remove doors and drawer fronts. Remove hinges and hardware. Clean with Spic and Span Rinse and let dry. Scrape any loose finish. Fill any damaged spots or hardware holes that won't be reused. Sand fill smooth. Scuff sand the rest. Tack off dust. Hang in dust free paint booth with wires through hardware points to spray both sides. Or lay on a spinner, and do one side at a time. Tack off dust again. Spray with shellac based primer. Scuff sand again. Tack off dust. Spray with second coat of primer. Spray with first finish coat of a polyurethane enamel (DIY) Or conversion varnish, (Pro product) . NOT house paint. Never house paint. Spray with second coat. If glazing is to occur, that is next. Spray with clear over glaze that is compatible with base coat and glaze. Add more molding or decorative details to boxes, filling nail holes and sanding smooth. Repeat prep process with face frames and exposed cabinet sides using plastic to create a spray booth on site. If interiors are to be done, they are done before face frames and sides. Interiors are difficult, and add both time and expense to the job. Most interiors are laminate and don't accept paint well. Allow everything to fully cure. That's 7-14 days. Clean hinges and hardware and clear coat if you're keeping the old hardware. Install new (or old) hinges and hardware. Re-install doors and drawers and adjust for proper clearances. If you are receiving or doing a job without this amount of effort, then you are not getting a quality job. You are getting a poor quality job that will not last....See MoreTroy Farwell
7 years agoTroy Farwell
7 years agoTroy Farwell
7 years agolast modified: 7 years ago
jellytoast
7 years ago
cpartist
7 years agoTroy Farwell
7 years agolast modified: 7 years ago
weezel
7 years agoTroy Farwell
7 years ago
eam44
7 years agocpartist
7 years ago


Related Stories

KITCHEN BACKSPLASHESHow to Install a Tile Backsplash
If you've got a steady hand, a few easy-to-find supplies and patience, you can install a tile backsplash in a kitchen or bathroom
Full Story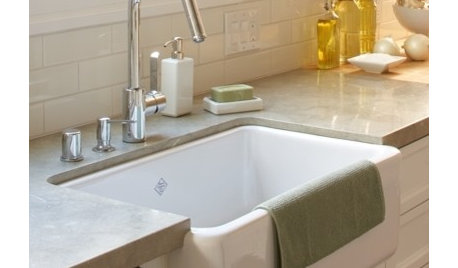
CONTRACTOR TIPSContractor Tips: Countertop Installation from Start to Finish
From counter templates to ongoing care, a professional contractor shares what you need to know
Full Story
BATHROOM DESIGNShould You Install a Urinal at Home?
Wall-mounted pit stops are handy in more than just man caves — and they can look better than you might think
Full Story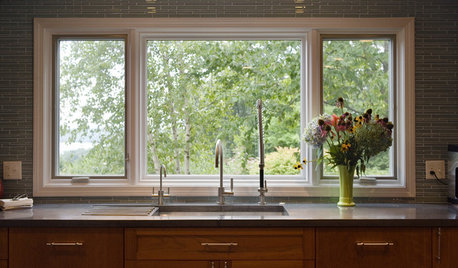
WINDOWSContractor Tips: How to Choose and Install Windows
5 factors to consider when picking and placing windows throughout your home
Full Story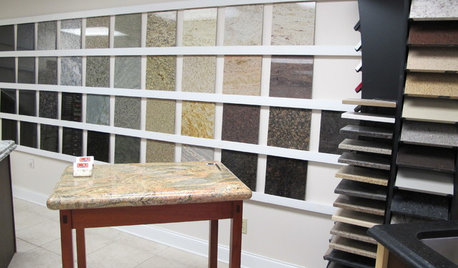
KITCHEN COUNTERTOPSWalk Through a Granite Countertop Installation — Showroom to Finish
Learn exactly what to expect during a granite installation and how to maximize your investment
Full Story
KITCHEN DESIGNHow to Choose the Best Sink Type for Your Kitchen
Drop-in, undermount, integral or apron-front — a design pro lays out your sink options
Full Story
TILE6 Questions to Answer Before You Install Tile Flooring
Considering these things before tackling your floors can get you a better result
Full Story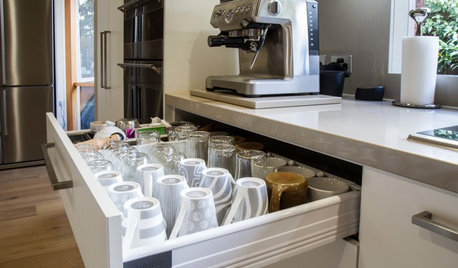
KITCHEN DESIGNToday’s Coffee Stations Have All Kinds of Perks
Some of these features are so over the top that they will give you a jolt
Full Story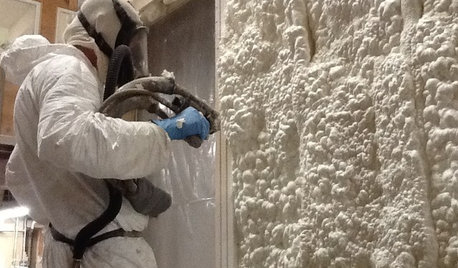
MATERIALSInsulation Basics: What to Know About Spray Foam
Learn what exactly spray foam is, the pros and cons of using it and why you shouldn’t mess around with installation
Full Story
DOORS5 Questions to Ask Before Installing a Barn Door
Find out whether that barn door you love is the right solution for your space
Full Story
eam44