


Kleenex box 1, cat 0
Bunny
7 years ago
last modified: 7 years ago

Featured Answer
Sort by:Oldest
Comments (43)
Related Discussions
new: the brighten up your beds named iris swap :0)
Comments (66)Hi everyone! Happy Friday!!! Shirley, so glad they made it :)...and the secret in the soil is...ready...wait for it...wait for it...cow pooh! Yup, cow pooh that is at least 3 years old, so it won't burn the roots. I actually mix it with mulch and dirt, like a dirt smoothie. Works fantastic! and...since its old NO SMELL! There is a mulch store around here that actually sells something very similar to what I have been using for years. I've tried it and that stuff works great too. And best of all, I don't have to do any of the mixing. :) I also split my iris' about every year (or every other). I have a bunch of them so the foliage is a big part of my gardens once they are done flowering. And the nicer it stays the better my beds look. :) Suzanne, your box actually went out yesterday. And I totally forgot, until I got home, that I was suppose to put a del. confirmation on it. I am so sorry! that I forgot. The hostess probably shouldn't be forgetting her own rules, lol! :) Hopefully, you'll be getting them Saturday. Hope you having fun camping. Karen, if you having as much of a crazy time as I am I feel for you! I have decided with to completely dig out my entire back of the house flowerbed and re-plant everything. This be is 15 feet wide and 46 feet long...I think I have officially lost my mind! But, things are poking and starting all over the place and I need more organization than the craziness that has taken over. Besides, I got a new glider for my birthday from my MIL and it needs a nice new home :) DH and the kiddos got me a stone bench for the pond and a new bird bath, which is over in my new daylily bed around the pool. :) I also realized that I need to update the pics on my GW page. They are over 2 years old. My BIL put them on there for me, there is no way I could ever figure that out. Maybe I can sweet talk him with some lasagna and garlic bread to give me an update on my page :) Have a super day everyone! vina...See MoreFood Photo Tips: Part 6 - Making a Mini Light Box
Comments (0)Posted by canarybird (My Page) on Wed, Aug 12, 09 at 11:45 Food Photo Tips: Part 6 - Making a Mini Light Box Hi again everyone. I'm back with another entry on how to use your digital camera for taking tabletop photos. This time I'm going to show how to make a miniature version of a light box, which can be useful for photographing small objects. I'm also working on making a full sized box out of a cardboard printer box which will be used for photographing larger objects, including plates and dishes of food. Mini box (left) Full size box under construction (right) But it might be easier to practise with a mini box to test your results and your skills with a box cutter or sharp scissors. If you have a handy teenager, (or other person clever with crafts and model building, who won't cut off a finger with the box cutter) you may enlist some help with this although it takes less than an hour to make, requires no special skills and doesn't have to be good looking. The idea of a light box is to create a partially enclosed 'white room', with white walls, a white sweep (that paper background we made previously in Part 4 - Seamless Backgrounds), with cutout windows and ceiling covered with white paper, into which we project a strong overhead light and usually a light on either side aimed at the white paper windows so that any object introduced into the box will be bathed in total white light with no shadows. You will have often seen pictures on the web of an object which seems to float on a pure white background. Eg: Cook's Thesaurus. This effect can be achieved in a light box. And it's quite entertaining to see what you can produce from this setup. These last two pictures were taken with my 15 watt CFL desk lamp overhead and one 7 watt CFL spot lamp (that green one) at the left window. Even better would be a 2nd spot pointing at the right window. (I need to go out and buy that 2nd spot lamp...they cost about $12 here so not an expensive item and good for the mini box.) Construction of the Mini Box: Materials needed: small box of sturdy cardboard, box cutter or small sharp scissors, ruler or metal straight edge, pen, glue stick, white paper (I always seem to use printer paper.) I used a small box measuring 5.25 x 7 inches (13.5 x 18 cm) that contained a little desk lamp. You can use a larger box as well of course, but your lights will have to be accordingly more powerful. And I think it's better that you keep it as a vertical box, higher than wider, so that the lid opening will be your ceiling. We can still make the bigger box later once we have caught the idea of how best to create the whitest environment. On my little box I took off the top flaps of the lid and using a box cutter, cut out windows on the sides, leaving a frame of cardboard about 1 inch (2.5 cm) all around, except for the bottom edge of the front 'door' which I cut off. Then I took white printer paper and after cutting it to the size of one side (5.25 x 7 inches/ 13.5 x 18 cm) glued it with a glue stick into the INSIDE of a window side, then repeated that on the inside of the window facing it. Glue carefully and smooth out any wrinkles, which would show up in your photos. To further cover the edges, cut out strips of white paper to size and overlap the newly installed white paper to the back wall and the floor, smoothing carefully so the edges are well stuck down and wrinkle free. Do this on both window sides. Cut a paper sweep to go inside your box, but DON"T GLUE it in, just slide it in so it is removable when it becomes spotted . The measurements should be....width a little smaller than the width of your box. In my example, with a 5.25 inch (13.5 cm) box width, my paper sweep was perfect at 1/4 inch less than the box width...that is at 5 inches wide (11.5 cm). Length of the sweep:....start with a piece of paper a little shorter than the box height plus the box depth (from back wall to front door) and slip it into place until it reaches the edges of the door, as in the photo below. Check that you have a nice curve in the sweep, that it reaches the 'front door' and trim off any excess that sticks up over the top at the back. The finished box should look something like this. Many light boxes also use a thin sheet of paper...often white tissue paper or white tracing paper over the 'roof' of the box and this will give you a soft diffused light. If you are going to photograph any reflective item of metal, ceramic or glass you won't want a reflection of the light bulb in the top lamp showing on your object, so you should then use a thin white material or paper to soften the white glare. If you have a good strong light on both top and sides you will be okay with the diffusor on top as the light will be sufficient. If the light is too strong, then move the lamps away a little from the box. Some examples with fruit: First a sideview of the setup and one example of creating a very soft photo using Exposure Compensation (EV +1.3)... that's 4 clicks up from 0.0... to give deliberate over exposure. Here I was able to get photos using just the overhead desk lamp. If you don't have extra lamps (they must all have the same type of bulb...tungsten or CFL, not mixed) see how you can do with the overhead lamp close to the top opening of your box and raising the EV value to make the picture lighter. This you can do while looking through the viewfinder before taking the photo. A little less raising of the Exposure Compensation, that is.... pushing it up 3 clicks (instead of 4) to EV +1.0, makes the image a little less over exposed and more defined (left photo). With no EV changes to the picture, you would have a normal exposure, as in the second photo. Now you know how to make misty white photos if you wish to have that effect. When you raise the EV value using the plus+, you are actually decreasing the shutter speed of your camera, so it stays open longer, lets in more light and gives you a more exposed (lighter) image. Conversely, when you lower the EV value using the minus -, you are in fact increasing the shutter speed, the shutter closes sooner, letting in less light and your image is darker. If you manage to make this mini light box, try using a PORTRAIT setting, and maybe add a click on the MACRO option as mentioned below. Remember to set the White Balance WB for the type of bulb you are using...hopefully you have a CFL fluorescent in there, and practice using the EV button to lighten or darken your image while looking through the viewfinder. I think this is enough for one day but I did want to introduce MACRO, or closeup photography. If you look at the back your camera you will have noticed a little tulip icon somewhere on or near the round touchpad. That is your option to tell the camera that you want to make closeup photos. You should be able to click on it from any of the other options that you have, such as AUTO, PORTRAIT, INDOOR. By clicking on the tulip icon you will probably bring up three options: OFF, the tulip icon representing MACRO, or another tulip icon with a small 's' beside it. Some point and shoot cameras may not have this second tulip but it refers to SUPER MACRO where you can get even closer to your subject. Try it out....remember you can still be in another mode and add the macro option. I'll explain more next time with examples of how you can capture very close, sharp pictures of food, insects and plants. I hope you are understanding it all and if you have questions please ask here or PM me. So thanks for joining me. I'll be uploading the next installment soon. And please feel free to save the pages on your computer. Sharon (Canarybird) :-) (All text and photos copyrighted) Free for personal, non-commercial use Follow-Up Postings: o RE: Food Photo Tips: Part 6 - Mini Light Box & Macro clip this post email this post what is this? see most clipped and recent clippings * Posted by loves2cook4six (My Page) on Wed, Aug 12, 09 at 22:36 Ahh Sharon. THANK YOU!! When will the book be published :) I'm going to be the first to buy it! o RE: Food Photo Tips: Part 6 - Mini Light Box & Macro clip this post email this post what is this? see most clipped and recent clippings * Posted by ntt_hou (My Page) on Sun, Aug 16, 09 at 20:25 Wow, I learned more in these 6 parts than some photography books I have. Thank you so much !!! o RE: Food Photo Tips: Part 6 - Mini Light Box & Macro clip this post email this post what is this? see most clipped and recent clippings * Posted by antiquesilver (My Page) on Mon, Aug 17, 09 at 19:32 Ditto to what ntt_hou said! And now I'm going to make a light box so I can photograph my silver. Your instructions are great. Thanks for taking the time to do this. Hester o RE: Food Photo Tips: Part 6 - Mini Light Box & Macro clip this post email this post what is this? see most clipped and recent clippings * Posted by canarybird (My Page) on Mon, Aug 17, 09 at 19:56 Thank you again for your comments! They are appreciated. I'm looking forward to seeing your results. Hester I'm sure your silver will look beautiful in a light box! SharonCb o RE: Food Photo Tips: Part 6 - Mini Light Box & Macro clip this post email this post what is this? see most clipped and recent clippings * Posted by antiquesilver (My Page) on Sun, Aug 30, 09 at 0:38 Finally got around to semi-finishing my light box - WOW, what a difference! I gave it a quick trial run using an under counter light as an overhead with a thin cloth on top & a POS snake light on one side. I'm amazed that I got good shots without a tripod, although I know it will be necessary when I use a macro lense for the maker's mark photos. I didn't have time today for that, but wanted to thank you for taking time to enlighten all of us who aren't quite in the 21st century - at least photography-wise! Florentine Pie Server Florentine blade detail Florentine Shoulder detail o RE: Food Photo Tips: Part 6 - Mini Light Box & Macro clip this post email this post what is this? see most clipped and recent clippings * Posted by canarybird (My Page) on Sun, Aug 30, 09 at 6:40 Lovely shots antiquesilver! The focusing looks good but you do need a stronger light to brighten up the images. Keep the thin cloth on top as you have done to avoid sharp reflections on the silver (beautiful piece by the way,) and raise the Exposure Compensation (EV) higher...start with +0.3, then +0.7, and +1.0, taking one or two shots at each and see how they turn out. You would need a tripod as changing the Exposure Compensation will probably slow the shutter speed, opening up the possibility of camera shake. I would also check the ISO setting if you can do that. Perhaps that's not possible if you are using an automatic setting. Raising the ISO increases the camera sensor's sensitivity to light, so a higher number makes the photo brighter. (Same as when using film we could buy ASA 100, 200 or 400 for different film speeds.) For sure you can change the ISO when in manual or semi-automatic modes, which show as M, A, S, or P on your mode dial. I'm so glad to see you are trying this out and showing your photos here! Keep going....you are doing well! SharonCb o RE: Food Photo Tips: Part 6 - Mini Light Box & Macro clip this post email this post what is this? see most clipped and recent clippings * Posted by antiquesilver (My Page) on Mon, Aug 31, 09 at 15:06 I need to buy at least 1 more lamp but I wanted to try it out anyway & the difference (box vs. no box) is amazing even without the needed adjustments. Taking a decent photo of silver without glare, blur, & a tripod is no small feat so P&S is a small miracle! I did play with the EV but overexposure was a problem when going higher; maybe not so much overexposure as a loss of silver details - another problem w/silver. Yesterday, I realized the overhead light I used is halogen & I changed my setting to adjust for it & that got rid of the yellow tones. I can't remember if I can change the ISO in Portrait mode or not - I've found so many things on this camera that I didn't know were there, it's mindboggling! FYI - it's a Panasonic Lumix. o RE: Food Photo Tips: Part 6 - Mini Light Box & Macro clip this post email this post what is this? see most clipped and recent clippings * Posted by canarybird (My Page) on Wed, Sep 2, 09 at 18:01 Antiquesilver...I imagine that ISO is not changeable when in any semi automatic mode. The camera wants to do that for you so it will most likely be automatic. However you should be able to raise the EV just one notch up to +0.3, or get a stronger light bulb. Also try substituting the thin cloth with white tissue paper or tracing paper. The cloth might be cutting out too much light. I know what you mean about too strong a light blowing out the detail on the silver pieces. But keep experimenting to get the right combination of camera setting, light and diffusor. If you are interested in reading photography books, I can highly recommend this one "Light - Science & Magic. An Introduction to Photographic Lighting."" by Fil Hunter, Steven Biver, Paul Fuqua. There are detailed explanations of setting up tabletop lighting with a whole chapter dealing with how to photograph metal objects. You might want to have a look in your library or bookstores. The ISBN (I have the 3rd edition) is: ISBN-13:978-0-240-80819-2 , published by Focal Press. Tutorial number nine will be a few days late this week. Probably have it ready for the weekend since we had a lot to do this week, including rescuing our new cat from a neighbour's locked backyard LOL. (All turned out well there.) SharonCb...See MoreNewly-updated Firefox (47.0.1) causing trouble?
Comments (15)Kudzu9: That's a good suggestion. I'll try uninstalling and reinstalling FF, 48.0.2. And I do have a list of sorts that I can go by to reinstall my Add-ons, since my husband's computer has the same ones I did. Next time, I'll keep my own list, though, because, who knows, HIS PC could someday have the same problem mine does. Azinoh: That's news to me. Not sure when I updated FF. In fact, I thought I had done so several weeks ago, but then got a notice that it needed updating, so went ahead again. Wow, it's beginning to look more and more as if something is seriously wrong somewhere. FF has always been unreliable in its updating on my PC. (Perhaps a sign of a deeper problem somewhere.) I have it set to automatically update, and presume that the updates were coming from Mozilla, but it has been erratic in doing so. "Help>about FF" leads to a box that says "FireFox is up to date." Now, obviously a lie, but I believed it. I will reconsider the number of add-ons I have. The main ones were a pop-up blocker and IE View lite. Some, I know, I installed because a site I wanted to see required them (or it?), but when possible, I had set things so that the add-ons I didn't need often were temporarily disabled and had to ask permission. This is the second time I have had trouble with Scrapbook. I will definitely go check out the reviews of it; never did that, though I always check reviews before buying things! Hm. What I like about Scrapbook is that even if a site disappears from the Internet, whatever you have saved in Scrapbook is still accessible. With very important info, I generally copy and paste it into Word and save it as a document, but that is tedious. I appreciate all the comments and help and will post again re new developments....See MoreKleenex Box Notice
Comments (46)There has been a few stories in the news of late about city pipes and clogs and suggestions as to what should and should not go down the sewer. The stories always are told from the perspective of OF COURSE one shouldn't...but unless one has lived where there is a private well/sewer system I am sure most never gave it a thought. I think it was stretched to the limits with disposable baby wipes. From there we morphed into "flush-able personal hygiene wipes" now paper towels in the bathroom are all the rage. We are a disposable society and then SHOCKED when our oceans/landfills/sewers are full of garbage. Malls at Christmas especially give me pause. Where does all this merchandise end up--in the end?...See More
Bunny
7 years agoBunny
7 years agoBunny
7 years agoBunny
7 years agolast modified: 7 years ago
Annie Deighnaugh
7 years ago
User
7 years agoBunny
7 years agoBunny
7 years agoBunny
7 years agoBunny
7 years agoBunny
7 years agoBunny
7 years agolast modified: 7 years agoBunny
7 years ago
Related Stories
HOUZZ TOURSHouzz Tour: For the Love of a Cat in Philadelphia
Pet-friendly features integrated into a mod, eclectic and colorful home mean everyone in the family is happy
Full Story
PETSHouzz Call: Send in the Design Cats
Post your best photo of your cat at home, in the garden or with you in your studio. It could be published in a featured ideabook
Full Story
PETS12 Stylish Solutions for Ugly Cat Furniture
Bland beige post unhappily marking your living room territory? Scratch that with rakish kitty condos, perches and staircases
Full Story
FEEL-GOOD HOME6 Design Ideas for Happy Pets
Keep your dog or cat feeling safe and in high spirits, and you'll all feel more at peace. Here's how
Full Story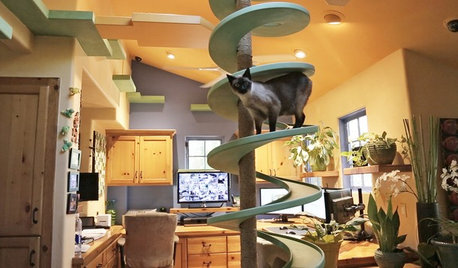
PETSIncredible Home Catwalks Make for Purr-fectly Happy Felines
Walkways and tunnels custom built to the tune of about $35,000 keep a homeowner’s 18 cats on cloud nine
Full Story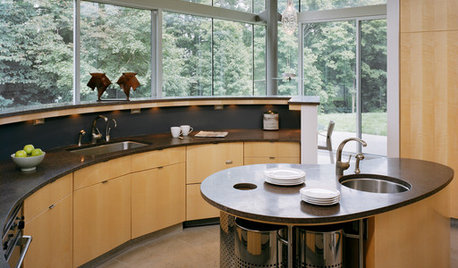
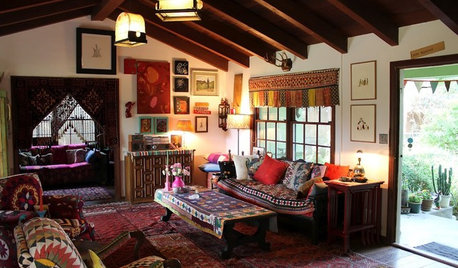
HOUZZ TOURSMy Houzz: A Cabin of Curiosities in Los Angeles
A sheep's head here, a beaded fringe there and layers of exotic prints and art everywhere work wonderfully in a personal "Shangri-La"
Full Story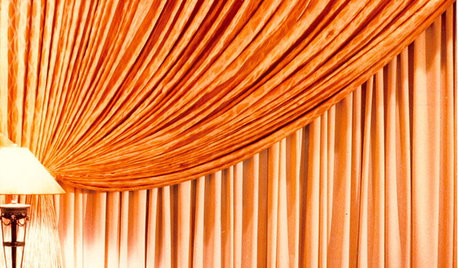
DECORATING GUIDES22 Divine Draperies That Indulge and Delight
Yards of luscious fabrics, luxuriously swagged and layered, create drapes that gratify the senses
Full Story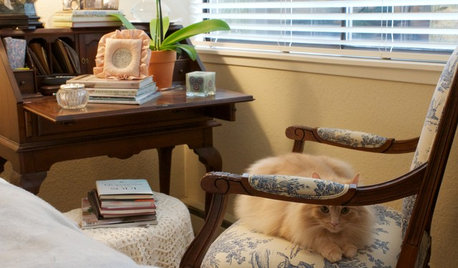
DECORATING GUIDESSee a Seattle-Area Home Steeped in Graciousness
Brimming with welcoming touches, this condo shows that a home short on space and decorating funds can still go long on personal style
Full Story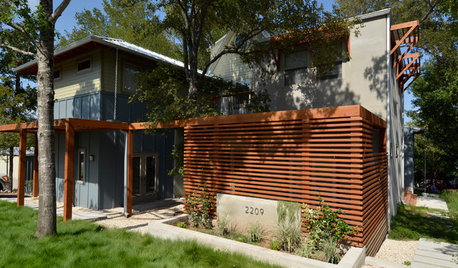
HOUZZ TOURSHouzz Tour: Visit a Forward Thinking Family Complex
Four planned structures on a double lot smartly make room for the whole family or future renters
Full StorySponsored
Columbus Area's Luxury Design Build Firm | 17x Best of Houzz Winner!


Annie Deighnaugh