

Stupid Simple Soup- Got One?
10 years ago
Featured Answer
Sort by:Oldest
Comments (20)
 10 years agolast modified: 10 years ago
Related Discussions
arggh - i hate being stupid!!
Comments (19)Thanks so much for the sympathy, support, and advice, folks. I will concede the "mistake" label for this year, Seil & Kim, but it still frustrates me. I'm pretty sure the damaging factor was how close the alfalfa pellets rolled to the center of the cane and settled there as they puffed up. I usually do keep the alfalfa out to the drip line as several of you recommended, or at least several inches from the main cane, but with this kind of rain, everything washed to the nearest obstacle, and that unfortunately was the nearest rose cane. The ones that immediately bit the dust were the ones that weren't intended for any alfalfa at all, being 3-4 inches tall and very tender stems. There weren't any surviving canes on virtually all of my roses, particularly these smallest ones, so it wasn't the "phantom growth" Kate mentioned that I've learned to recognize as not genuine winter survival. It only took a few hours for those canes to be fried by the combination of trapped moisture and ammonium salts. Having a name to call the toxic soup helps MIchael, and I wouldn't like to be swimming in ammonium salts either. As soon as I saw this happening, I pulled back the sopping alfalfa from the bases out to safe distances and we've had more rain twice since then with a mostly clear base. I did take your advice and pour clean water at the base of those worst affected, though I had to wade through calf deep ponds to do so, but I hesitate to do a full bed-wide spray since the ground really is sopping wet still (and more rain expected tomorrow). Like Kippy, I'm afraid of running the opposite extreme and drowning the poor things. One important difference from previous years is that I've always used alfalfa hay rather than pellets, since that's all my local farm store had in 50 lb. bales of pure alfalfa. I've still never found the alfalfa meal around here and I can't face ordering 250 lbs of it, though it's nice to know a source prairiemoon. Similarly, I agree with Jim that alfalfa tea would be safer but I can't fathom brewing enough for 750 roses. I was so pleased to find the alfalfa pellets because they handle easier, but the benefit of hay is that it has more retained fiber and doesn't roll. It at least stays where I put it, and has more of the consistency of the surrounding leaves. I think I'm going back to the hay next year. It is reassuring to hear others make these kinds of mistakes, themselves (bluegirl, floridarose) or by proxy (buford). Glad to be an excuse to have you join the rose forum sjerin, and do stop back in to share your experiences now and then! I was checking on them today, and the rose I had pictured (a Color Magic) has absolutely black stems for the full foot of its length, but seems to be trying to put on some new growth at the end of it. That cane is probably still toast, but hopefully the inclination to put out growth will trigger some new basals that survive better. Believe me, though, that was one of the better cases - at least a dozen are so fried there's nothing to see, and another dozen are moving in that direction. This also means I need to put off the "death march" for a few more weeks to see if these survive. Usually some time in mid-June I pull the tags from roses that really have died over the winter and aren't coming back. I used to keep the tags up all year in case they come back late (Valentine grew back from own roots a full year later), but I've discovered it's just discouraging to see those tags with empty spaces. As soon as I pull the tags, I mostly stop fretting about them, and planning next year's purchases (always a good way to cheer up a rose fiend!) Thanks again for helping to cheer me up. Y'all are good folks! Cynthia...See Morestupid '50s china question
Comments (20)To answer one of your other questions: Question: "Were postwar Americans such savages that they didn't have tea?" Answer: YES- but it was not a result of WWII, in fact it goes back about another 150yrs. Just prior to commencing hostilities in our revolution there was a protest action known as the "Boston Tea Party", Dec.16,1773 in which a number of colonists disguised themselves as Native Americans and boarded an English ship in Boston harbor that was loaded with tea and they tossed the tea overboard to protest the outrageous tax on tea imposed by the King of England. After that it was considered a mild form of personal protest to refrain from consuming tea, which explains why coffee is considered the primary hot drink in USA. In polite society, even when coffee or tea is served, it is generally not served with the meal, but rather as a separate course after desert, and often served from a large silver urn buffet style to allow the wait staff time to clear the table. An alternative was for the ladies to retire to another room and have tea, while the gentlemen retired to another room for brandy & cigars. I don't recall ever seeing a butter dish with a formal or semi formal set of dishes, not meaning to say they weren't made, but from my experience for formal dining they used small butter molds to form individual serving pieces into decorative flowers, perhaps individual pats with the family crest or the initial of the host and the butter pats were then either placed on the individual bread plates, placed on a small communal butter plate with the butter fork....See MoreGreen bean casserole, and cream of mushroom soup
Comments (21)Funny - my "original" recipe for the Green Bean & COM soup calls for Worcestershire instead of Soy Sauce LOL! I wonder which original is original! LOLOLOL! As an alternative, I had this at a friends house last year and it was really REALLY good... maybe it might work for you? Best Ever Green Bean Casserole Recipe courtesy Alton Brown, 2007 .Prep Time:25 minInactive Prep Time:-- Cook Time:45 minLevel: EasyServes: 4 to 6 servings.Ingredients For the topping: 2 medium onions, thinly sliced 1/4 cup all-purpose flour 2 tablespoons panko bread crumbs 1 teaspoon kosher salt Nonstick cooking spray For beans and sauce: 2 tablespoons plus 1 teaspoon kosher salt, divided 1 pound fresh green beans, rinsed, trimmed and halved 2 tablespoons unsalted butter 12 ounces mushrooms, trimmed and cut into 1/2-inch pieces 1/2 teaspoon freshly ground black pepper 2 cloves garlic, minced 1/4 teaspoon freshly ground nutmeg 2 tablespoons all-purpose flour 1 cup chicken broth 1 cup half-and-half Directions Preheat the oven to 475 degrees F. Combine the onions, flour, panko and salt in a large mixing bowl and toss to combine. Coat a sheet pan with nonstick cooking spray and evenly spread the onions on the pan. Place the pan on the middle rack of the oven and bake until golden brown, approximately 30 minutes. Toss the onions 2 to 3 times during cooking. Once done, remove from the oven and set aside until ready to use. Turn the oven down to 400 degrees F. While the onions are cooking, prepare the beans. Bring a gallon of water and 2 tablespoons of salt to a boil in an 8-quart saucepan. Add the beans and blanch for 5 minutes. Drain in a colander and immediately plunge the beans into a large bowl of ice water to stop the cooking. Drain and set aside. Melt the butter in a 12-inch cast iron skillet set over medium-high heat. Add the mushrooms, 1 teaspoon salt and pepper and cook, stirring occasionally, until the mushrooms begin to give up some of their liquid, approximately 4 to 5 minutes. Add the garlic and nutmeg and continue to cook for another 1 to 2 minutes. Sprinkle the flour over the mixture and stir to combine. Cook for 1 minute. Add the broth and simmer for 1 minute. Decrease the heat to medium-low and add the half-and-half. Cook until the mixture thickens, stirring occasionally, approximately 6 to 8 minutes. Remove from the heat and stir in 1/4 of the onions and all of the green beans. Top with the remaining onions. Place into the oven and bake until bubbly, approximately 15 minutes. Remove and serve immediately....See MoreInduction stove? Anyone got one?
Comments (69)As I mentioned in an earlier post, the shape is one that would fit an older style TV, the kind with the big back on it. And it goes even a little deeper to accommodate the receptacle and cable connections that previous owners had installed. The opening is about 30-1/2 inches wide at the front, about two feet deep, plus a few inches, and about four feet high. The part of the wall that becomes angular toward the back center (following the supposed shape of the TV they must have once had) is pretty far back into the space, beyond where it would interfere with anything I'm trying to do, and I believe a moderate-sized micro could be mounted in the mouth of the opening with room to spare behind, for the cord to plug into the receptacle back there (which of course I will make sure is wired and circuited correctly). There would still probably be something like a foot and a half of space below it. I am not planning on a full-sized drop-in induction cook top, only a double-burner induction hotplate. They are not too wide, not too deep. Just right, as Goldilocks might say. But the combination, with both these items tucked into the hole-in-the-wall, contained in a "cooking area," as it were, would 1) give me a use for the hole in the wall, 2) mimic the arrangement of the stove top with above-mounted micro commonly found in homes today, and 3) offer a decorating opportunity, such as if I put a faux brick or stone on the floor of the opening (which hits me at just about the same height as a stove I'd stand in front of). I think the items I'm talking about will fit (at least one contractor thinks so, so far), as long as the basics of electricity and practicality of movement are addressed. The hotplates, while not dropped in like a cooktop, would still stay in the same place and, being relatively shallow, would, I think, convey the impression of a cook top. Enough to suit me, anyway. I'm not a gourmet chef or anything. That's why I want a micro-convec (instead of just micro) oven, because I am foregoing a standard oven altogether due to space constraints....See More 10 years agolast modified: 10 years ago
- 10 years ago
- 10 years ago
 10 years ago
 10 years ago
 10 years agolast modified: 10 years ago
- 10 years ago
- 10 years ago
 10 years ago


Related Stories
WEDDINGSHow One Couple Got a Perfectly Intimate Backyard Wedding
Vintage pieces, natural materials and close family and friends are an ideal combination for a Pittsburgh couple
Full Story
ENTERTAININGGot Hand-Me-Down Dinnerware? Make a Memorable Meal
They might be mismatched and not your style, but those inherited plates and forks can help bring meaning to your table
Full Story
LIFESimple Pleasures: Dinner for One
Make a solo meal a luxurious experience by savoring the moment along with whatever you cook
Full Story
FEEL-GOOD HOMESimple Pleasures: 10 Ideas for a Buy-Less Month
Save money without feeling pinched by taking advantage of free resources and your own ingenuity
Full Story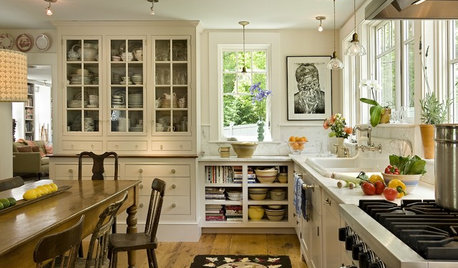
KITCHEN DESIGN12 Great Kitchen Styles — Which One’s for You?
Sometimes you can be surprised by the kitchen style that really calls to you. The proof is in the pictures
Full Story
CHRISTMASGift Giving the Simple-ish Way
If buying holiday gifts drives you to the spiked holiday punch, try these easier but still rewarding traditions
Full Story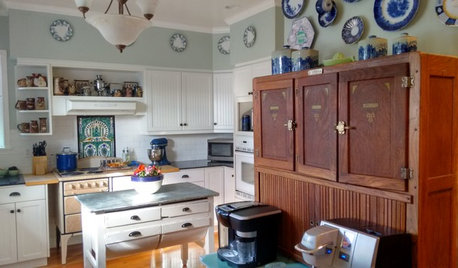
KITCHEN DESIGNKitchen Recipes: Secret Ingredients of 5 One-of-a-Kind Cooking Spaces
Learn what went into these cooks’ kitchens — and what comes out of them
Full Story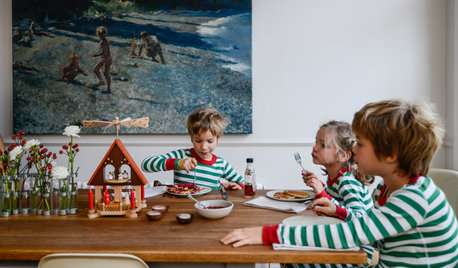
HOLIDAYSHow to Have a Just-Simple-Enough Holiday
Make this the year you say no to holiday stress and yes to joy and meaning
Full Story
LIFE10 Beautifully Simple Ways to Go Greener in the New Year
You may just find more green in your wallet along the way
Full Story
LIFESimple Pleasures: Get a Book Club Going
Kick back with friends and a thought-provoking read for an event that’s entertaining and educational all at once
Full StorySponsored

ruthanna_gw