


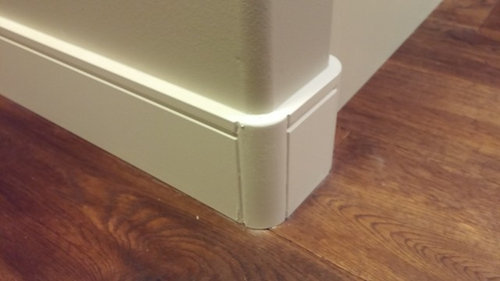
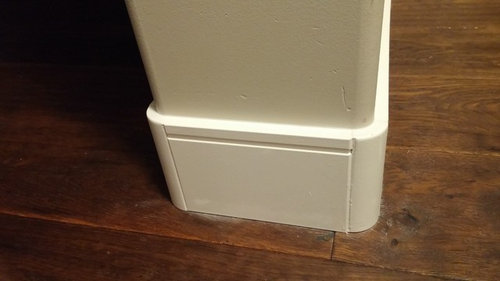
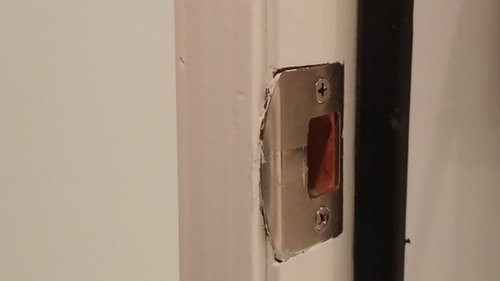
Panicking about trim painting, what do I do?
akl_vdb
8 years ago
last modified: 8 years ago
Featured Answer
Sort by:Oldest
Comments (13)

akl_vdb
8 years agoRelated Discussions
Painting Trim- How do I do this?
Comments (3)I'm going through that same process. Here's what was recommended to me and has worked really well. 1) Clean the trim really well with TSP Substitute (get at Home Depot). 2) Scuff sand the trim with a 220 grit sandpaper or 220 sanding sponge. I prefer the sponge because you can wet it to cut down on dust and also you can get into the little cracks better. 3) Clean thoroughly so there's no grit or dust remaining. 4) To get a clean edge between the trim and carpet, I put painter's tape as far down in between the trim and carpet as I can maneuver it. If you wedge it down, then pull it toward the carpet as you press it down, it will help to open up a gap between the carpet and trim. It's not perfect, but it's the best you're going to get. As I paint, I also jam a broad bladed putty knife down in between the trim and carpet, which also helps some. But when you release the putty knife, the carpet will spring back a bit - there's nothing you can do about that unless you untack, then retack the carpet edge. Once you're done and remove the tape, the carpet will spring back and everything will look fine. I've tried the long plastic edge shields, but found that the tape works just as well. 5) Prime the trim with something similar to SW ProBlock Alkyd Interior Quick Drying Primer/Sealer-white if you're planning to use a light paint color on the trim, gray if you're going to use a dark color-check at the store. Use a 1"-1.5" Chinex OR good quality natural bristle brush for this step. The brushes will have to be cleaned up with mineral spirits. This should cover pretty well in one coat. You might still see a little of the stain color through the primer, but it should cover pretty well. If you see a lot of the stain through the primer, sand lightly with the sanding sponge after the primer has dried, clean off the dust and reapply the primer. I have used this primer on dark walnut trim and found it covers in one coat as long as I'm not stingy with the primer application. 6) Sand primer lightly with 220 grit, clean, then you're ready for your first topcoat. I highly recommend SW ProClassic Satin Acrylic for a beautiful finish. Use a Chinex brush if you can find one or a high quality synthetic bristle meant for acrylic paints. Again, use a 1-1.5" brush. Don't put too heavy a coat of paint on. This paint tends to drip and sag if you go too heavy. Paint from the unpainted sections into the painted sections about 1". Don't overwork the paint. Brush it through once or twice to even it out, then go on. 7) Once the recoat time has passed (follow directions), sand again lightly, then put on a second coat. That should do it. It's tedious, but once it's done, you'll be very satisfied with how it looks. I'm slowly doing all the woodwork on my first floor which was all stained dark walnut, doors, windows, baseboard, chair rails, crown moulding-the works. I LOVE how it brightens up everything. I doubt I'll ever have stained woodwork again. I recommend SW paints because the store is only about a mile away from me and I get a nice family discount, but if a BM store is closer to you, I'm sure they have comparable products for this task....See MoreTiling Window Sill...help please! What do I do with window trim?
Comments (5)My sink and window set-up are very similar to yours, right down to the window moulding abutting the sides of the cabinets. the only difference is that our sill is much deeper. We have a tall faucet as well. If you're thinking that you need to tile the sill because it will get wet, I can tell you that our sill does not get wet. Don't know why, but it just doesn't. If you want to, you could trim or remove the part of the old sill that sticks out horizontally and use a different piece of painted wood trim applied on its side. By this I mean so its front is flush with the front edge of the moulding on the side of the windows. This is what we did. We have a piece of moulding about 2 inches high and maybe 5/8 inches thick. The side window moulding runs into it. So it's like a frame to the window, but a different profile from the side moulding. It looks like it belongs there. We needed a flat moulding to have room for our faucet. We tiled up to the bottom of the cabinets, and the tile runs into (and stops at) the moulding on the sides and bottom of the window. It looks nice. Sorry I haven't learned how to post pics....See MorePainting trim is the devil...what other options do i have?
Comments (1)What you have described is exactly why most painters don't even mess around with pre-painting the painted trim. After nail holes are filled and joints are caulked, it all needs to be painted anyway, so we just wait until it is all installed. As for the spraying, yes it is messy. The overspray hits the air and turns into a fine powder that goes everywhere. As for painting without brushmarks and roller stipple, this can be difficult to achieve for a non-pro because you need to work very fast with todays fast drying paints. Even for pros, it is hard. Todays paints are a challenge. I haven't really found a Sherwin Williams product that flattens out nicely which is why I use Benjamin Moore for trim painting. I use a 4" Wooster Pro-Dooz roller cover usually 3/8" nap. The trick is to get the paint on quick with the roller then brush it out quickly or you can just use the roller and leave it. Depends on what you are painting really and how fast you can go....See MoreOops! I forgot about the crown molding...what do I do?
Comments (0)The previous owners put crown molding in all rooms except the living room. Why? I have no idea! So, master bedroom, master full bath, and master half bath all have crown molding and it is in really good shape. I cleaned it up and it looks great. Now I need to decide if I keep it or not. Here is the problem... We removed the soffett over the 5 ft tub, and we will be turning it into a tiled shower. The oak crown molding went above the door then around the soffett. With the soffett gone, that means the crown molding will go inside the shower. The oak looks brand new, so I hate to get rid of it. I don't think I have ever seen wood in a shower except for Teak. My guesses: 1. Put the crown molding in the shower, maybe use marine grade clear coat, run the tile up to the molding. 2. Remove all molding, but then the cabinets will be affected because the molding was removed. Would need new trim pieces where the molding used to touch the cabinets. 3. Put the crown molding around all but the interior of the shower. The wall that separates the toilet from the shower would have crown molding, but only to where the tile will be. Do the same on the wall by the door. That might look a little weird though. Any other suggestions? Thank you....See Moreakl_vdb
8 years agoakl_vdb
8 years agoakl_vdb
8 years agolast modified: 8 years agoakl_vdb
8 years ago

Related Stories

FUN HOUZZEverything I Need to Know About Decorating I Learned from Downton Abbey
Mind your manors with these 10 decorating tips from the PBS series, returning on January 5
Full Story
PAINTINGWhat to Know About Milk Paint and Chalk Paint — and How to Use Them
Learn the pros, cons, cost and more for these two easy-to-use paints that are great for giving furniture a vintage look
Full Story
KITCHEN DESIGNKitchen of the Week: Making Over a Rental for About $1,500
Fresh paint, new hardware, added storage, rugs and unexpected touches breathe new life into a Los Angeles apartment’s kitchen
Full Story
ENTRYWAYSHelp! What Color Should I Paint My Front Door?
We come to the rescue of three Houzzers, offering color palette options for the front door, trim and siding
Full Story
PETSSo You're Thinking About Getting a Dog
Prepare yourself for the realities of training, cost and the impact that lovable pooch might have on your house
Full Story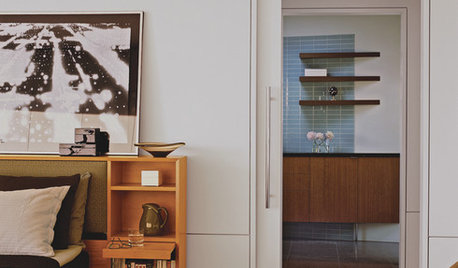
ARCHITECTUREThe Truth About 'Simple' Modern Details
They may look less costly and easier to create, but modern reveals, slab doors and more require an exacting hand
Full Story
GARDENING GUIDESNew Ways to Think About All That Mulch in the Garden
Before you go making a mountain out of a mulch hill, learn the facts about what your plants and soil really want
Full Story
KITCHEN DESIGNHouzz Call: Tell Us About Your First Kitchen
Great or godforsaken? Ragtag or refined? We want to hear about your younger self’s cooking space
Full Story
DECORATING GUIDESExpert Talk: Designers Open Up About Closet Doors
Closet doors are often an afterthought, but these pros show how they can enrich a home's interior design
Full Story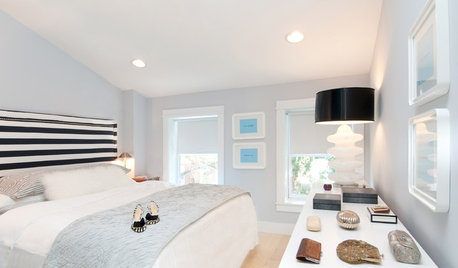
BEDROOMSGuessing Game: What Might Our Bedrooms Say About Us?
For entertainment only; actual accuracy may vary. Always don fun goggles and engage your imagination before playing!
Full Story


Rudebekia