


How to bond new drywall to existing plaster?
Heather L
8 years ago
last modified: 8 years ago

Featured Answer
Sort by:Oldest
Comments (9)

tim45z10
8 years agoHeather L
8 years agolast modified: 8 years agoRelated Discussions
Drywall over Plaster plus new electrical
Comments (23)"aren't you an example of an 'incredibly fast' pro?" Not at fixing lots of large cracks. Every crack more than about 1/16 inch wide needs to be brushed clean, then vacuumed clean (crevice tool along the crack), then bonding painted into the crack, then your choice of material used to fill the crack while the bonding material is tacky but not dry. I use Durabond many times. If the crack sides are still in plane you can use a narrow drywall knife to force the Durabond into the crack and then strike it level. Durabond does NOT sand easily, so make sure any excess is removed. Easysand is better for the inexperienced. At least you can come back and scrape it dry or sand it lightly. Plaster is not all that useful without a LOT of retarder added. It sets WAY to fast. Even narrower cracks can have Durabond forced into them, but running a vacuum is still a good idea. If a narrow crack is in an area that shows badly, widen it with a Rotozip (buy a lot of bits, plaster eats the edges off in a very few inches) through the finish layer(about 1/8 to 1/4 inch deep) and then treat as a wider crack. Larger areas that are solid can be patched using bonding agent, but if the lathe is exposed you should try to clean it enough to allow new keys to form to hold the patch in place....See MoreRemoving drywall from plaster without damaging plaster
Comments (22)Progress: And 1 inch of what may have been the original 1887 wallpaper. I like the green: I ended up using the circular saw to make grid cuts 12-18" apart. I used the multi tool to make cuts closer to the wall and corners where the circular saw couldn't clear. I tried different methods to pry the sections off; some were too narrow; some had too much flex. A 5" wide blade, hammered in and then pried down, did most of the work. Where the ceiling met the wall, I did a combination of breaking the paint and skim coat with a putty knife hammered upwards, and just cutting around with a multitool. There was only about a 1/8" thick bond to break through so it came away, thankfully, easily. I'd say it was altogether 10 hours in a 6 x 8 room to get this far--crazy! I definitely won't be doing the rest of the house. In most other rooms I plan to knock off the flecky balls and skim coat the ridged scallops, like Worthy suggests. In the double parlor, which has crown molding, I'll go through this routine. It's a great upper body workout! Some of the original ceiling is loose, so I'll be putting in some plaster washer anchors. You can also see where they poked holes to verify the location of studs. Those and the cracks will get fiberglass tape and patched. A little skimming, a little sanding, a little paint, and she'll be done. Of course, before all that, I'll do a thorough scrub down with tsp and water, then rinse, dry, and coat with benjamin moore calcimine recoater. Then plaster bonding agent to all the damaged places, and then fiberglass tape, patch/fill with durabond, knock down with a putty knife, then easy sand, then sanding, priming, and finally paint. What could be easier?!? Hope everybody else is having as much fun as I am this weekend! And yes, I'm saving a sample of the wallpaper for the house book....See MoreReplacing plaster with drywall in kitchen remodel--how thick?
Comments (12)hendricus It is good to know 3/4-inch-thick drywall is available. I was concerned the general contractors might tell us we have no choice but to go with 1/2-inch-thick drywall. I would rather pay the difference in cost and use 3/4-inch. brickeyee Our plaster consists of 3/8-inch-thick gypsum (rock) lath, covered with about 1/4-inch of "cement" plaster, then approximately 1/8-inch of "finish" plaster. We have a chunk we saved from a damaged area we patched several years ago. It fits your first description of two-coat plaster exactly. (I did a little research Online last night after you told me what it wasÂit is definitely not veneer plaster.) What do you recommend using as a setting compound? We used mesh tape and ready-mix drywall joint compound, since it is easy to sand, which could be our problem. Our home has a 1/2-story with stairway access, which was never finished. We do walk up there some, since we use it for storage. It could be the floor joists have too much give. Thank you both for the helpful information! CK (Sorry if this posts twice. This is my second try!)...See MoreI need help with taping plaster to drywall & prep to paint.
Comments (9)Yippee it worked. My thread is back. I had to go into my computer's history to find this thread. I had posted to it last week or so and it never re-appeared on the GW forum. Update: I fixed the large hole with plastic screen type lath, fastened up into the plaster with drywall screws. I couldn't reach one edge so I wedged in a 1x.5" piece of wood lath at one end and overlayed the plastic lath, and I think the screws are pegging the plastic screening in place :) There was a lot of technique getting that piece of plastic screening up there! Then I took Easysand 20 and filled the screening, it was ugly: After it dried for several days I took my "California Patch" and slathered a bunch more Easysand 20 on it and wedged it in place. It stayed! It is drying now. As I was trimming away some of the extra Easysand I inadvertently scrapped away some of the sheetrock paper, not the full thickness though. It will need to be gone over with another thin coat of mud, either Easysand or my pre mixed green lidded joint compound. It will need to dry for a long time: I took that Easysand 20 and filled the gap along the entire ceiling periphery. After several hours, I took my 5-in-1 tool and shaved it flush with the existing plaster ceiling and made sure everything looked square. The product was still damp and easily shaved. When all of this dries I will tape up the corners and ceiling junctions using the green lid premix joint compound and a webbed, creased, tape I found. It was sort of expensive, but I only have right angles on this job and I figured it would help make the angles cleaner. Thanks for everyones input. It was very helpful. Now I just hope this works out ok as I have some thick layers up there....See More PRO
PROSombreuil
8 years ago
Vith
8 years agoHeather L
8 years agoHeather L
8 years agolast modified: 8 years agoHeather L
8 years ago
Related Stories

MATERIALSRaw Materials Revealed: Drywall Basics
Learn about the different sizes and types of this construction material for walls, plus which kinds work best for which rooms
Full Story
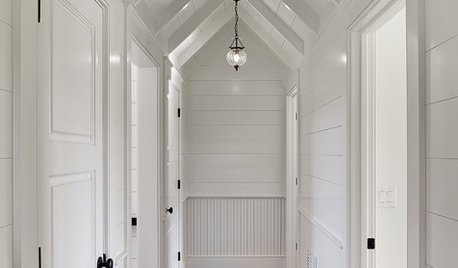
REMODELING GUIDESTongue and Groove Wall Paneling Joins the Comeback Club
Try this smooth architectural move to give your walls a streamlined appearance that conveys quality
Full Story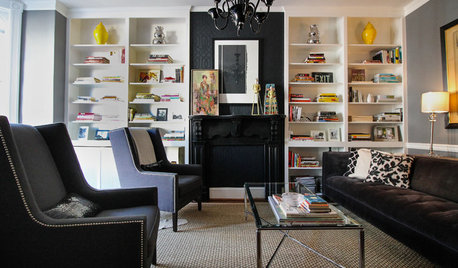
HOUZZ TOURSMy Houzz: Relaxed Glamour in a Downtown Row House
See how this Maryland couple put their own creative stamp on their 1890 home
Full Story

WORKING WITH PROSHow to Work With a House Painter
A professional house painter may be your best friend for refreshing rooms. Here's what you need to know to get the best result
Full Story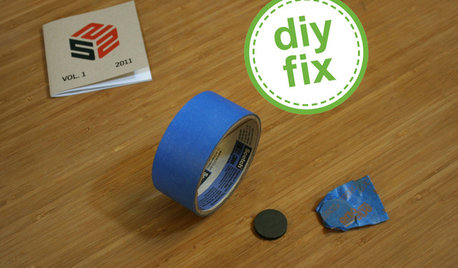
DECORATING GUIDESQuick Fix: Find Wall Studs Without an Expensive Stud Finder
See how to find hidden wall studs with this ridiculously easy trick
Full Story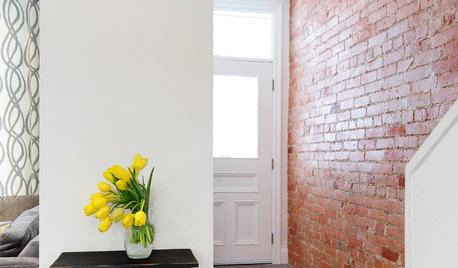
BRICKHow to Make an Interior Brick Wall Work
Learn how to preserve, paint, clean and style a brick wall to fit your design scheme
Full Story
DECORATING GUIDESWalls Have a Field Day With Grass Cloth
Rustic or refined, richly textured grass cloth provides a burst of natural freshness to your interior decorating
Full Story
DIY PROJECTS29 Home Projects to Make You a DIY Superstar
Patch up holes, turn trash to treasure, erase stains ... these doable DIY projects will better your home and boost your ego
Full Story
rwiegand