Cost to build a roof with exposed ceiling joists/collars?
9 years ago
Featured Answer
Sort by:Oldest
Comments (11)
- 9 years ago
Related Discussions
Height of Joist between 1st floor ceiling and the 2nd floor?
Comments (15)There is no absolute set answer. The necessary joist height (thickness) depends in part on the distances you are trying to span. It also depends on the load you will be putting on the joist, how widely you space your joists, and the type of wood your joists are made of. A good grade of 2X10 lumber might be used for joists spaced 16 inches apart where the longest clear span is no more than say 15 feet. If you needed to span a room that is 20 feet across with lumber of the same quality, you might need to use 2x12s that were spaced no wider than every 12 inches. You mentioned a 7000 square foot home. I would lay odds that you intend to have large open rooms downstairs. That fact alone means you will need thicker joists. The whole issue of space between the floors for can lights and ductwork is secondary compared to making sure that your joists will support the load that is put on them. This is NOT an area that a novice should be playing around in. I have an undergraduate minor in physics and despite having recently read far more about joist loads and span table that I ever wanted to, and I can barely comprehend the subject. I would NEVER trust myself to actually try to determine the proper size joists for a house without help from a structural engineer. And frankly, I rather doubt most architects - who are only required to take a very minimal amount of physics to get their degrees - really understand span load tables either. I suspect (pray) they confer with qualified structural engineers whenever they are designing anything out of the ordinary. But, let me give you two examples and tell a cautionary tale... In our current house, the joists are 2x12 lumber. (I know b/c several years ago I repaired the sheetrock in the dining room after we had a leaking pipe.) However, our current house is a very simple rectangular shape of only 1900 sq feet. It has a central staircase with rooms on either side. The joists between the 1st and 2nd floor run perpendicular to the staircase and the widest room they have to span is only 14.5 ft wide. The HVAC unit also sits in the middle of the house (behind and just to one side of the staircase) so the AC ducts run parallel to the joists (i.e., each duct lies between two joists) to reach the rooms on either side of the staircase. A soffit over my kitchen cabinets houses a duct that runs perpendicular to the joists from the HVAC unit to the back of the house. Parallel ducts T out of the top of this to reach the rooms that are at the back of the house. No holes had to be cut thru the joists to accomodate the ductwork. Meanwhile, all our upstairs plumbing is centralized over a single "wet wall" so all the drainage pipes run straight down. Again, no need to cut holes thru those 12 inch joists. The only holes drilled through our 12 inch joists are little tiny ones that accomodate electrical wiring. Now the second example and the cautionary tale... Our new home - still under construction - is a 3200 sq ft house with a much more complex design with much larger rooms downstairs. I will also have two large cast-iron bathtubs upstairs and wanted to be sure their weight, when filled, would not be a problem. My architect and his engineer specified 18" deep open-web trusses spaced 16 inches on center. To save money however, my builder elected to use 18 inch i-beams joists made of oriented strand board (OSB) instead. (Actually OSB is stronger than real lumber when used for ibeams.) The engineer at the lumber store where my builder bought his lumber package told the builder he could place safely place the OSB ibeam joists 24 inches apart. I was out of town for several days while framing was going on so first time I saw the i-beam trusses, my builder was already framing up the second floor. I immediatley insisted that he stop what he was doing and verify with his engineers that he would be able to cut large enough holes thru the ibeams to accomodate my HVAC ducts BEFORE he went any further. I should have just told my builder he had to follow the specs but I was trying to be reasonable. I told him that IF holes could be cut through those ibeam joists large enough to accomodate HVAC ducts without compromising their structural integrity, he could go ahead and use them. But, if not, he needed to back up, take down the second floor framing, and replace the ibeams with the open web trusses specified in the plans. Two days later, in one of many many lies he told me, my builder said he had checked with his engineer and that the HVAC ducts would be "no problem"... that I should "trust him" and "let him do his job" because he was a professional. Foolishly, I did so. Later - after my house was fully framed, sheathed, roofed, shingled, sided with Hardie, had all windows and doors installed, and the exterior was painted - I learned for the first time what my builder meant by "no problem." It meant he had unilaterally decided that he would move the two HVAC units and ductwork up into the attic so holes would not have to be cut thru the ibeams for the ductwork! He completely ignored the fact that this decision meant the HVAC would no longer be in the heated and cooled envelope of the house which would increase my utility bills AND require him to purchase larger and more costly HVAC units; that running flex duct down from the attic to the first floor rooms required chases which took significant amounts of space out of each of my bedroom closets; and that positioning two HVAC units and a spiderweb of flex duct in the attic made it completely impossible to ever consider putting in an attic bedroom - which was the whole reason I had elected to have a 12/12 stick built roof in the first place! But my cautionary tale continues... It then turned out that the necessary holes for the plumbing drainage pipes was too much for the joists! In some cases the joists span distances of 25 feet. Once the plumber cut a 4 inch diameter hole through several joists to accomodate a toilet drainage pipe, the joists started bowing inward. I noticed rather quickly that the sub-floors on the second floor were no longer level. My builder tried to tell me that it was "normal" for the subfloors to bow a little but that putting the final layer of flooring on top would correct the problem! HAH! By this point, I was long past trusting anything the man said. We are building out in the country where no inspections are required except for septic systems but I had included in my contract a provision allowed me to call in an independant third-party inspector at any point. The contract stated that the third-party inspector's finding and recommendations regarding the safety or structural integrity of any element in the house would be controling. In other words, if the inspector said something needed to be done, builder had to do it at his cost. The inspector required my builder to go back and put an additional 18 inch i-beam joist between every pair of existing joists that had had a hole cut thru it. So now the joists are spaced every 12 inches instead of every 24 inches and the second floor no longer bows. I don't know what it cost my builder to put in the additional joists and then to replace the drain pipe he had to cut... but I'd lay odds the total cost was more than if he'd used the open web trusses in the first place. In case you're wondering, we ultimately fired the builder and filed suit against him after even more issues reflecting his incompetance and dishonesty. Now I'm the GC to finish the build... and believe me, I'm relying heavily on my third-party inspector to help me get things done right! The bottom line, simply by asking "10 inches or 18 inches? which one is the correct answer?" you reveal that you have a lot to learn before you proceed. You might start by reading this link. Here is a link that might be useful: Tutorial on joist design...See MoreHow 2 build house w/ exposed-beam ceiling?
Comments (2)Do you want to build a timber frame home? Those have to be built frame/beams first. My parents have a lakehouse with large wood beams that were installed after the sheetrock. The installers had to drill large holes through the beams and attach them to the structure. They plugged the holes. They look nice also. My personal taste is to stay away from faux beams (and rocks). Not having priced our beams any other way, I don't know how cost compare. I do know a true timber frame home is not inexpensive. We have beams that are structural. They were installed during construction prior to the roof, sheet rock, etc being installed. During: The kitchen beams were installed the same way: Here is a link that might be useful: kitchen pictures...See Morecathedral ceiling without collar ties
Comments (3)I'm neither an architect or engineer, but how about more and deeper rafters closer together? 8" rafters on 12" spacing for example. You'd need an engineer to calculate that for you....See Morecathedral ceiling without collar ties?
Comments (13)The 2003 IRC requirements regarding rafter ties and ridge beams is not easy to understand. It is wise to test the wording against accepted engineering practice in order to avoid narrow contradictory interpretations like applying a Rafter Span Adjustment Factor to a "simple span" rafter between structural supports. If anyone doesn't understand what I am talking about, here is the clearest explanation I can think of at the moment: For a simple wood-framed steep-sloped roof structure with opposed rafters meeting at a non-load-bearing ridge board and the other ends supported by and connected to the top plates of the exterior walls, the top plates must be restrained from moving outward by one of three methods: 1) The top plates can be connected together DIRECTLY by structurally continuous joists or ties located at the level of the top plates and connected directly to the plates & rafters 2) The top plates can be connected together INDIRECTLY by an "assembly" (R802.3.1, line 3) consisting of structurally continuous joists or ties attached to rafters above the level of the top plates. Because the lateral restraint force takes an INDIRECT rather than a DIRECT path between the top plates, additional bending moment is induced into the rafters and they must therefore be increased in size using the Rafter Span Adjustment Factors shown below the standard rafter tables. (note: The 2003 IRC says these rafter ties must be located at least every 48" horizontally but because that would make it necessary to either increase the size of rafters only at every 48" or increase all of them even though most would not be tied, the IRC has since changed the tie spacing to be at every rafter) 3) Where no DIRECT or INDIRECT connection is provided "at the top plate" (line 16) by methods 1 or 2, the ridge must be supported by a "girder designed in accordance with accepted engineering practice" (line 18). Since the rafters would then be supported as "simple beams" they should be attached to the ridge girder with joist hangers. Since there is no additional moment induced in the rafters by any intermediate connectors or ties, the rafters do not need to be increased in size by an adjustment factor and can be sized from the standard rafter tables or by the person allowed by the state to provide "acceptable engineering practice" for the design of the ridge girder, itÂs connections and supports. If anyone finds fault with this explanation, rather than argue without resolution, post it at the ICC Bulletin Board and see what the members there think of it. Here is a link that might be useful: ICC Bulletin Board...See MoreRelated Professionals
Ken Caryl Architects & Building Designers · Pedley Architects & Building Designers · Artondale Home Builders · Buena Park Home Builders · Saint Petersburg Home Builders · Eagan General Contractors · The Crossings General Contractors · Big Lake General Contractors · Bon Air General Contractors · De Pere General Contractors · Leon Valley General Contractors · Leon Valley General Contractors · Mashpee General Contractors · Waianae General Contractors · Waxahachie General Contractors- 9 years ago
- 9 years ago
- 9 years ago
- 9 years ago
- 9 years agolast modified: 9 years ago
- 9 years ago
- 9 years ago
- 9 years ago
- 9 years ago
Related Stories

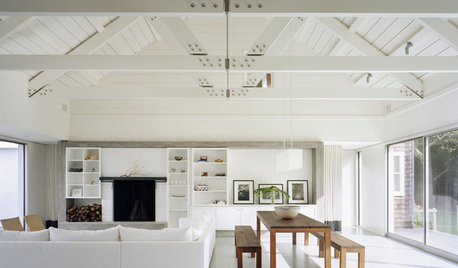
REMODELING GUIDESSupporting Act: Exposed Wood Trusses in Design
What's under a pitched roof? Beautiful beams, triangular shapes and rhythm of form
Full Story
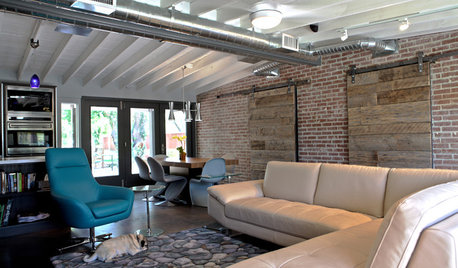
ARCHITECTUREHVAC Exposed! 20 Ideas for Daring Ductwork
Raise the roof with revealed ducts that let it all hang out — and open a world of new design possibilities
Full Story
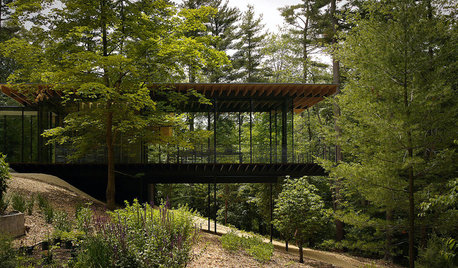
ARCHITECTUREDesign Workshop: The Intriguing Effects of Exposed Framing
Reveal the structure of your home for interesting design opportunities and eye-catching visual effects
Full Story
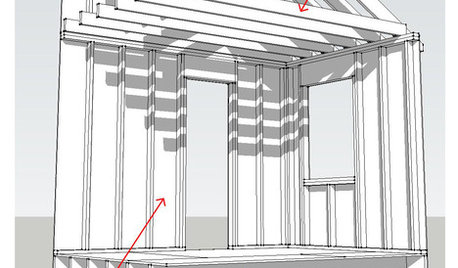
KNOW YOUR HOUSEKnow Your House: Components of a Roof
Don't get held up by confusion over trusses, rafters and purlins. Learn about a roof's features and their purposes here
Full Story
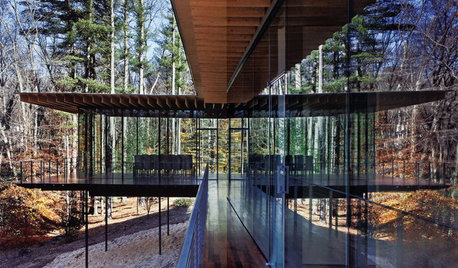
ARCHITECTUREHouses Exposed: Show Your Structure for Great Design
Why take part in the typical cover-up when your home’s bones can be beautiful?
Full Story
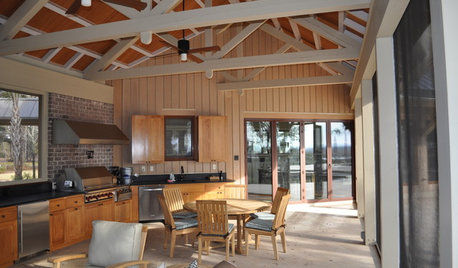
ARCHITECTURELearn the Language of Trusses in Design
If figuring out all those intersecting beam configurations under roofs makes your eyes cross, here's help
Full Story
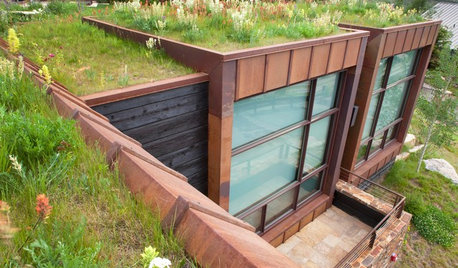
GREEN BUILDING6 Green-Roof Myths, Busted
Leaky, costly, a pain to maintain ... nope, nope and nope. Get the truth about living roofs and see examples from simple to elaborate
Full Story
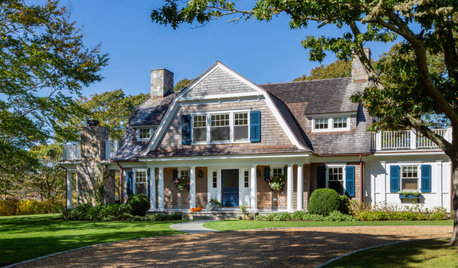
CONTRACTOR TIPSYour Complete Guide to Building Permits
Learn about permit requirements, the submittal process, final inspection and more
Full Story
CONTRACTOR TIPSBuilding Permits: When a Permit Is Required and When It's Not
In this article, the first in a series exploring permit processes and requirements, learn why and when you might need one
Full Story
CONTRACTOR TIPSBuilding Permits: The Inspection Process
In Part 5 of our series on home building permits, we explore typical inspection schedules for a variety of project types
Full Story
User