


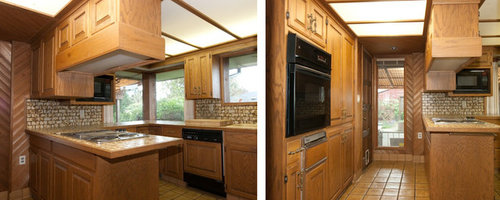
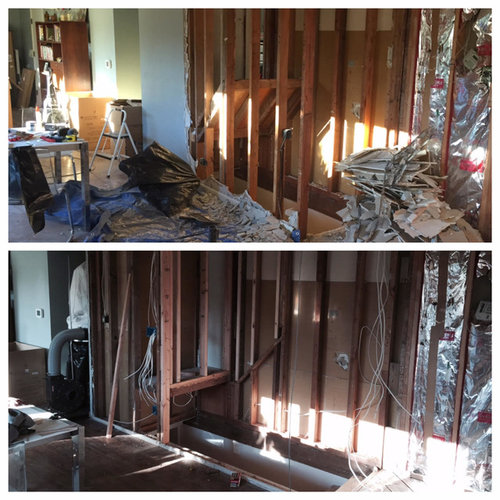
IKEA Sektion Kitchen Remodel DIY
Sarah Seitz
8 years ago


Featured Answer
Sort by:Oldest
Comments (107)

Sarah Seitz
8 years ago
cindygreenestudio
8 years agoRelated Discussions
OTR microwaves not compatible with Ikea Sektion depth
Comments (32)Hello, newbie girl here needing some help with the ikea microwave install. Hoping someone can answer some dumb questions... A. I know that I need to use the Nyttig spacer but I’m not clear on how this works with the mounting bracket. Wanted to confirm: I should attach the nyttig spacer to the wall stud (using super long screws). Next, I attach the mounting bracket to the nyttig spacer. Is that correct? B. The instructions say to leave a 1/4” gap, my understanding is that this refers to the comments above where the microwave needs to stick out from the cabinet for venting and door hinge allowance - is that correct? There is no other 1:4” gap required anywhere else, correct? (The instruction pictures almost make it seem like a 1/4” clearance is required between the top of the microwave and bottom of the microwave cabinet. Which doesn’t make sense to me...but I wanted to be sure.) Any info you might have is much appreciated....See MoreIkea Sektion REVEAL!
Comments (63)Love your new kitchen! Those grey cabinets with white make it really light and a farmhouse sink is one of my favorites! I have found that IKEA really isn't that bad for some things and it really can save you some money. As for the costs there is a free Home Renovation Estimator that can help anyone estimate home renovation costs....See More1970's Kitchen Reveal: Modern w/ touch of rustic IKEA Sektion Bodbyn
Comments (24)Thank you everyone for your comments. It has been such a journey, but so glad we did it. @practigal I sure did! we had around 30 cabinets total or so. @Karenseb I actually am not sure what was used for lighting or power exactly. The electrician provided them, but they look pretty standard. Here is a picture. Sorry for the poor quality. I am pretty excited. I just ordered a bunch of reclaimed black walnut to wrap the brick wall in and to add some floating shelves to the right of the exterior kitchen door. It looks like this:...See MoreRecommended trash bins for IKEA Sektion SE BP1D?
Comments (67)I see a few more requests looking for tall bins that fit 15 wide ikea cabinets. Can you believe after all this effort, recycling pick up is no longer offered for my address! 😢 ive been using the 2 bins I bought and installed quite awhile back They are still working out great. i was going to make something similar to what a few others did but ended up finding these. Witt Industries 13R Plastic 13-Gallon Rigid Waste Liner, Square, 11" Width x 11" Depth x 20" Height, Black. got them 1/2 off on AMZ warehouse deal very thick strong commercial use plastic. https://www.amazon.com/dp/B005QNOFES/ref=cm_sw_r_cp_api_i_TAcHDb3D23QJK AMZ often has them as unavailable in that size, but you can find them elsewhere online mine did not have any dents/defects. Note that these are commercial grade liners to go inside a metal trash can vs a polished plastic meant to be placed out in your room. You can see pics in my Akurum ikea 15 inch base if scroll dowm the posts I have the 1st bin, raised up by about an inch to account for the slight flare at the lip and that makes them fit perfectly using all availble drawer and height space, while still allowing for my shallow drawer. I should note that I did not install the upper rod of my lower drawer that my trash cans sit in. I never got around to it and with both cans in, it actually makes that drawer and door fromt super stable - door front doesnt move and is perfectly vertical. mine are the older line, akurum, with similar but not identical specs. if needed I can measure further up the trash bins height, for the width I dont believe they flare out any, until the very top where there is a slight flare in where the lip area is, but can double check if needed....See More
cdanettesing
8 years ago
Colleen Donnelly
8 years ago
D M
8 years agocappiello12
8 years agoSewingLadyDi
8 years ago PRO
PROM&R Custom Millwork Inc
8 years agojessandjames
8 years agoSarah Seitz
8 years ago
Barbara Simpson
8 years agocashji
8 years agoUser
8 years ago PRO
PRONielson Interiors Team
8 years agojeanps
8 years agoSarah Seitz
8 years agoSarah Seitz
8 years ago
Karen
8 years ago
Kim C
8 years agoKendrah
8 years agoEdward Gorsline
8 years agoSarah Seitz
8 years agoSarah Seitz
8 years agoSarah Seitz
8 years agoSarah Seitz
8 years agoIdicula Samuel
8 years ago PRO
PROMorrone Interiors
8 years agodcustode
8 years agoCynthia Johnson
8 years agohpatel808
8 years ago PRO
PRORegal Construction & Remodeling Inc.
8 years ago
Stephanie Lopez
7 years ago PRO
PROAmes Peterson - International Architecture
7 years ago
michelleh114
7 years ago PRO
PRO123 Remodeling Inc.
7 years agoSarah Seitz
7 years ago PRO
PRORaegan Ford Interior Design
7 years ago
Coalla
7 years ago PRO
PROMay Construction, Inc.
7 years ago
Joann
7 years ago
Stephanie Gibbs
7 years agotoni1947
7 years ago PRO
PROERT Architects, Inc
7 years ago PRO
PROGrassroots Design
7 years agodrmagda
6 years ago PRO
PROMega Builders
6 years agopamelamacleod
6 years ago PRO
PROArchitecture Plus Inc
6 years ago PRO
PROPacific Coast Cabinetry
6 years agolesleycurl
6 years ago


Related Stories
KITCHEN DESIGNDIY Spirit and $8,700 Transform a Townhouse Kitchen
The Spanos taught themselves some remodeling tricks, created a Houzz ideabook and then got to work on their kitchen makeover
Full Story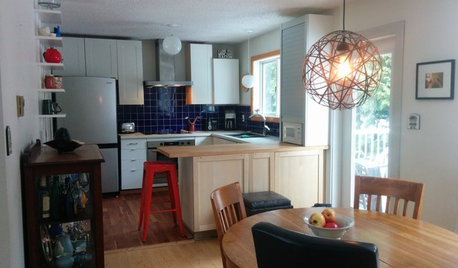
SMALL KITCHENSThe 100-Square-Foot Kitchen: One Woman’s $4,500 DIY Crusade
Teaching herself how to remodel, Allison Macdonald adds function, smarter storage and snazzier materials
Full Story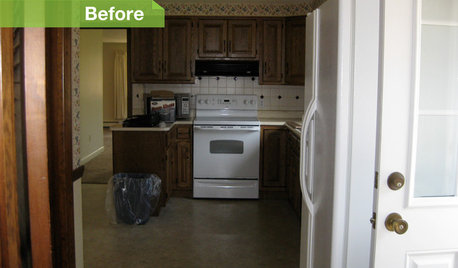
KITCHEN DESIGN6 Kitchens, 6 DIY Updates
Get inspired to give your own kitchen a fresh look with ideas from these affordable, do-it-yourself fixes
Full Story
BATHROOM DESIGNSee 2 DIY Bathroom Remodels for $15,500
A little Internet savvy allowed this couple to remodel 2 bathrooms in their Oregon bungalow
Full Story
HOUZZ TOURSMy Houzz: Hard Work Pays Off in a DIY Cottage Renovation
First-time homeowners roll up their sleeves and give their midcentury Montreal home an infusion of style and personality
Full Story
KITCHEN MAKEOVERSSee a Kitchen Refresh for $11,000
Budget materials, some DIY spirit and a little help from a friend turn an impractical kitchen into a waterfront workhorse
Full Story
KITCHEN DESIGNShow Us Your Fabulous DIY Kitchen
Did you do a great job when you did it yourself? We want to see and hear about it
Full Story
INSIDE HOUZZHouzz Survey: See the Latest Benchmarks on Remodeling Costs and More
The annual Houzz & Home survey reveals what you can expect to pay for a renovation project and how long it may take
Full Story
KITCHEN DESIGNKitchen Remodel Costs: 3 Budgets, 3 Kitchens
What you can expect from a kitchen remodel with a budget from $20,000 to $100,000
Full Story
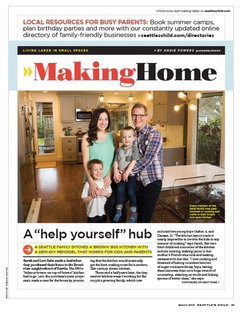
HOUZZ TOURSMy Houzz: Highlighting Farmhouse Roots in a Seattle Suburb
New and old mix with DIY touches in a remodeled 1928 home for a family of 6
Full Story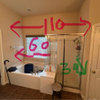


Sarah SeitzOriginal Author