


Update on "Finishing touches needed"
niktay
11 years ago


Featured Answer
Sort by:Oldest
Comments (14)

niktay
11 years agoniktay
11 years agoRelated Discussions
Is a 4 inch granite backsplash out of style?
Comments (32)I am so happy to read this vigorous debate about back splash height because I am in the midst of trying to figure out what to do in my new kitchen. I have selected a 1"x1" glass mosaic tile (in 12"x12" sheets) -- first decision made (phew!). The tile is pretty snazzy -- different shades of blue glass with a few stainless steel tiles scattered throughout. The walls are painted white (not green like in the drawing). So now I have to figure out: 1) how high to go on the west wall with no cabinets? 2) how high to go on the north wall with the cabinets? 3) do I tile to the underside of the hood or to the top of the wall cabs (I have already ruled out going up to the ceiling) The hood is 30" wide in a 36" opening (intentional for more open space and future expansion possibilities). The outlets and switches are at about 5" from the counters and the counters don't have an integrated back splash. Doing a 4" strip would be the easiest, but would it look strange adjacent to the big swath of tile under/behind the hood. Thanks in advance for weighing in and helping me think this through!...See MoreBathroom Reveal, Finally.
Comments (62)I love what you've done to the bathroom. It's so elegant and serene. That's really interesting about the larger floors tiles bowing in the center, and I'm so glad I read this. I'm having 5"x32" wood grain Castlevetro tiles put down in my studio and the tile salesman didn't mention this. Do you remember where you read this? I looked at some of Bill Vincent's old posts but I didn't see it. I'd like to show that to my installer because he's never put down this type of tile before. I also wanted to do the 1/16" grout line and ordered the sandless grout, but I may have to rethink this. Again, the salesman said there would be no problem with that. Grrrr....See MoreShow us your under $20K kitchen, part 2
Comments (30)***CROSSPOST from Finished Kitchen: Circa 1840 Farmhouse*** Hi all, Well, we've finally got a (mostly) finished kitchen! This kitchen's been in the planning stages for 8 years and I've been in and out of this forum for just about that long-- wow, time flies! Whether I've posted or just lurked, the information I've gotten here has been INVALUABLE. I can unequivocally say that my kitchen would not look anything like what it does without this Forum, and for that I offer my profound gratitude-- there is, quite literally, no way I could have done it without all of you, past and present. So, here are the photos of the finished result: For the entire album with detailed photos, just click on the link below any of the photos above! Here are the details: Cabinetry: IKEA Lidingo White (with glass uppers) for the perimeter, Tidaholm Brown/Black for the island Island Knobs & Pulls: Anne at Home Farm Collection and Lewis Dolin Glass Cup Pulls (from Myknobs.com) Perimeter Knobs and Pulls: Anne at Home Horse Collection, generic polished chrome knobs, cup pulls, and bar pulls (from Myknobs.com) Wall Paint: BM Revere Pewter Trim, Hood, and Fireplace Paint: Valspar Bright White (from Lowes) Perimeter Counters: IKEA Butcher Block, stained Black with India Ink and sealed with Waterlox Island Counter: IKEA Butcher Block, sealed with Watco food safe butcher block sealer Main Sink: Whitehaus 36" farm sink (from Vintagetub.com) Island Sink: IKEA single Domsjo, undermounted instead of the usual overmount installation Faucets: IKEA Hjuvik Refrigerator: Because we grow a lot of what we eat (so we don't need to store much) and have a large fridge in an adjacent laundry room, we chose a generic small undercounter fridge (Home Depot, off the shelf) Wine chiller: Sunbeam (Home Depot, off the shelf) Dishwashers: Kenmore and Hotpoint, both existing and 5-7 years old Microwaves: 8 year old Kenmores Island Oven: IKEA Datid 30" Hood: ProLine 36" range hood (from eBay) Range: IKEA Praktfull Pro A50 Backsplash Behind Range: Handthrown Williamsburg brick (local brickyard, left over from another project) Flooring: Lumber Liquidators, Hand Scraped Teak Island and Sink Pendants: IKEA Ottava Cabinet lights: IKEA Grundtal single puck lights Chandelier over the Table: Progress lighting, black 5-light chandelier (Home Depot, off the shelf) Fireplace: Style Selections 36" Vent Free LP fireplace (LoweÂs, off the shelf) A few notes about the remodel, just to hit some discussion points I see come up a lot in this Forum: Our kitchen lives in a big old 1840 farmhouse, which has been part of a working farm since the day it was built. Originally it was soybeans, but now it's part of a gentleman's farm (horses, heritage gardens and poultry), so everything has to be hard wearing and practical. It needs to stand up to heavy traffic, mud, hay, tools, and the occasional chicken (though usually when they wander in, they don't go much further than the family room, because they like the television). That definitely informed our choices for surfaces-- they needed to be hard cleanable, and ultimately easily refinished or replaced down the line. Because the entire house already has strong architectural elements (huge moldings and built-ins), we worked within the style we already had-- all the kitchen moldings, mantels, panels and cabinets match (or are closely styled after) what already exists in the house. We definitely didn't do a period kitchen (we wanted a 2010 layout with all the conveniences), but we wanted the kitchen to look like it belonged in the house. The big thing for us was budget-- believe it or not, the entire kitchen was done for UNDER $20K. Four big things contributed to that: 1/ We DIY'ed the ENTIRE project, start to finish. The only thing we hired out was the gas line install for the fireplace and range, because state law requires it. Other than that, all planning, demo, sourcing, and construction was on us. Might be why it took us 8 years. . . 2/ We reused what we could, and scrounged a lot, especially construction materials (which could have been buckets of money, considering all the custom work we did in the space), and kept what appliances we could. It was also a great way to be environmentally responsible on a project that, let's face it, has a lot of non-necessities involved. 3/ IKEA, IKEA, IKEA. If you're anywhere reasonably close to an IKEA, and you're on anything approaching a budget, go check it out. The cabinet quality for the price can't be beat (except for a few pockets of custom cabinet makers), and there are a lot of great accessories, appliances, lighting and other things to be had for a terrific price. As always, you have to pick and choose your items for quality and value, but at least in our experience, it is definitely there to be had for the buyer with a good eye. 4/ We didn't go for major appliance upgrades. Our whole family LOVES to cook (and eat!), and we wanted a great looking, functional space to do it all in, but we just weren't convinced that we needed more than the basics right now. If we want to upgrade down the line, it's easy enough to do, but right now our Wolf budget is standing in our barn eating hay, and our LaCanche budget is steered towards this Show Hunter prospect I have my eye on . . . So there's our formula for a great kitchen that works for us considering the (kind of odd!) parameters we had. Hope you all can take at least something useful away from our experience. I've submitted the kitchen to the FKB, and I'll answer whatever questions you've got. . . Thanks again, everyone!...See MoreBefore/After small bathroom reno, suggestions for finishing touches?
Comments (19)Thanks everyone, looks like white towels is the way to go. @mercurygirl - I forgot to put the old blind back up (it's a simple white roller blind), but have been contemplating putting in a new blind instead. A wood blind is a nice idea, thanks @sandi125 yes the before I think is original from the 80s. The kitchen has similar cabinets and will be the next project - but I think I will wait and give myself a bit more time and planning for that one :)...See Moreniktay
11 years ago
elklaker
11 years ago PRO
PRODesign & Decor By Shelley
11 years ago
Linda Coolen
11 years ago PRO
PROWelcome Home designs
11 years agoniktay
11 years agoniktay
11 years agoniktay
11 years ago PRO
PROThen & Again Designs
11 years ago
decoenthusiaste
11 years ago PRO
PROBudget Blinds
11 years ago


Related Stories
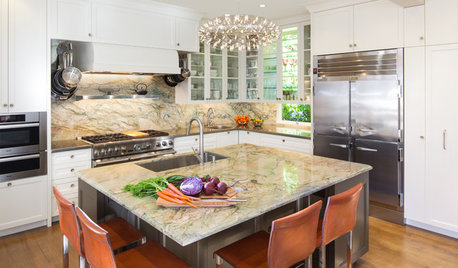
KITCHEN DESIGNKitchen of the Week: Elegant Updates for a Serious Cook
High-end appliances and finishes, and a more open layout, give a home chef in California everything she needs
Full Story
DECORATING GUIDESDesign Dilemma: I Need Lake House Decor Ideas!
How to Update a Lake House With Wood, Views, and Just Enough Accessories
Full Story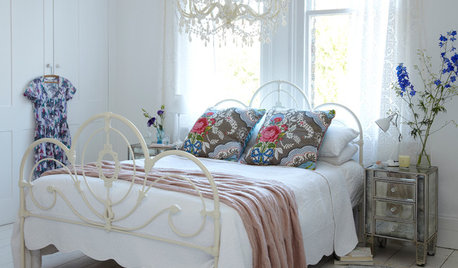
BEDROOMS10 Summer Touches to Refresh Your Bedroom
Try these quick and simple updates to give your sleep space a fresh, warm-weather mood
Full Story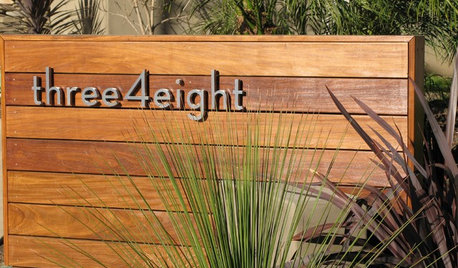
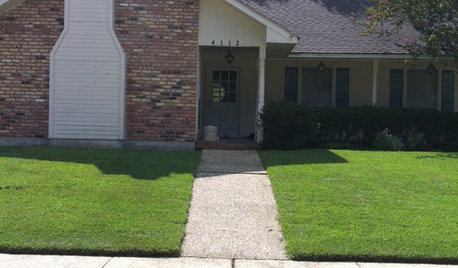
CURB APPEAL7 Finishing Touches for a Thoughtful Front Yard
Make a great first impression with artful house numbers, water features, garden art and more
Full Story
REMODELING GUIDESFinishing Touches: Pro Tricks for Installing Fixtures in Your Tile
Cracked tile, broken drill bits and sloppy-looking fixture installations? Not when you follow these pro tips
Full Story
PRODUCT PICKSGuest Picks: 20 Modern, Masculine Finishing Touches
Take a room from man cave to swanky pad with lighting, furnishings and accessories that speak to good taste
Full Story
HOUZZ TOURSMy Houzz: Thoughtful Updates to an Outdated 1900s Home
Handmade art and DIY touches bring a modern touch to a classic Boston-area home
Full Story
MY HOUZZMy Houzz: Charming Update for a 1920s Bungalow in Salt Lake City
Travel-inspired style and new finishes help the original character shine through in this designer’s home
Full Story


decoenthusiaste