


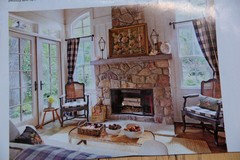
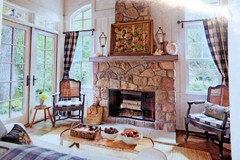
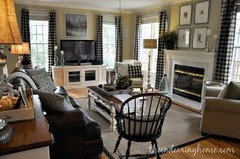
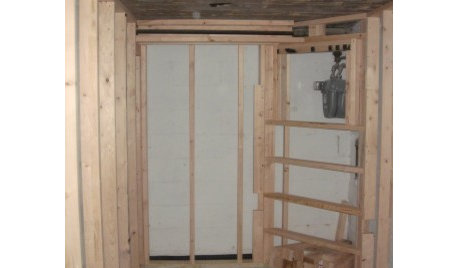
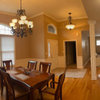
rough mash up of FR project -- help please!
awm03
8 years ago

Featured Answer
Sort by:Oldest
Comments (10)

awm03
8 years ago
MtnRdRedux
8 years agoRelated Discussions
Bill and Mongo- I messed up laying the tile. Help, please!
Comments (9)My primary concern is why are the tiles lifting in the first place? Was the base ever sealed with anything? And you said this is a "concrete pan", is this deck mud over a membrane, or are you going over a slab? There's a membrane somewhere under the "concrete", right? Just asking. The thinset should not be from an old bag that's been laying around for months and months. Old thinset can undergo partial hydration in the bag, weakening the final bond strength. If your thinset is old, go crazy and splurge $15-$30 on a new bag. The thinset should be mixed so it spreads like soft butter; loose enough to spread, but tight enough so that when you do spread it with a notched trowel, the ridges hold and don't flow out and collapse. The idea with using a 1/4" notched trowel is that after the tile compresses the thinset, the 1/4" high ridge is compressed to a 1/8" thick setting bed of thinset, evenly coating the underside of the tile. You want to bed the tiles in the thinset so you compress the thinset ridges down, but you don't want to mash them so hard that you squeeze out all the thinset from between the tile and the substrate. All that said...yes, clean off the old thinset so that there is no loose powder or clumps adhered to the bed. You want it smooth. You can have a residue of old thinset on it, but you want it smooth. If youre using Custom thinset, then as Bill mentioned, use a modified thinset for your next attempt. Either VersaBond (lightly modfied) or FlexBond (highly modfied). My apologies if I'm being too much "Tile 101" on this reply, but even dryset will provide a good bond to a properly prepared base. Mongo...See MoreFinished up the bead board wallpaper project
Comments (20)Thank you, ALL of you, for your thoughtful tips and great decorating advice! I tried hard to learn from you and adapt this room to suite our taste and still conform to the home's older southern Low Country style, and think I succeeded. I'm still debating about building cornices, which I would cover in white fabric, for over the window and door areas, but overall, I'm delighted with the warmth of this room. Moonkat and Oceanna, the painting of the wallpaper didn't alter it much. When the paint was wet it looked as though the shadow of the beads had receded, and I didn't like that, but once the paint dried it looked normal again. It didn't even change the textured feel of the vinyl. I used a satin finish paint, and applied it with a thicker nap roller designed for semi-smooth to rough walls, thinking that the longer nap would help get the paint into those indentations the beading makes. I used a brush at the edges to make sure that all the indented parts were covered. I'm not worried about moisture in the tub area, I had paper here before and it held up beautifully through the antics of a splashing, frolicking grandson who I raised for 12 years. I've got cherished photos of him in this tub with bubbles practically overflowing on the floor...it was his favorite play area. Those days are long over, (he graduates next year.....sigh), the tub only gets used by me, and my splashing days are over! Yayagal and Allison, thanks for mentioning my DS. This is his 4th, and hopefully last tour over there. He just got married a month before he left, and I know his wife would love to have him home, too. And Brutuses, thanks for your invitation, but I've seen the photos of your new home, and your doing a beautiful job with that, all on your own! It's stunning, I especially love your new master bath....See MorePlease Help Me "Cute Up" my Garage
Comments (35)How about a vine on the right side, trim around the garage door and a barn light above the garage door. I bought two (barnlights) for my bathroom for $40 each on Amazon. I would even just put the light for decoration purposes. http://www.blog.barnlightelectric.com/gooseneck-lighting-from-barn-lighting-to-a-home-remodeling-must-have/...See MorePlease HELP: Nightmare Bookcase-Stain Project
Comments (12)So how did it turn out? I recently did something similar but took a different tactic so don't feel these sorts of things happen to just you. Here is my tale to make you feel better. I wanted to install a recessed cabinet. I saw lots of great looking ones on pinterest. I found this great web site WG Wood Products that had lots of options for you to custom order. Mentally I had placed several of these around the house. To test I ordered one with the extra depth, a door style to match my interior doors, extra glass shelves and I decided to order it in white as that is what my interior doors and wood trim is. The total cost for the unit was $625 including shipping. Definitely on the high side but if it looked as good as I thought it would I was willing to pay. I thought I would get painted wood. What showed up was MDF doors that look like an over the toilet cabinet from Walmart. I was crushed. When I e-mailed the company to complain they said it was wood. I tried to find a place on their web site that stated wood so I would protest and get my money refunded because I definitely have el cheapo MDF doors. Instead I found small print that said if you ordered the door in the style I did and in painted white it was made out of MDF instead of wood. I had no recourse. I took the stinky MDF doors off and put them in the garage. I am using the recessed cabinet for picture frames. It doesn't look that great without the doors and I'm temped the next time I need drywall repair to just take it out and throw it out. Total waste of $625. Your cabinet looks finely crafted. Hopefully you were able to fix the finish. The WG Wood products can be bought unfinished on discount web sites but I didn't take that route for the reason I didn't think I could finish it well. Unfortunately paying the company to finish it didn't work out for me either because they switched up the materials....See MoreMtnRdRedux
8 years agolast modified: 8 years agoawm03
8 years agolast modified: 8 years agoawm03
8 years agolast modified: 8 years agoawm03
8 years ago PRO
PROBeverlyFLADeziner
8 years ago


Related Stories

RUSTIC STYLEHouzz Tour: Roughing Up a Fancy Mountain Home
Overstuffed furniture, bright color, local artwork and eclectic details help a couple cozy up their home away from home
Full Story
EARTH DAYHow to Help Your Town’s Beneficial Birds and Bugs
Make a habitat using local materials to provide a home to the creatures that help our gardens
Full Story
PETS15 Outdoor Pet Projects You'll Lap Up
These bubbling fountains, shelters and other creations by Houzzers are treats for pets and inspiration for other owners
Full Story
SELLING YOUR HOUSE5 Savvy Fixes to Help Your Home Sell
Get the maximum return on your spruce-up dollars by putting your money in the areas buyers care most about
Full Story
SUMMER GARDENINGHouzz Call: Please Show Us Your Summer Garden!
Share pictures of your home and yard this summer — we’d love to feature them in an upcoming story
Full Story
DECORATING GUIDESSwitching Up a Colonial Home to Suit a Modern Family
Floor plan labels are thrown out the window as a designer helps a family shape rooms to fit the way they live
Full Story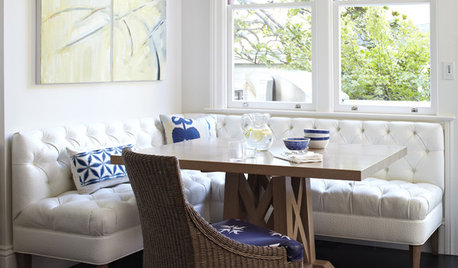
WORKING WITH PROS3 Reasons You Might Want a Designer's Help
See how a designer can turn your decorating and remodeling visions into reality, and how to collaborate best for a positive experience
Full Story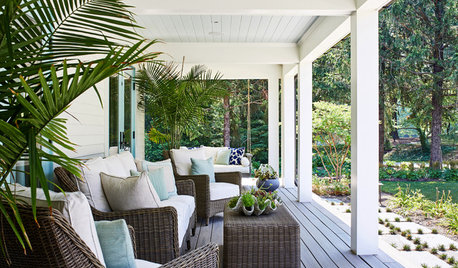
STANDARD MEASUREMENTSThe Right Dimensions for Your Porch
Depth, width, proportion and detailing all contribute to the comfort and functionality of this transitional space
Full Story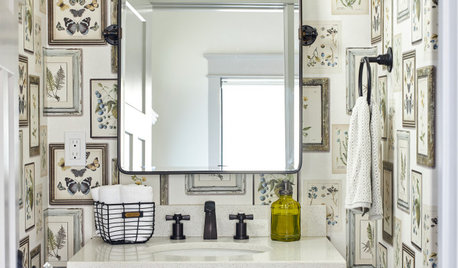
BATHROOM DESIGNKey Measurements to Help You Design a Powder Room
Clearances, codes and coordination are critical in small spaces such as a powder room. Here’s what you should know
Full Story


MtnRdRedux