


Sewing eyelet material onto T shirt to make it longer?
hobby_libby
9 years ago
Featured Answer
Sort by:Oldest
Comments (6)

User
9 years ago
hobby_libby
9 years agoRelated Discussions
Reaaally long T shirts and tank tops...Why??
Comments (22)L.L. Bean is a good suggestion. They did carry a t-shirt called "Saturday T.-shirt" which was a shorter t-shirt. Not so short that you're stomach is exposed, but a good length with shorts, jeans, etc. Despite being long wasted, they weren't too short on me. I'm 5'8". They wash well and last forever. I have them in all sorts of colors, so I didn't need to order them last summer. Hopefully, they are still carrying that style. Target stopped carrying the Cherokee t-shirts and replaced them with the Mossimo brand. Don't care for the Mossimo since it has too much elasticity in the fabric makeup. Feels like it has a bit of lycra or something which makes it feel like it is too fitted for me. I like roomier t-shirts, not bigger men's type shirts, just not clingy. The Cherokee was more of a brushed cotton, which washed & dried without a wrinkle. So disappointed that Target stopped carrying the Cherokee tee;( I do like a bit longer t-shirt for the gym, not covering my butt, however, not riding up, exposing my back while exercising. I usually buy separate workout wear for that very reason....See Moresewing box cushions--how to make snug?
Comments (24)I realize I'm several years late to this posting, but I think I have a VERY GOOD formula for boxed cushions. Please bear in mind though, I've only used this formula with indoor/outdoor fabric like Sunbrella and Crypton that has little to no give. Okay, so If I had a 24" x 24" piece of foam 3" thick, I would cut my top and bottom plates 24" x 24" (exact width and length of foam). Where I would allow for zipper plaques and seam allowances is in the BOXING (the strip that goes around the cushion). Since my foam is 3" thick, I would cut my boxing strips 4" wide; that gives you a 1/2" seam allowance for the entire cushion. Also, if you find with your fabric that it's still too loose, or too tight, (even though it's a pain) it's much easier just to take off the boxing and either cut it down or a cut a larger strip. Always doing your adjustments in the boxing REALLY saves fabric (and most of the outdoor stuff is "through the roof" expensive as it is). Adding an inch to the boxing always makes the top of my cushions look taught, flat, and plump....See MoreIs it possible to make your own sewing patterns?
Comments (5)I was going to try to explain how to make a pattern from scratch but it may not work well for a dog as it would for a person since doggies don't stand still. Plus it is a lot of free hand drawing and cutting muslin then fitting and recutting. So my best suggestion when someone asks me how to do this and they don't sew a lot is use an old shirt, dress or skirt. You can de-construct a piece of clothing then transfer it to muslin and or paper. You said she has a unusual body shape so if you have one outfit that doesn't fit quite right that would be the one to use. Another suggestion if you don't have any outfit for your dog now is to buy people clothes to fit her. A thrift store is good. You can buy a boys or girls tee shirt and even some pajamas would work. You can adjust it large, small, longer, or even shorter. You will put the shirt or coat on the dog inside out. You couldn't pin it since you will need to pull if off the doggy and she may get stuck! Not good so I would recommend instead of pinning is just pinching the fabric up at the seams where it needs to be smaller and draw a line by your finger on each side with a marker. If you need to add to the area/seam to make it bigger you will have to guess a little and mark next to the seams +1/2" or whatever extra you need. If it needs to be longer measure and write how much you need to add or mark a line where you want to shorten it plus 1/2" for seam allowance. Next you then will just rip the seams out or if you choose to cut the seam then add a 1/2" seam allowance to your pattern. Iron the all the pieces flat. You will lay the pieces out on a paper or muslin. Next you will have to free hand the lines of the pattern if making it larger or just cut the shirt piece in where it needs to be smaller. I prefer to cut out my pattern on muslin first then sew it all together with a long stitch. One suggestion is to cut the muslin pattern with a seam or opening on the back of the dog if a pullover shirt. That way it's easy to put on your dog to check the fit. Muslin doesn't stretch and it would be hard to pull on but you will get the over all fit of your pattern. Once you have the fit you like with the muslin repeat as you did before mark the seams and length then take out the stitching recut the pattern to the adjustments. Now finally you can lay it down on paper and cut out a permanent pattern. I use a drawing paper that comes on big rolls. It's a little stiffer than regular paper plus it will last forever. If you make a full length with sleeves pattern first then you have one you can trace and make different cuts from. Example if I was to make a A Line dress pattern I would make a full length long sleeve first. I could then copy that pattern to another piece of paper adjust it maybe to knee length and no sleeves for the same person. My best tips are the neck opening, arm opening and arms are always tricky. If enlarging you will need to taper in each depending on the look or style you are going for. Remember to add fabric allowances if using non stretchy fabric. The first cut of a pattern alway's go a little larger then adjust. Don't forget the seam allowances. When using a shirt for a pattern they are already there except when you reduce your pattern. When you are pinching the area smaller mark it at the pinch but then note you will have to add 1/2" seam allowance to that area and if enlarging you will need to also add the seam allowance. Several fittings are best. Oh, don't forget the seam allowances it's the best advice I can tell you over and over. I tried to write everything as I do it step by step. But if not clear or any questions let me know. Have Fun and Good Luck!...See MoreEasy to sew valance directions
Comments (18)Hi sheesharee, Let me take these in order - Lining fabric is sold at any store that carries home dec fabric. It's usually white or off-white and comes 54" wide. I buy mine on eBay about 20 yards at at time, since I use quite a bit of it. It comes in all cotton, all poly and cotton/poly blends. Joann Fabric has many different linings. Pin your fabric ALL the way around. I use a pin about every 3". You can leave the opening for turning on the top, side or on the bottom. As noted above, if the openings you leave on the sides near the top are large enough, based on the type of curtain rod you are using, these openings may be large enough to use for turning the fabric. The opening that you leave for turning your fabric right side out must be left OPEN. You will choose where to leave your opening - I suggest the bottom or on a side. Wherever you leave it - stitch across the top of your valance using a half inch seam. Stitch across the bottom of it next. Now stitch each side, from top to bottom, using the seam allowance. Doing it in this order reduces the chance of puckering. BUT, you must also leave the openings near the top of each side that will become the openings for your rod pockets. If they are large enough, you do not need to leave another opening to turn the fabric. You can stick your hand in the rod pocket openings to turn it. No, if you do it correctly, the opening that you have left open, when you turn and press your valance, will be folded under by ironing. It will fold in itself as you iron. You simply need to cut the fusible tape to the length of that opening, place the tape inside on top of the folded fabric edge, and press it closed. It will look just the same as the stitched fabric above and below it. I suggest cutting off the selvages, which are the white parts with the writing, before you pin the fabric and lining together. This assures that you will not see that writing through the lining when you finish your valance. You will see in the 3rd paragraph above where I say that I use about 1 1/4 yards of fabric for the length of my valances. This extra fabric is needed for the folds that are created when you tie up the fabric. However, if you are making this for a short window, you can buy less. The center 'drop' on my finished valances after tying them up is generally 20" - 24", but there are folds in that, as you see above in the pic, or in the one below that shows it clearly. I'd always err on the side of it being too long, rather than too short. When it's short it looks skimpy and cheap, IMO. You can tie it up as high or as low as you want, but the folds add richness to the valance. Here is a link that might be useful: see lining fabric here on ebay...See Morehobby_libby
9 years ago
donna_loomis
9 years ago
Related Stories
CLOSETSHow to Store Your Clothes to Keep Them Looking Good Longer
Here’s what clothes to fold, what to hang and how to stash your off-season stuff
Full Story
MOST POPULAR5 Remodels That Make Good Resale Value Sense — and 5 That Don’t
Find out which projects offer the best return on your investment dollars
Full Story
DIY PROJECTSMake a Gorgeous (Cheap!) Pillow Using Vintage Clothes
With secondhand fabric and a steady hand on the sewing machine, your pillow choices are endless
Full Story
DECORATING PROJECTSDIY: Make a Designer-Look Pillow Sham
Give a sofa or bed a high-end touch in about an hour with low-cost materials — if you don't tell, they'll never know
Full Story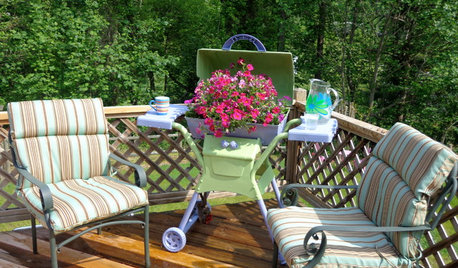
SALVAGEReinvent It: Make a Cheery Planter From an Old Eyesore
Don't ignore that yucky old grill growing rust in your yard — turn it into a lighthearted planter that's a joy to see
Full Story
DECLUTTERINGDecluttering — Don't Let Fear Hold You Back
Sure, you might make a mistake when tackling a decluttering project, but that's OK. Here's why
Full Story
FEEL-GOOD HOMESimple Pleasures: Make Do and Mend
Experience the satisfaction of fixing, repurposing and creating things yourself around the home
Full Story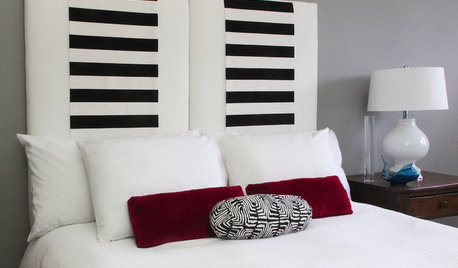
DIY PROJECTSMake an Upholstered Headboard You Can Change on a Whim
Classic stripes today, hot pink tomorrow. You can swap the fabric on this DIY headboard to match your room or your mood
Full Story
MOST POPULARSo You Say: 30 Design Mistakes You Should Never Make
Drop the paint can, step away from the brick and read this remodeling advice from people who’ve been there
Full Story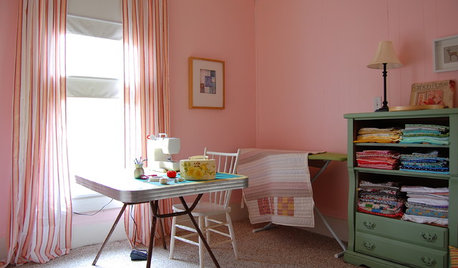
STUDIOS AND WORKSHOPSA Stitch in Time: Creative Sewing Spaces
Sewing rooms have become popular again as people of all ages embrace simple crafts they can do at home
Full StorySponsored
Columbus Area's Luxury Design Build Firm | 17x Best of Houzz Winner!
More Discussions
susie53_gw